That crackle of the graham cracker — the kind that snaps loud enough to startle you before you even lift the lid — still takes me straight to a humid July afternoon in 1998. We were sitting on the back porch steps, knees scraped, waiting for the rain to stop so we could run to the creek. My older brother had just pulled a plastic tub from the fridge, and the air inside that kitchen smelled like toasted marshmallows and cold dairy. It wasn’t a fancy dessert. It was just layers of dry crackers and sweet cream, left to sit while we fought over who got the biggest piece.
I remember the texture was weird at first. Cold and soft, yet still holding its shape. You know how icebox cakes are supposed to be? That specific kind of chewy-soft, like a cookie that gave up its fight against the milk. We didn’t have a stove to burn the marshmallows, so we just ripped them from the bag and layered them in. It was messy, sticky, and absolutely perfect. That moment stuck with me because it was simple. No oven heat, no precise measurements, just whatever we had and a whole lot of sugar.
Fast forward twenty years, and I still make this no-bake s’mores icebox cake when the weather turns too hot for baking. Honestly, there is something about the quiet anticipation of letting it chill overnight. You know that feeling when you’re not quite sure if it will work, but you trust the process? That’s the magic here. The crackers transform into something resembling a soft sponge cake, absorbing the vanilla and chocolate until they are unrecognizable.
I used to think I needed to be a pastry chef to make something impressive. But this recipe taught me that comfort food doesn’t need to be complicated. It just needs to be honest. Now, when my kids ask for dessert, I don’t reach for the oven mitts. I reach for the graham crackers and the whipped cream. It brings me back to those porch steps, to the sound of rain on the tin roof, and to the simple joy of eating something sweet without any fuss.
Why You’ll Love This Recipe
Let’s be real for a second. Who has the energy to turn on the oven on a day that feels like 95 degrees outside? Nobody. This no-bake s’mores icebox cake is your answer to that problem. It’s not just about avoiding heat, though. It’s about the texture transformation that happens while you sleep. I’ve tested this recipe dozens of times, and every single time, I’m surprised by how the dry crackers turn into a tender, cake-like layer. It’s like culinary magic, but with ingredients you already have.
Here is why this dessert deserves a spot in your weekly rotation:
* **Quick & Easy**: You don’t need any baking skills. Just layer and chill. It comes together in under 20 minutes of active prep time, perfect for busy weeknights or when you need a last-minute treat for guests.
* **Simple Ingredients**: No fancy grocery trips needed. You likely already have graham crackers, whipped cream, chocolate pudding, and marshmallows in your pantry or fridge.
* **Perfect for Summer**: Great for potlucks, backyard barbecues, or cozy dinners when you want something sweet but not heavy. It’s refreshing and doesn’t leave you feeling sluggish.
* **Crowd-Pleaser**: Always gets rave reviews from kids and adults alike. The familiar flavors of s’mores are universally loved, making this a safe bet for any gathering.
* **Unbelievably Delicious**: The texture and flavor combo is next-level comfort food. The contrast between the soft cracker layers and the creamy filling is addictive.
What makes this recipe different from the rest? It’s the balance. Many icebox cakes can get soggy or bland. This version uses a thick chocolate pudding and stable whipped cream to keep the structure intact. Plus, using mini marshmallows or toasted ones adds a textural pop that elevates it from a simple snack to a proper dessert. It’s not just another version—it’s your best version of a summer classic.
This recipe isn’t just good—it is the kind that makes you close your eyes after the first bite. It’s comfort food reimagined—faster, easier, but with the same soul-soothing satisfaction as a campfire treat. Perfect for impressing guests without stress, or turning a simple meal into something memorable.
What Ingredients You Will Need
This recipe uses simple, wholesome ingredients to deliver bold flavor and satisfying texture without the fuss. The beauty of an icebox cake lies in its minimalism. You don’t need exotic spices or hard-to-find items. Just good quality basics that play well together.
Here is what you need to gather:
* **Graham Crackers**: You’ll need about two full sleeves. Look for the classic honey-sweetened kind. I prefer brands like Keebler or TruMoo because they hold their structure well before softening. Avoid the ones that are too crumbly, or your layers might fall apart.
* **Instant Vanilla Pudding Mix**: One 3.4-ounce box. This is your binder. It adds moisture and flavor. Don’t skip the dry mix step if you want that authentic pudding taste, though you can make instant pudding from scratch if you’re feeling fancy.
* **Whole Milk**: Two cups, cold. This is what you whisk with the pudding mix. Whole milk gives the richest texture, but 2% works fine if that’s what you have.
* **Whipped Topping**: One 8-ounce container of thawed frozen whipped topping (like Cool Whip). This adds lightness and stability. If you prefer dairy-free, coconut whipped cream works well here too.
* **Chocolate Pudding**: One 3.4-ounce box of chocolate instant pudding. This creates the rich, dark layers that mimic chocolate bars.
* **Mini Marshmallows**: One 10-ounce bag. These are crucial for the s’mores vibe. They melt slightly into the cream, creating gooey pockets.
* **Chocolate Chips**: Semi-sweet or milk chocolate chips. Sprinkling these between layers adds a bit of crunch and intense chocolate flavor.
A quick tip on sourcing: If you can find graham crackers that are slightly thicker, they will take longer to soften, giving you a better texture if you plan to eat the cake the same day. For the marshmallows, standard large ones can be used, but you’ll need to cut them into pieces. Mini marshmallows distribute more evenly.
You can swap the milk for almond milk for a lighter version, but the pudding might not set as firmly. If you are avoiding gluten, you can use gluten-free graham crackers, though they tend to break apart more easily, so handle the layers gently.
Equipment Needed
You don’t need much to pull this off, which is part of the appeal. Here is what you’ll need on your counter:
* **9×13 Inch Baking Dish**: A glass or ceramic dish is best. It helps you see the layers as you build them. A metal pan works too, but glass keeps the cake cool longer.
* **Mixing Bowls**: You’ll need two medium bowls. One for the vanilla pudding and one for the chocolate pudding. Make sure they are large enough to whisk vigorously.
* **Whisk**: A balloon whisk is ideal for getting the pudding smooth and lump-free. A fork works in a pinch, but your arms might get tired.
* **Spatula**: An offset spatula is helpful for spreading the whipped cream evenly. A regular rubber spatula works fine for folding.
* **Measuring Cups and Spoons**: Standard dry and liquid measures. Precision matters less here than in baking, but being close helps the texture.
If you don’t have a 9×13 dish, an 8×8 will work, but the layers will be thicker and harder to cut. In that case, use a smaller dish or divide the recipe in half.
I’ve tried using plastic containers with lids, but the crackers can absorb odors from the fridge. Glass is neutral and easy to clean. Also, make sure your whipped topping is fully thawed but still cold. If it’s too warm, it will deflate when you fold in the pudding.
Preparation Method
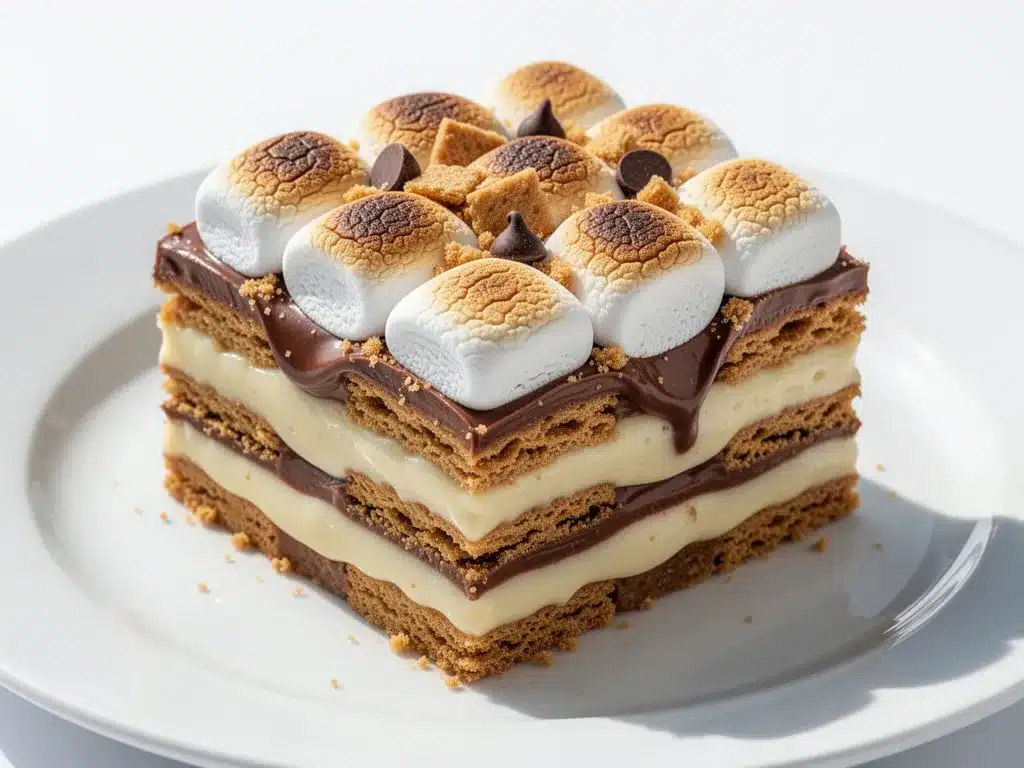
Building this cake is like layering a lasagna, but sweeter and easier. Here is how to do it step by step.
1. **Prepare the Vanilla Pudding**: In a medium bowl, whisk together the instant vanilla pudding mix and cold milk. Whisk for about two minutes until it thickens slightly. Let it sit for five minutes to fully set. This ensures the layers don’t turn into soup.
2. **Fold in Whipped Topping**: Gently fold the thawed whipped topping into the set vanilla pudding. Use a spatula and lift from the bottom. Do this slowly to keep the air in the mixture. You want a light, fluffy consistency.
3. **Prepare the Chocolate Pudding**: In a separate bowl, whisk the chocolate pudding mix with half a cup of milk (or the remaining milk if you split it evenly). Let it set for five minutes. This creates the dark, rich contrast.
4. **Start the First Layer**: Take your 9×13 dish. Line the bottom with graham crackers. You might need to break some pieces to fit the corners. It should be a single, even layer.
5. **Add Vanilla Cream**: Spread half of the vanilla whipped cream mixture over the crackers. Use an offset spatula to smooth it out to the edges.
6. **Add Marshmallows**: Sprinkle a generous handful of mini marshmallows over the cream. Don’t skimp here; this is where the gooey goodness lives.
7. **Add Chocolate Chips**: Sprinkle a layer of chocolate chips over the marshmallows. This adds texture and prevents the layers from sticking together too much.
8. **Second Cracker Layer**: Add another layer of graham crackers. Again, break pieces to fit.
9. **Add Chocolate Pudding**: Spread the chocolate pudding evenly over the crackers. This is your main chocolate layer.
10. **Repeat**: Add another layer of marshmallows and chocolate chips.
11. **Final Cracker Layer**: Top with the final layer of graham crackers.
12. **Top with Remaining Cream**: Spread the remaining vanilla cream on top. Smooth it out nicely.
13. **Garnish**: Sprinkle extra chocolate chips and maybe a few whole marshmallows on top for presentation.
14. **Chill**: Cover the dish tightly with plastic wrap. Refrigerate for at least 6 hours, but overnight is best. This is the most important step. The crackers need time to soften.
When you take it out, the cake should feel firm but yielding. If it’s still hard, give it another hour.
Cooking Tips & Techniques
The secret to a great icebox cake is patience. I learned this the hard way after trying to eat one straight out of the fridge one year. It tasted like wet crackers and raw pudding. Not appetizing.
* **Don’t Rush the Chill**: The crackers need time to absorb the moisture. Six hours is the minimum, but 12 hours is the sweet spot. The texture changes dramatically after the first few hours.
* **Keep it Cold**: When you are layering, keep the whipped cream in the fridge until you’re ready to use it. Warm cream melts and separates, ruining the structure.
* **Break Crackers Carefully**: Don’t crush the crackers into dust. You want pieces that are large enough to hold the cream but small enough to fit. Snap them, don’t crumble them.
* **Layer Evenly**: Try to keep the layers even. If one side is thicker, the cake might lean or break when you cut it.
* **Toast the Marshmallows?**: For a deeper flavor, you can quickly torch the top marshmallows before serving. But be careful not to melt the whole cake. A kitchen torch works best for this.
I once tried using homemade whipped cream, but it deflated too much. Stick to the stabilized whipped topping for this recipe. It holds up better against the moisture from the crackers.
Also, if you are making this for a party, build it the night before. It saves you stress on the day of. Plus, the flavors meld together overnight, making the chocolate taste richer.
Variations & Adaptations
This recipe is a canvas. You can change it up depending on what you have or what you’re craving.
* **Nutella Swirl**: Swap the chocolate pudding for a Nutella and milk mixture. It’s richer and has a hazelnut kick.
* **Peanut Butter Cups**: Add crushed peanut butter cups between the layers. It turns it into a Reese’s-inspired treat.
* **Gluten-Free**: Use gluten-free graham crackers. Just be gentle when layering, as they can be more fragile.
* **Vegan**: Use dairy-free milk, vegan pudding mix, and coconut whipped cream. It’s surprisingly good and just as creamy.
* **Oreo Version**: Swap graham crackers for Oreo cookies. Remove the cream filling first, or leave it for extra sweetness. This makes a “Cookies and Cream” icebox cake.
I tried adding a layer of crushed pretzels once for a salty-sweet contrast. It was interesting, but not my favorite. Stick to the classic combo for the best result.
If you want a fruit twist, add a layer of sliced strawberries between the cream and crackers. It adds acidity and cuts the sweetness.
Serving & Storage Suggestions
Serve this cake chilled. It’s best eaten straight from the fridge. Cut it with a sharp knife for clean slices. Wipe the knife between cuts if it gets messy.
Garnish with extra chocolate chips or a drizzle of melted chocolate for a fancy touch. Serve with a cold glass of milk or a cup of coffee. The bitterness of coffee balances the sweetness perfectly.
Store leftovers in the refrigerator, covered tightly with plastic wrap or in an airtight container. It keeps well for up to 5 days. In fact, it often tastes better on day two as the flavors deepen.
You can freeze it, but the texture might change slightly. The crackers can become a bit mushy upon thawing. If you must freeze it, wrap it tightly in foil and plastic wrap. Thaw in the fridge overnight.
The flavors develop over time. The first day is bright and fresh. The second day is rich and cohesive. By the third day, it’s almost like a trifle. Enjoy it while it’s at its peak texture.
Nutritional Information & Benefits
This dessert is indulgent, so enjoy it in moderation. A slice contains about 350 calories, mostly from carbohydrates and fats. The graham crackers provide some fiber, and the milk offers calcium.
It’s not a health food, but it’s a treat. The marshmallows add sugar, but they also add fun. If you want to lighten it up, use low-fat milk and less whipped topping.
For those with allergies, check the labels of your pudding mixes and crackers. Many contain dairy, wheat, and soy. Always read the fine print.
Personally, I view this as a comfort treat. It’s about the memory and the feeling, not just the macros. Life is short, so enjoy the sweet stuff.
Conclusion
This no-bake s’mores icebox cake is more than just a dessert. It’s a shortcut to happiness. It’s easy, it’s delicious, and it brings people together. I love it because it requires no effort but rewards you with something spectacular.
Try it out. Customize it with your favorite toppings. Share it with friends. I’d love to hear how you make it your own. Leave a comment below with your variations.
Thanks for reading. Happy baking, or should I say, happy chilling!
FAQs
Can I make this cake ahead of time?
Yes, it’s best made the night before. This allows the crackers to fully soften and the flavors to meld. It can be stored in the fridge for up to 5 days.
What kind of marshmallows work best?
Mini marshmallows are ideal because they distribute evenly. If you use large ones, cut them into smaller pieces. You can also toast them for a deeper flavor.
Can I use homemade whipped cream?
You can, but it may not hold its shape as well as stabilized whipped topping. If you use homemade, add a bit of gelatin or cream cheese to stabilize it.
Is this recipe gluten-free?
Not traditionally, as graham crackers contain wheat. However, you can use gluten-free graham crackers to make it safe for gluten-sensitive diets.
How do I store leftovers?
Cover the dish tightly with plastic wrap or transfer slices to an airtight container. Store in the refrigerator for up to 5 days.
Pin This Recipe!
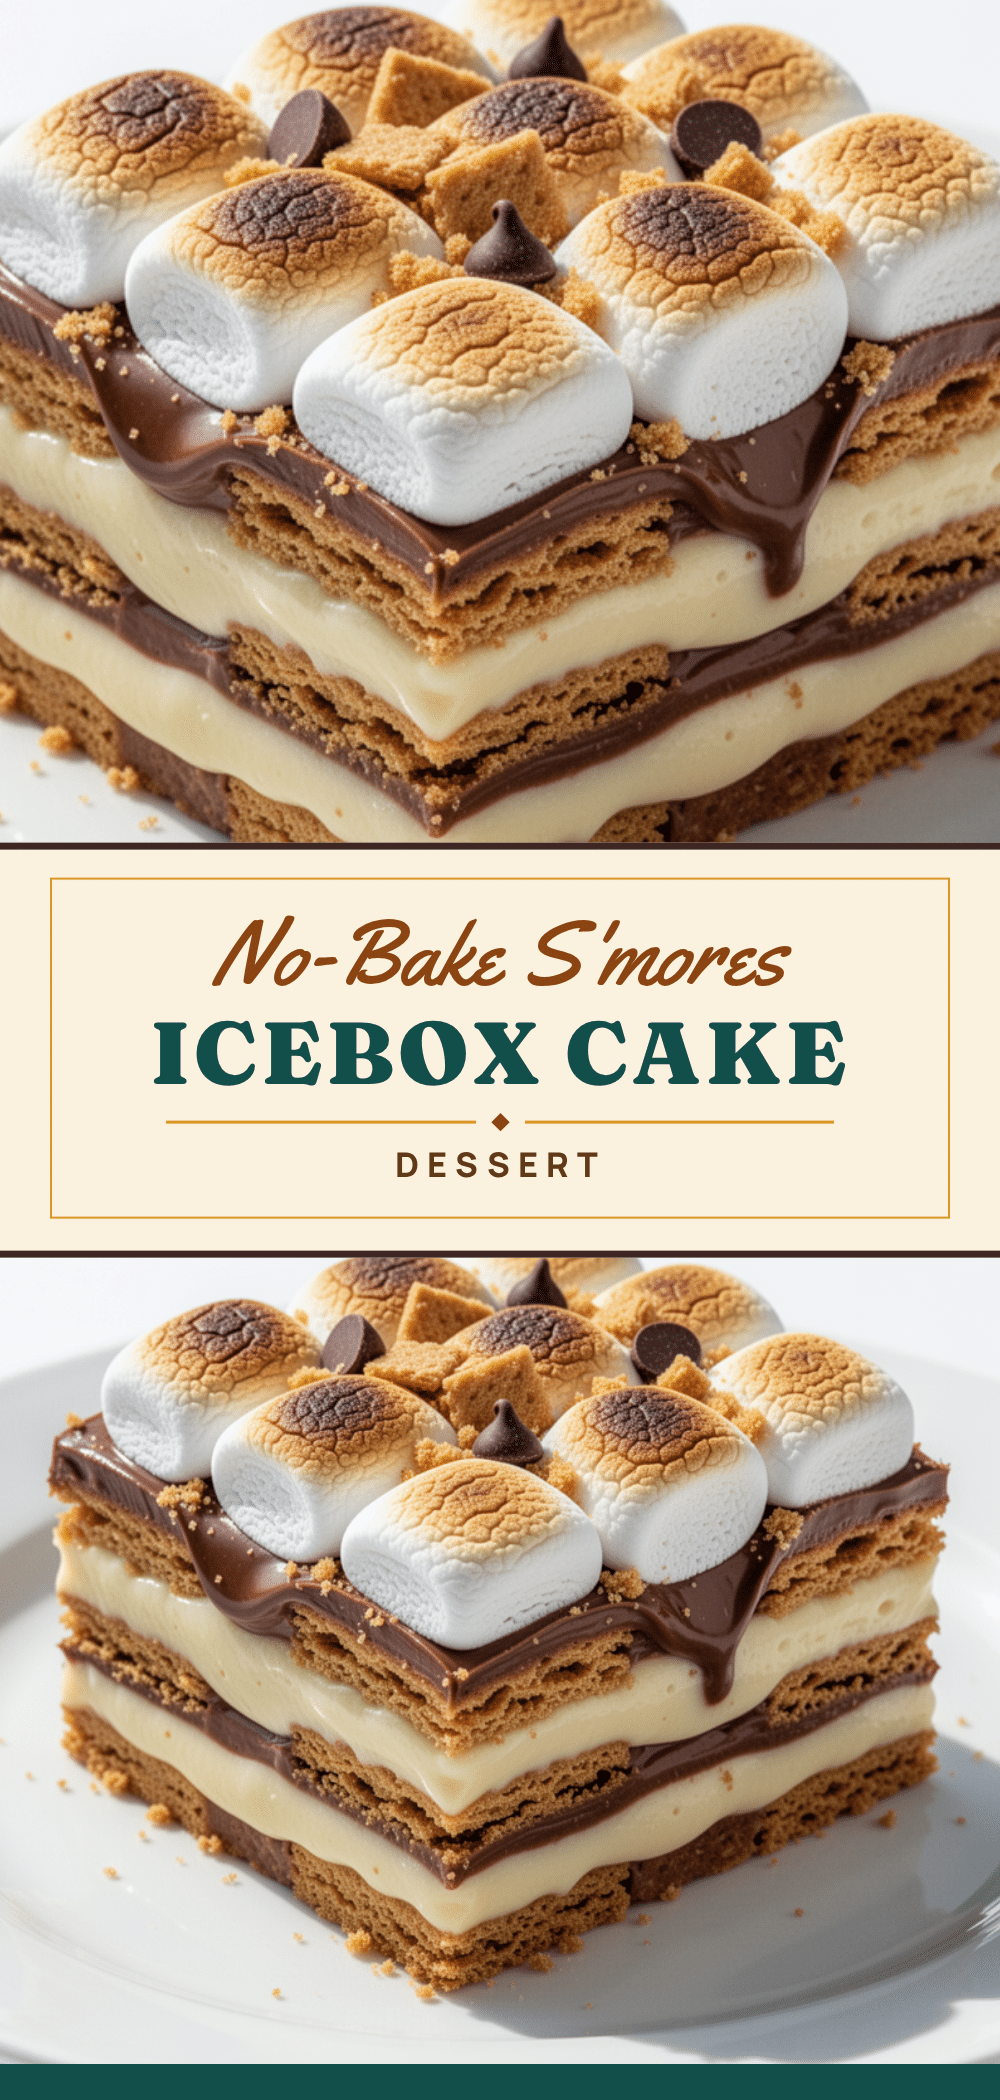
No-Bake Smores Icebox Cake: Easy 5-Ingredient Dessert
A simple, no-bake summer dessert featuring layers of graham crackers, vanilla whipped cream, chocolate pudding, and mini marshmallows that soften overnight into a cake-like texture.
- Prep Time: 20 minutes
- Cook Time: 0 minutes
- Total Time: 6 hours 20 minutes
- Yield: 12 servings 1x
- Category: Dessert
- Cuisine: American
Ingredients
- 2 sleeves graham crackers (classic honey-sweetened)
- 1 box (3.4 oz) instant vanilla pudding mix
- 2 cups cold whole milk
- 1 container (8 oz) thawed frozen whipped topping (like Cool Whip)
- 1 box (3.4 oz) chocolate instant pudding mix
- 1 bag (10 oz) mini marshmallows
- Semi-sweet or milk chocolate chips
Instructions
- In a medium bowl, whisk together the instant vanilla pudding mix and cold milk for about two minutes until thickened. Let sit for five minutes to set.
- Gently fold the thawed whipped topping into the set vanilla pudding using a spatula, lifting from the bottom to keep the mixture light and fluffy.
- In a separate bowl, whisk the chocolate pudding mix with half a cup of milk (or remaining milk if split evenly). Let it set for five minutes.
- Line the bottom of a 9×13 inch baking dish with a single layer of graham crackers, breaking pieces to fit corners.
- Spread half of the vanilla whipped cream mixture evenly over the crackers.
- Sprinkle a generous layer of mini marshmallows over the cream.
- Sprinkle a layer of chocolate chips over the marshmallows.
- Add a second layer of graham crackers.
- Spread the chocolate pudding evenly over the crackers.
- Repeat with another layer of marshmallows and chocolate chips.
- Top with the final layer of graham crackers.
- Spread the remaining vanilla cream on top and smooth it out.
- Garnish with extra chocolate chips and whole marshmallows.
- Cover tightly with plastic wrap and refrigerate for at least 6 hours, preferably overnight, until the crackers are soft.
Notes
For best results, chill overnight to allow crackers to fully soften. Use stabilized whipped topping for better structure. Can be stored in the refrigerator for up to 5 days. For a gluten-free version, use gluten-free graham crackers. Variations include adding Nutella, peanut butter cups, or strawberries.
Nutrition
- Serving Size: 1 slice
- Calories: 350
- Sugar: 30
- Sodium: 250
- Fat: 15
- Saturated Fat: 6
- Carbohydrates: 45
- Fiber: 2
- Protein: 4
Keywords: no-bake, s'mores, icebox cake, summer dessert, easy dessert, graham crackers, marshmallows, chocolate pudding, whipped cream, crowd-pleaser