The last slider was gone in two bites. Honestly, I didn’t even get a chance to grab one. That is how it always goes with these cheesy Philly cheesesteak sliders. One minute, the baking sheet is piled high with gooey, saucy perfection, and the next, there are just crumbs and a few empty napkins left behind. My brother-in-law looked at me with that guilty grin, holding out his empty plate like it was a trophy. He asked for the recipe before I could even wipe down the counter.
It’s not the first time this has happened. In fact, it’s probably the fifth time this month. I started making them for a casual game day watch party, thinking they’d be a quick snack. Instead, they became the main event. People don’t just eat them; they hunt for them. You know that feeling when you walk into a room and everyone is crowded around the kitchen island? That’s the moment I live for, even if it means I’m stuck in the kitchen making more.
The beauty of the ultimate cheesy Philly cheesesteak sliders is that they look complicated but are actually quite lazy to make. You don’t need to be a professional chef to pull this off. You just need some good hoagie rolls, thinly sliced beef, and enough provolone cheese to make anyone happy. The smell alone is enough to clear the living room. It’s a savory, warm, garlic-heavy aroma that sticks to your clothes for hours.
I used to worry about the bread getting soggy. I tried wrapping them in foil, I tried baking them at different temperatures. But the truth is, the slight softness is part of the charm. It’s like eating a sandwich that has been hugged by cheese and butter. These sliders are my go-to for any gathering where I want to impress without spending all day cooking. They are rich, salty, and deeply satisfying. If you make them, you will understand why they disappear so fast.
Why You’ll Love This Recipe
There is a specific kind of magic that happens when you combine the classic flavors of a Philadelphia cheesesteak with the convenience of a slider. This isn’t just another appetizer idea you found on a random blog. This recipe has been tested, tweaked, and perfected over dozens of game days and holiday parties. I’ve learned exactly how to keep the bread from falling apart while ensuring every bite has the perfect ratio of meat to cheese.
- Quick & Easy: You can have these from oven to table in under 30 minutes. It’s perfect for those nights when you want to host but don’t want to spend hours in the kitchen.
- Simple Ingredients: You likely have most of this in your pantry or fridge already. Ground beef works if you can’t find steak, and frozen onions are a great time-saver.
- Perfect for Parties: These are the ultimate finger food. They are easy to hold, not messy (mostly), and disappear quickly, which means you can make a big batch without stress.
- Crowd-Pleaser: Kids love the cheesy bread aspect, and adults appreciate the savory beef and onion mix. It bridges the gap between comfort food and elegant appetizer.
- Unbelievably Delicious: The combination of sautéed onions, savory beef, and melted provolone creates a texture that is both chewy and creamy. It’s next-level comfort food.
What makes these sliders different from the rest is the buttery garlic topping. Most people just sprinkle cheese on top and bake it. But brushing those hoagie rolls with a mixture of melted butter, garlic, and parsley changes everything. It adds a crispy, flavorful crust that contrasts with the soft, warm interior. It’s a small step that makes a huge difference.
I also recommend using a mix of cheeses. While provolone is traditional, adding a little sharp cheddar or even a slice of American cheese can help with the melt. The goal is that stretchy, gooey center that pulls away from the bun. It’s the kind of meal that makes you close your eyes after the first bite. It’s not just food; it’s a hug in sandwich form.
What Ingredients You Will Need
This recipe relies on simple, high-quality ingredients to deliver bold flavor. You don’t need anything exotic, but using good quality beef and fresh garlic will make a noticeable difference in the final taste. The key is balancing the savory elements with the richness of the cheese and the crunch of the bread.
- Hogie Rolls or Sub Rolls: You will need one large sheet of rolls, usually sold in packs of six or eight, still connected. Look for soft, white bread rolls. Brands like King Arthur or local bakery rolls work well. Avoid dense, whole wheat rolls as they won’t get soft enough.
- Beef Steak: Traditionally, this is ribeye or sirloin, thinly sliced. If you can find pre-sliced steak for cheesesteaks at your grocery store, that is the easiest option. If not, you can buy a steak and freeze it slightly to slice it thinly yourself. Aim for about 1 to 1.5 pounds.
- Onions: Yellow onions are standard, but sweet onions like Vidalia add a nice depth. You want them sliced thin so they cook down quickly and become sweet and caramelized.
- Cooking Oil: Use a neutral oil like vegetable or canola oil for sautéing the beef and onions. Olive oil can work but might burn at high heat.
- Provolone Cheese: Sliced provolone is the classic choice. It melts beautifully and has a mild, tangy flavor. I prefer the sliced kind from the deli counter over the pre-packaged slices for better melting.
- Butter: You will need about half a cup of unsalted butter, melted. This is for the garlic topping that goes on the buns.
- Garlic: Fresh minced garlic is a must. Pre-minced garlic from a jar can work in a pinch, but fresh garlic has a brighter flavor that cuts through the richness of the cheese.
- Parsley: Dried parsley is fine for the butter mixture. It adds a pop of color and a subtle herbal note.
- Salt and Pepper: Season your beef generously. Use kosher salt and freshly cracked black pepper to taste.
- Optional Add-ins: Some people like to add sautéed mushrooms or bell peppers. If you do, add them with the onions. However, keep it simple if you want the classic Philly taste.
If you are looking to substitute, you can use ground beef if you can’t find steak. Brown it with the onions instead of searing it. For a gluten-free option, you can use gluten-free sub rolls, but they can be more fragile, so handle them gently. The key is to keep the ingredients fresh and the preparation simple.
Equipment Needed
You don’t need a fancy kitchen to make these sliders. A few basic tools will get the job done. The most important piece of equipment is a large skillet. I prefer a cast-iron skillet because it holds heat well, which helps get a good sear on the beef. If you don’t have cast iron, a non-stick pan works fine too.
You will also need a large baking sheet. A standard half-sheet pan is perfect for holding the entire block of rolls. Make sure your pan is big enough to hold the rolls without crowding, but small enough that they stay connected. A rimmed baking sheet is best to catch any melted cheese that might drip.
A small saucepan or microwave-safe bowl is needed to melt the butter for the topping. A pastry brush is helpful for applying the butter mixture evenly to the tops of the rolls. If you don’t have a pastry brush, you can use a silicone spatula or just tilt the pan to spread it around.
Finally, a sharp knife is useful if you need to slice the steak yourself. But if you buy pre-sliced meat, you won’t need to sharpen much. Keep your tools simple and clean, and you’ll be ready to go in no time.
Preparation Method
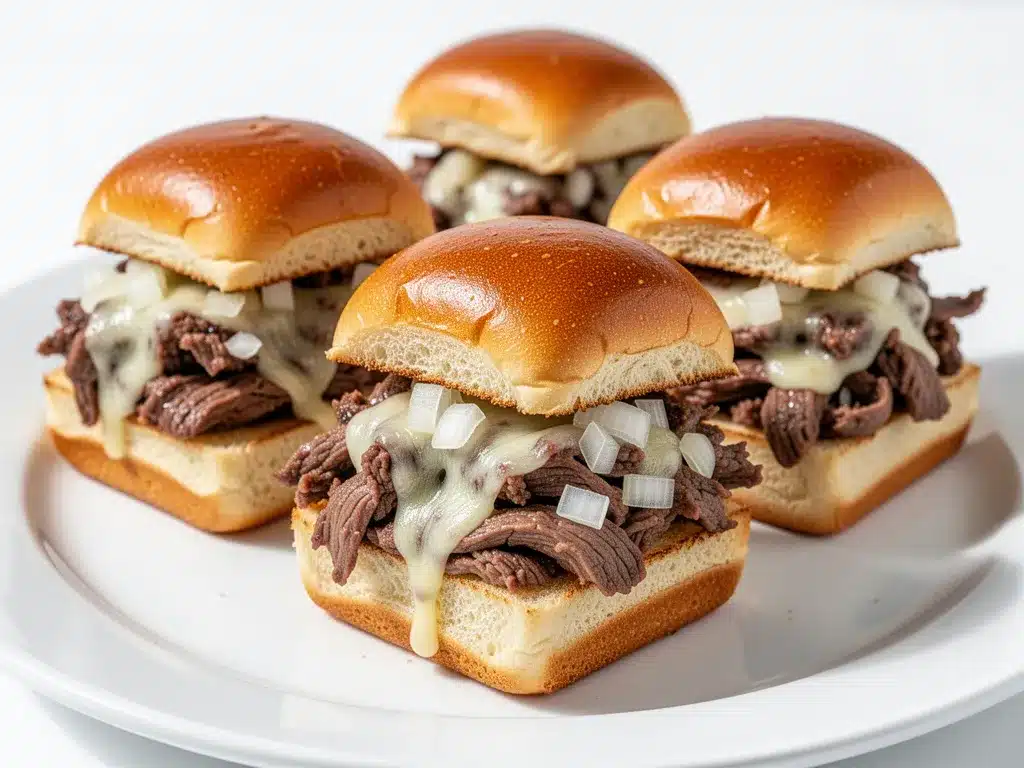
Start by preheating your oven to 350°F (175°C). This ensures the oven is hot and ready when your assembly is complete. While the oven heats up, you can prep your ingredients. Take the sheet of hogie rolls and place them on your cutting board. You want to slice the entire block horizontally through the middle, so you have a top half and a bottom half. Be careful not to cut all the way through; you want them to stay connected as one large piece.
Next, move on to the filling. Heat a large skillet over medium-high heat and add a tablespoon of oil. Once the oil is shimmering, add the thinly sliced beef. Cook it quickly, breaking it up with a spatula if needed, but don’t overcook it. You want it browned but still tender. This should take about 3-5 minutes. If you are using pre-sliced steak, it will cook even faster. Remove the beef from the pan and set it aside on a plate. You don’t need to wipe the pan clean.
In the same skillet, add a little more oil if needed and toss in the sliced onions. Sauté them over medium heat until they are soft and translucent, about 5-7 minutes. You want them sweet, not browned. Once the onions are cooked, add them back to the beef. Season the meat and onion mixture with salt and pepper. Taste it and adjust the seasoning if needed. This is your core filling.
Now, assemble the sliders. Place the bottom half of the rolls on the baking sheet. Spread the beef and onion mixture evenly over the bread. Be generous, but don’t overload it so much that the sliders fall apart. Next, lay the slices of provolone cheese over the meat. You want full coverage. If you are using other cheeses, add them now. The cheese should cover the meat completely.
For the topping, melt the butter in a small saucepan or microwave. Stir in the minced garlic and dried parsley. Brush this mixture generously over the top half of the rolls. The butter should soak slightly into the bread but also coat the surface. Place the top half of the rolls back onto the cheese-covered bottom half. Press down gently to help them stick.
Bake the sliders in the preheated oven for 10-12 minutes. You are looking for the cheese to be fully melted and the tops of the rolls to be golden brown and crispy. Keep an eye on them after 8 minutes to ensure the butter doesn’t burn. Once they are done, remove them from the oven and let them cool for 2-3 minutes. This step is crucial; if you cut them immediately, the cheese will run out and make a mess. Letting them rest allows the cheese to set slightly.
Finally, slice between the individual rolls. You can serve them whole or cut them in half for easier eating. Serve warm and enjoy the compliments.
Cooking Tips & Techniques
The biggest mistake people make is overcooking the beef. Since the steak is sliced thin, it cooks in minutes. If you cook it until it’s well-done, it will be tough and chewy. You want it medium-rare to medium. It will continue to cook slightly when you put it in the oven with the cheese, so pull it off the heat while it’s still juicy.
Another tip is to not skip the garlic butter topping. It sounds like a small detail, but it adds a layer of flavor that ties everything together. The garlic infuses the butter, and the butter toasts the bread. It creates a crispy texture that contrasts with the soft interior. Make sure you use fresh garlic for the best flavor. Old garlic can taste bitter.
When assembling, don’t be shy with the cheese. The cheese acts as the glue that holds the slider together. If you use too little, the filling might fall out when you pick it up. But don’t go overboard either, or it will be too greasy. A single layer of slices is usually perfect.
Watch the oven temperature closely. Every oven is different. If your sliders are browning too quickly on top but the cheese isn’t melted, you can cover them loosely with aluminum foil for the last few minutes of baking. This traps the heat and melts the cheese without burning the bread.
Finally, let them rest. I know it’s hard to wait, but cutting into them immediately is a recipe for disaster. The cheese needs a moment to thicken. It’s the difference between a messy eater’s nightmare and a perfect party appetizer.
Variations & Adaptations
While the classic Philly cheesesteak is delicious, there are many ways to adapt this recipe. One popular variation is the “Philly Cheesesteak Pizza” style. Instead of hogie rolls, use pizza dough or pita bread. Top it with the beef and onion mixture, cheese, and bake until the crust is crispy. This gives it a different texture and is great for a different kind of party.
For a spicy kick, add some sliced jalapeños or a drizzle of hot sauce to the beef mixture. You can also use pepper jack cheese instead of provolone for a sharper, spicier flavor. This is a great option if you have guests who like a bit of heat.
If you want a vegetarian option, substitute the beef with sautéed mushrooms and bell peppers. Use a plant-based cheese alternative, and the result is surprisingly satisfying. The savory umami from the mushrooms mimics the beef well, especially when seasoned with garlic and onions.
Another variation is to add a fried egg on top of each slider before serving. The runny yolk adds a rich, creamy element that pairs well with the savory beef. This turns the appetizer into a more substantial brunch item.
I have also tried using hoagie rolls filled with leftover roast beef. It’s a great way to use up leftovers. Just warm the beef with the onions and cheese, and you have a quick, tasty meal. The flexibility of this recipe makes it a staple in my kitchen.
Serving & Storage Suggestions
These sliders are best served warm, right out of the oven. They are perfect for game day parties, potlucks, or casual dinner gatherings. Pair them with a simple green salad or some potato chips to balance the richness. A cold beer or a creamy milkshake is a classic pairing for cheesesteaks.
If you have leftovers, store them in an airtight container in the refrigerator for up to three days. To reheat, place them in the oven at 350°F for 10 minutes. This helps crisp up the bread again. You can also reheat them in an air fryer for a few minutes, which works very well for maintaining texture. Avoid the microwave, as it will make the bread soggy.
For longer storage, you can freeze the unbaked sliders. Assemble them completely, wrap the entire block tightly in plastic wrap and then aluminum foil. Freeze for up to one month. When ready to eat, let them thaw in the refrigerator overnight, then bake as directed, adding a few extra minutes to the baking time.
The flavors actually develop over time, so day-old sliders are still delicious, though the texture of the bread will be softer. They make a great quick lunch or snack for the next day. Just be prepared to share, because they will likely be gone quickly.
Nutritional Information & Benefits
These sliders are rich and indulgent, so they are best enjoyed in moderation. Each slider contains a good amount of protein from the beef and cheese, which helps keep you full. However, they are also high in saturated fat and sodium due to the cheese and processed meat.
If you are watching your carb intake, you can use low-carb hoagie rolls or even lettuce wraps instead of bread. This reduces the carbohydrate count significantly. For a healthier option, use leaner cuts of beef and reduced-fat cheese.
The onions provide some fiber and vitamins, adding a nutritional boost to the dish. Garlic is known for its immune-boosting properties, so you are getting a small health benefit from that too. Overall, these sliders are a treat, not a daily meal, but they can fit into a balanced diet if you are mindful of portion sizes.
Conclusion
Making ultimate cheesy Philly cheesesteak sliders is a simple way to bring big flavors to any gathering. They are easy to make, incredibly delicious, and always a hit. I love how they bring people together around the kitchen table. There is something special about sharing food that is warm, cheesy, and savory.
I encourage you to try this recipe and make it your own. Add your favorite vegetables, swap the cheese, or change the spice level. The possibilities are endless. Just remember the key steps: thin beef, sweet onions, lots of cheese, and that garlic butter topping.
If you make these sliders, I would love to hear how they turned out. Leave a comment below with your thoughts or share a photo of your creation. Tag me on social media if you post them, as I love seeing your variations. Happy cooking, and enjoy every bite!
Frequently Asked Questions
Can I use ground beef instead of sliced steak?
Yes, you can use ground beef. Brown it with the onions in the skillet. It won’t have the exact same texture as sliced steak, but it will still be delicious and easier to cook.
What is the best cheese to use for Philly cheesesteak sliders?
Provolone is the traditional choice. However, you can also use white American cheese or a mix of provolone and cheddar. The key is to use a cheese that melts well.
Can I make these sliders ahead of time?
You can assemble them ahead of time and refrigerate them before baking. Just add a few extra minutes to the baking time if they are cold from the fridge. You can also freeze them unbaked.
How do I prevent the sliders from getting soggy?
Make sure you drain any excess grease from the beef and onion mixture before assembling. Also, let the sliders cool for a few minutes after baking to allow the cheese to set.
Can I add mushrooms or peppers?
Absolutely. Sautéed mushrooms and bell peppers are a great addition. Add them to the skillet with the onions and cook until soft before adding them to the sliders.
Pin This Recipe!
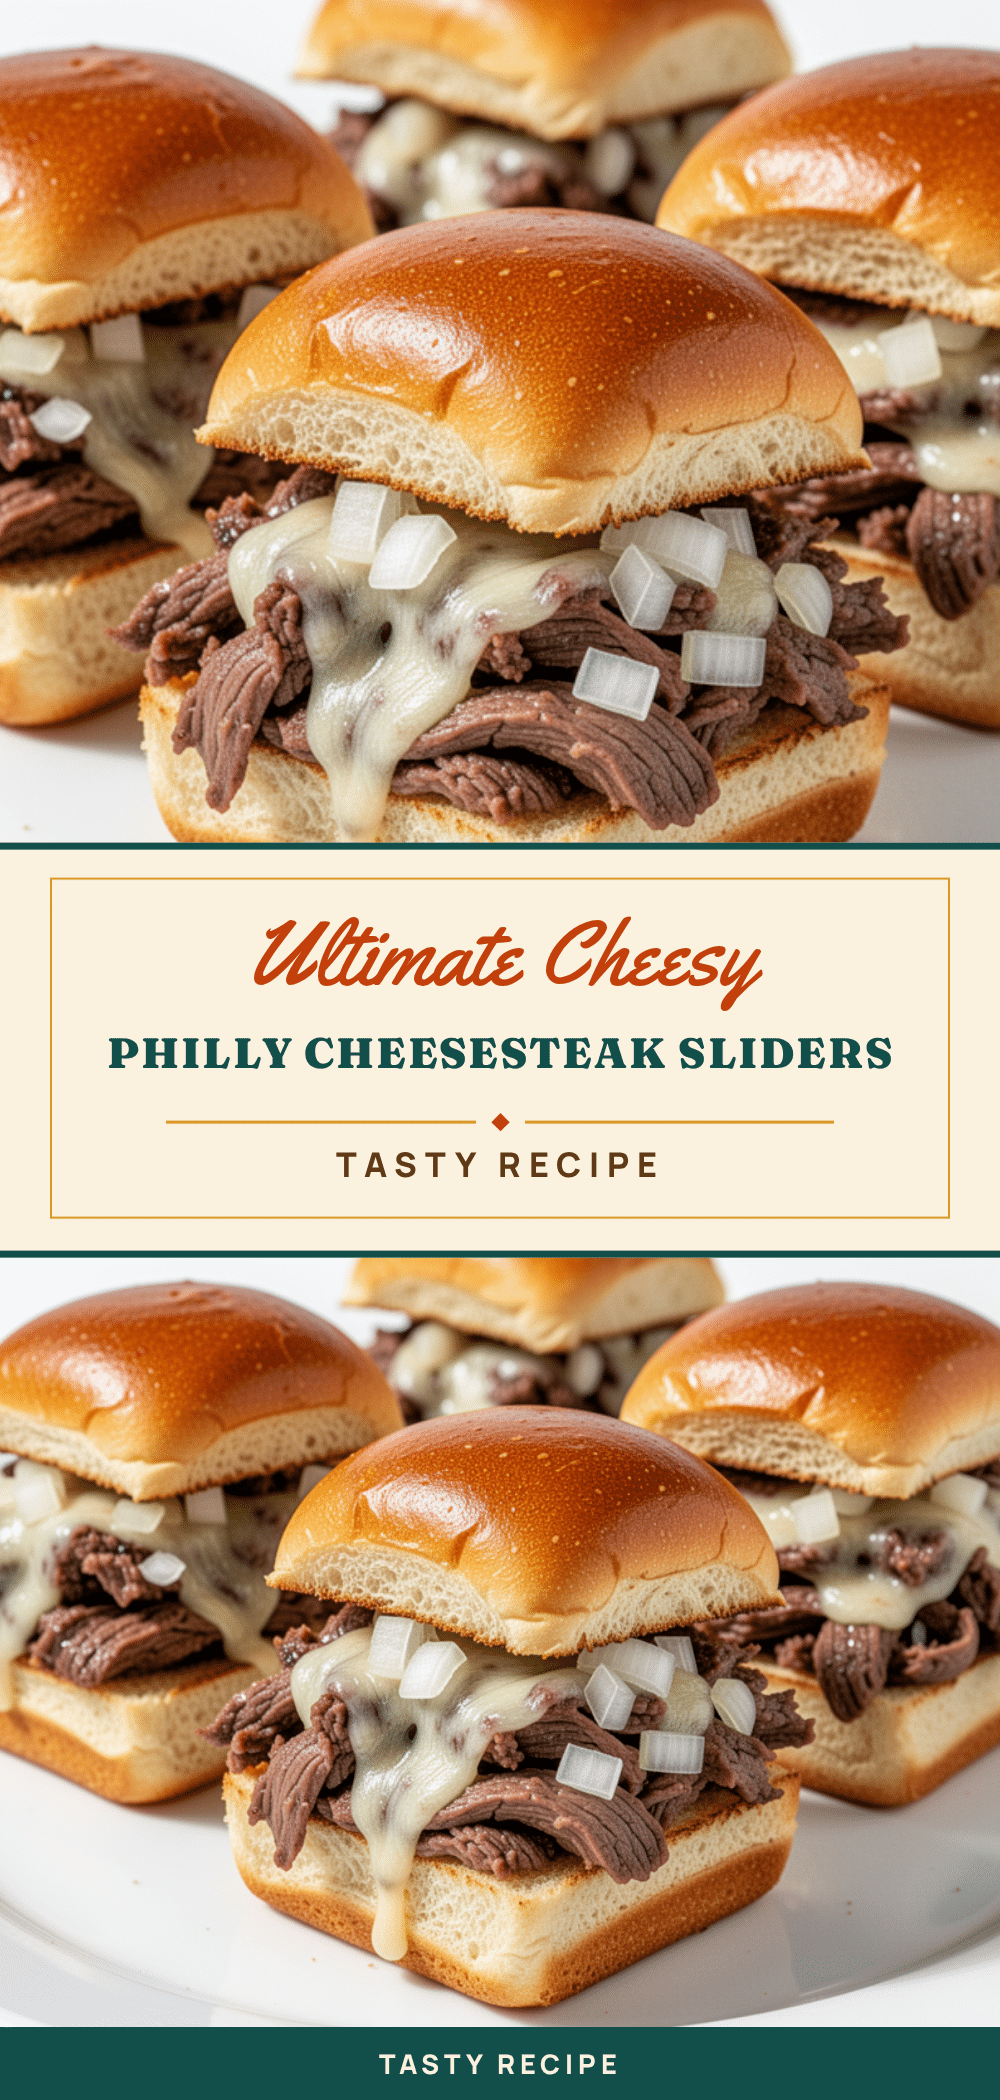
Ultimate Cheesy Philly Cheesesteak Sliders
These easy party appetizers combine classic Philly cheesesteak flavors with soft hoagie rolls, topped with a savory garlic butter mixture. They are quick to make, crowd-pleasing, and perfect for game day or gatherings.
- Prep Time: 15 minutes
- Cook Time: 15 minutes
- Total Time: 30 minutes
- Yield: 6-8 servings 1x
- Category: Appetizer
- Cuisine: American
Ingredients
- 1 large sheet of hoagie or sub rolls (6–8 rolls, connected)
- 1 to 1.5 lbs thinly sliced beef steak (ribeye or sirloin)
- 1 large yellow onion, thinly sliced
- 1 tbsp cooking oil (vegetable or canola)
- 12 slices provolone cheese
- 1/2 cup unsalted butter, melted
- 3 cloves garlic, minced
- 1 tsp dried parsley
- Kosher salt and freshly cracked black pepper to taste
- Optional: Sautéed mushrooms or bell peppers
Instructions
- Preheat oven to 350°F (175°C).
- Slice the sheet of hoagie rolls horizontally through the middle, keeping them connected as one large piece.
- Heat a large skillet over medium-high heat with 1 tbsp oil. Add sliced beef and cook for 3-5 minutes until browned but tender. Remove beef and set aside.
- In the same skillet, add onions and sauté over medium heat for 5-7 minutes until soft and translucent.
- Combine the cooked beef and onions. Season generously with salt and pepper.
- Place the bottom half of the rolls on a large baking sheet. Spread the beef and onion mixture evenly over the bread.
- Lay provolone cheese slices over the meat, ensuring full coverage.
- In a small saucepan or microwave-safe bowl, melt the butter. Stir in minced garlic and dried parsley.
- Brush the butter mixture generously over the top half of the rolls.
- Place the top half of the rolls onto the cheese-covered bottom half and press down gently.
- Bake for 10-12 minutes until cheese is melted and tops are golden brown.
- Remove from oven and let cool for 2-3 minutes to allow cheese to set.
- Slice between individual rolls and serve warm.
Notes
Do not overcook the beef as it will continue to cook in the oven. Let the sliders rest for 2-3 minutes after baking to prevent the cheese from running out. For a gluten-free option, use gluten-free sub rolls but handle gently as they can be fragile. You can substitute ground beef for sliced steak if preferred.
Nutrition
- Serving Size: 1 slider
- Calories: 450
- Sugar: 3
- Sodium: 650
- Fat: 28
- Saturated Fat: 14
- Carbohydrates: 25
- Fiber: 1
- Protein: 22
Keywords: Philly cheesesteak, sliders, party appetizer, game day food, cheesy sliders, easy recipes, beef and cheese, garlic butter