I was ten years old, standing on a step stool that wobbled just enough to keep me on my toes. The house smelled like cinnamon sticks simmering in water and brown sugar caramelizing on the bottom of a heavy pot. It wasn’t just a smell; it was a hug. My grandma didn’t measure anything. She cooked by feel, by the way the batter looked, by the sound it made when she stirred it. I remember watching her fold in the pumpkin puree, the orange swirls disappearing into the creamy white base until it was uniform and smooth.
She made these bars in a square pan, always a square pan. She said rectangles were for people who liked things to be complicated. Squares were honest. Simple. Just like life should be. We’d cut them into small squares, maybe an inch wide, because that’s how you make a dessert last through the week. And oh, did it last. The crust would be slightly crumbly, the filling dense but yielding, and the pumpkin spice would linger on your tongue long after the last bite was gone.
I haven’t made them exactly like she did for years. I’ve refined the technique, switched to cream cheese for that extra tang, and added a graham cracker crust that actually stays together. But the soul of this recipe? That’s all her. It’s the same balance of sweet and spiced, the same comforting weight on the palate. It’s the kind of dessert that doesn’t need to be fancy to be memorable. It just needs to be made with care.
That’s why I’m sharing this version. It’s not just a recipe; it’s a memory I finally learned how to capture in writing. And honestly, it’s better than I remember. The texture is silkier, the flavor is more balanced, and it’s easier to make than I thought possible. If you’re looking for that specific comfort food feeling, you’re in the right place.
Why You’ll Love This Recipe
There’s a reason this creamy pumpkin cheesecake bars with graham crust has become a staple in my kitchen every fall. It’s not just because it tastes incredible, although it absolutely does. It’s because it solves a few common dessert problems without adding stress to your day. Let’s face it, baking can be intimidating. But this one? It’s forgiving. It’s reliable. And it delivers results that look like you spent hours in the kitchen, even though it’s pretty straightforward.
- Quick & Easy: The whole process comes together in under an hour of active prep time. You don’t need to temper eggs or fold in air for twenty minutes. You mix, you pour, you bake. Perfect for busy weeknights or when you’re hosting guests and want to look like a pro.
- Simple Ingredients: No fancy grocery trips needed. You likely already have cream cheese, pumpkin puree, spices, and graham crackers in your pantry or fridge. It’s pantry-friendly comfort food.
- Perfect for Fall Gatherings: Whether it’s a Thanksgiving potluck, a Halloween party, or just a cozy Sunday dinner, these bars fit right in. They’re seasonal but not overpowering, making them a safe bet for guests with varying tastes.
- Crowd-Pleaser: I’ve served these to people who “don’t like pumpkin” and people who are pumpkin purists. Both groups went back for seconds. The neutral sweetness of the cheesecake balances the bold spices perfectly.
- Unbelievably Delicious: The texture is next-level. It’s not airy like a mousse, nor is it dense like a pound cake. It’s that perfect creamy, custard-like consistency that melts in your mouth. It’s comfort food reimagined.
What makes this recipe different from the rest is the ratio. Most pumpkin cheesecake recipes are too sweet or too eggy. This one uses a higher ratio of cream cheese to sugar, which gives it that signature tang you get from New York-style cheesecake. I tested this version about six times before I was happy with the texture. The first few batches were too runny. The later ones were too firm. This final version strikes that sweet spot — firm enough to hold its shape when cut, but soft enough to enjoy with a fork.
It’s the kind of dessert that makes you close your eyes after the first bite. It’s not just good; it’s nostalgic. It’s the kind of treat that turns a simple evening into something special. And the best part? You don’t need to be an expert baker to make it. If you can mix ingredients, you can make these bars.
What Ingredients You Will Need
This recipe uses simple, wholesome ingredients to deliver bold flavor and satisfying texture without the fuss. You don’t need specialized baking supplies or hard-to-find items. Most of this is likely already in your kitchen. The key to success here is quality. Since there are so few ingredients, each one plays a big role in the final taste and texture. Here is what you’ll need to gather:
For the Graham Cracker Crust
- Graham cracker crumbs: About 1 ½ cups. You can buy pre-made crumbs or crush whole crackers in a food processor. I prefer using honey graham crackers for a slightly richer flavor, but regular works fine too.
- Unsalted butter: 6 tablespoons, melted. This binds the crumbs together. Make sure it’s fully melted but not hot, so it doesn’t cook the crumbs.
- Granulated sugar: 2 tablespoons. Just a touch to sweeten the crust. Since the filling is sweet, we keep the crust mildly sweet to balance it out.
- Cinnamon: ½ teaspoon. Adds warmth and depth to the base layer.
For the Pumpkin Cheesecake Filling
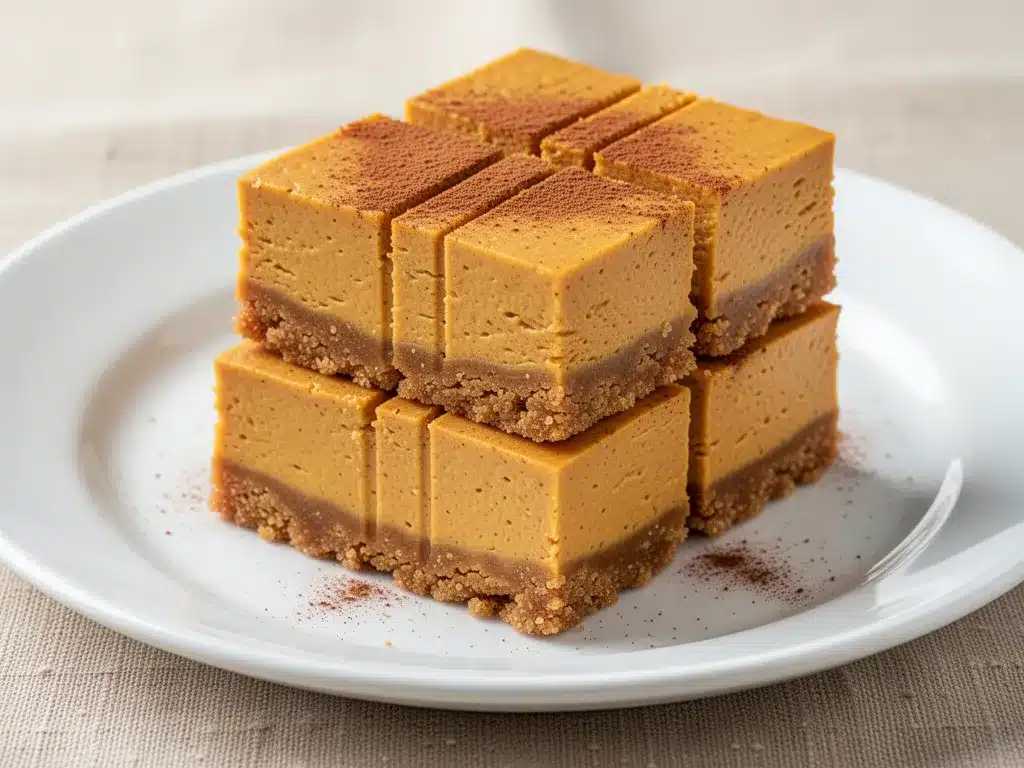
- Full-fat cream cheese: 24 ounces (about 3 blocks), softened to room temperature. This is crucial. If the cream cheese is cold, you’ll get lumps. I recommend using a brand like Philadelphia for consistency, but any high-quality full-fat block will work. Avoid the spreadable tub variety, as it has too much air and moisture.
- Granulated sugar: 1 cup. This provides sweetness and helps with the texture. Brown sugar can be used for a deeper flavor, but white sugar keeps the color bright and the texture smooth.
- Large eggs: 3 large eggs, room temperature. Room temp eggs emulsify better into the batter, creating a smoother mixture. Cold eggs can cause the batter to curdle slightly.
- Pumpkin puree: 15 ounces (one standard can). Do not use pumpkin pie filling. Pie filling has added sugar and spices, which will throw off the balance of this recipe. You want 100% pure pumpkin.
- Heavy cream: ½ cup. This adds richness and helps create that silky, creamy texture. Half-and-half can work in a pinch, but heavy cream gives the best result.
- Pumpkin pie spice: 2 teaspoons. This blend usually includes cinnamon, ginger, nutmeg, and cloves. If you don’t have it, you can make your own mix.
- Vanilla extract: 1 teaspoon. Use pure vanilla extract, not imitation, for the best flavor.
- Salt: ½ teaspoon. Essential for balancing the sweetness and enhancing the spices.
Optional Toppings
- Whipped cream: Homemade is best, but store-bought works.
- Extra cinnamon: For sprinkling on top.
- Toasted pecans: For added crunch.
Equipment Needed
You don’t need a lot of fancy gear to make these bars. The right tools just make the process smoother and the results more consistent. Here is what you’ll need:
- 9×13-inch baking pan: This is the standard size for bars. Make sure it’s metal or glass. Dark metal pans can cause the crust to brown too quickly, so keep an eye on it.
- Food processor or zip-top bag: To crush the graham crackers. A food processor gives you uniform crumbs, but a rolling pin and a bag work perfectly fine if you’re doing it by hand.
- Mixer: A hand mixer or stand mixer is highly recommended. Mixing cream cheese by hand is tough work and often leaves lumps. You want a smooth, creamy batter.
- Spatula: A rubber spatula is essential for scraping the bowl and folding in the pumpkin puree gently. This helps keep the batter airy.
- Parchment paper: Line your pan with parchment, leaving an overhang on the sides. This makes removing the bars easy and keeps cleanup simple. Grease the parchment lightly before adding the crust.
If you don’t have a food processor, don’t worry. Just put the crackers in a thick zip-top bag and crush them with a rolling pin until they’re fine. It takes a bit of elbow grease, but it works. Also, make sure your cream cheese is truly softened. If you’re in a hurry, you can microwave it in short bursts, but be careful not to melt it. Softened means it should yield to gentle pressure from your finger.
Preparation Method
Making these bars is straightforward, but taking your time at each step ensures the best texture. Here is how to put it all together.
- Preheat and Prep: Preheat your oven to 350°F (175°C). Line your 9×13-inch baking pan with parchment paper, leaving a slight overhang on the long sides. This will help you lift the bars out later. Lightly grease the parchment with non-stick spray or butter.
- Make the Crust: In a medium bowl, combine the graham cracker crumbs, melted butter, sugar, and cinnamon. Mix until the crumbs look like wet sand. Press this mixture firmly into the bottom of the prepared pan. Use the bottom of a measuring cup or your fingers to pack it down evenly. You want it tight, or the bars will crumble when cut. Bake the crust for 8-10 minutes until it’s lightly golden. Remove from the oven and let it cool while you make the filling. Leave the oven on.
- Mix the Cream Cheese: In a large mixing bowl, beat the softened cream cheese on medium speed until it is completely smooth and creamy. This should take about 2-3 minutes. Scrape down the sides and bottom of the bowl with a spatula to ensure there are no lumps. Lumps of cream cheese are the enemy of smooth cheesecake bars.
- Add Sugar: Add the 1 cup of granulated sugar to the cream cheese. Beat on low speed until just combined. Don’t overmix at this stage, as incorporating too much air can cause cracks later.
- Incorporate Eggs: Add the eggs one at a time, beating on low speed after each addition. Mix just until the yellow disappears. Overmixing after adding eggs can incorporate too much air, which leads to rising and then collapsing, causing cracks. Be gentle here.
- Add Pumpkin and Spices: Add the pumpkin puree, heavy cream, pumpkin pie spice, vanilla extract, and salt. Mix on low speed until everything is combined and smooth. Scrape the bowl one more time to make sure the bottom is clean. The batter should be thick, smooth, and orange-yellow in color.
- Assemble: Pour the filling over the cooled crust. Use a spatula to spread it evenly into the corners. Tap the pan gently on the counter a few times to release any large air bubbles.
- Bake: Bake at 350°F (175°C) for 35-40 minutes. The edges should be set, but the center should still have a slight jiggle when you gently shake the pan. It will continue to set as it cools. Do not overbake, or the texture will become dense and dry.
- Cool Completely: This is the hardest part. Let the bars cool in the pan on a wire rack for at least 1 hour. Then, refrigerate them for at least 4 hours, preferably overnight. Cold bars are much easier to cut cleanly. If you try to cut them warm, they will be messy and fall apart.
- Cut and Serve: Use a sharp knife to cut the bars into squares. Wipe the knife clean between cuts for neat edges. Serve with a dollop of whipped cream if desired.
Cooking Tips & Techniques
Getting the texture right is all about technique. Here are some professional tips to ensure your bars turn out perfectly every time.
Room Temperature is Key: I can’t stress this enough. Your cream cheese and eggs need to be at room temperature. Cold ingredients don’t blend well, leading to a lumpy batter. If you forget to take them out, you can soften the cream cheese by cutting it into cubes and microwaving in 10-second bursts. For eggs, just drop them in a bowl of warm water for 5-10 minutes.
Don’t Overmix: Once you add the eggs, mix on the lowest speed possible. You want to combine the ingredients, not whip air into them. Excess air causes the cheesecake to rise in the oven and then fall, creating cracks. A dense, smooth texture is what we want.
The Jiggle Test: Knowing when to take the bars out of the oven is an art. They are done when the edges are set and the center is still slightly jiggly, like Jell-O. If the center is completely firm, they are overbaked. They will continue to cook from residual heat as they cool.
Water Bath Option: For an even creamier texture and to prevent cracking, you can bake these bars in a water bath. Wrap the bottom of your pan in heavy-duty aluminum foil and place it in a roasting pan. Fill the roasting pan with hot water until it comes halfway up the sides of the baking pan. This creates a humid environment that cooks the cheesecake gently. It’s not strictly necessary for bars, but it helps if you’re worried about cracks.
Cooling Slowly: Sudden temperature changes can cause cracks. After baking, turn off the oven and crack the door open slightly. Let the bars cool in the oven for about an hour before moving them to the counter. This gradual cooling helps prevent surface cracks.
Variations & Adaptations
While the classic version is my favorite, these bars are versatile. Here are a few ways to customize them:
- Gluten-Free: Substitute the graham crackers with a gluten-free graham cracker brand or almond flour. Make sure to check that your pumpkin puree and spices are certified gluten-free.
- Dairy-Free: Use dairy-free cream cheese (like Kite Hill or Miyoko’s) and coconut cream instead of heavy cream. The flavor will be slightly different, but still delicious. Use coconut oil instead of butter for the crust.
- Maple Pecan: Add ½ cup of chopped toasted pecans to the crust. Or, swirl ¼ cup of maple syrup into the filling for a deeper, richer sweetness.
- Spice It Up: If you love ginger, add an extra teaspoon of ground ginger or some minced crystallized ginger to the filling. It adds a nice zing.
- Chocolate Drizzle: Melt some dark or milk chocolate and drizzle it over the cooled bars. The bitterness of the chocolate pairs beautifully with the sweet pumpkin.
I once tried making these with sweet potato puree instead of pumpkin. It worked surprisingly well, though the flavor was a bit earthier. If you do that, add a bit more cinnamon and nutmeg to balance the sweetness. It’s a great way to use up leftover sweet potatoes.
Serving & Storage Suggestions
These bars are best served chilled. The cold temperature firms up the filling and enhances the creamy texture. Serve them with a dollop of whipped cream and a sprinkle of cinnamon. They also pair well with a cup of hot coffee or tea, making them a perfect afternoon snack.
Storage: Store the bars in an airtight container in the refrigerator for up to 5 days. They actually taste better on day two, as the flavors have time to meld together. You can also freeze them. Wrap individual bars in plastic wrap and then place them in a freezer-safe bag. They will keep for up to 2 months. Thaw them in the refrigerator overnight before serving.
Reheating: You generally don’t need to reheat these bars. In fact, warming them up can make the texture too soft. If you prefer a slightly warmer bar, you can microwave a single serving for 10-15 seconds. Just be careful not to melt the crust.
The flavors develop over time. The pumpkin spice becomes more pronounced, and the cream cheese tang mellows out. If you make these ahead of time for a party, they are even better the next day.
Nutritional Information & Benefits
While these bars are a dessert, they do offer some nutritional benefits. Pumpkin puree is high in vitamin A, potassium, and fiber. Cream cheese provides protein and calcium. However, this is still a rich, calorie-dense treat, so moderation is key.
Estimated Nutrition per Bar: (Assuming 16 bars)
- Calories: 280
- Fat: 18g
- Carbohydrates: 25g
- Protein: 5g
- Fiber: 1g
For a lighter option, you can reduce the sugar in the filling by ¼ cup. It will still be sweet enough, but less sugary. If you’re watching your carb intake, you can use a almond flour crust instead of graham crackers. These bars are not gluten-free unless you use GF ingredients, and they contain dairy and eggs.
I always enjoy these as a mindful treat. A small square with a cup of tea is enough to satisfy a sweet tooth without feeling guilty. It’s about balance and enjoying the moment.
Conclusion
Making creamy pumpkin cheesecake bars with graham crust is a wonderful way to embrace the fall season. It’s a recipe that combines simplicity with incredible flavor, resulting in a dessert that is both comforting and impressive. Whether you’re a seasoned baker or a beginner, these bars are forgiving and delicious.
I hope you try this recipe and enjoy it as much as I do. Feel free to customize it with your favorite spices or toppings. And if you make it, I’d love to hear how it turns out. Leave a comment below with your thoughts, or share a photo on social media and tag me. I always love seeing your creations.
Happy baking! May your kitchen smell like autumn and your heart feel full.
FAQs
Can I use pumpkin pie filling instead of pure pumpkin puree?
No, it’s important to use 100% pure pumpkin puree. Pumpkin pie filling already contains sugar and spices, which will throw off the balance of sweetness and flavor in this recipe. Using pie filling will make the bars too sweet and the texture too dense.
Why did my cheesecake bars crack?
Cracking usually happens due to overmixing, overbaking, or sudden temperature changes. Make sure to mix the batter on low speed, especially after adding eggs. Also, avoid opening the oven door while the bars are baking. Let them cool gradually in the turned-off oven with the door cracked open.
Can I make these bars ahead of time?
Yes, these bars are even better the next day. You can make them up to 2 days in advance. Store them in the refrigerator in an airtight container. They can also be frozen for up to 2 months for longer-term storage.
How do I cut clean slices?
Make sure the bars are completely cold, preferably after an overnight refrigeration. Use a sharp knife and wipe it clean with a damp paper towel between each cut. This prevents the filling from sticking to the knife and ensures neat slices.
Can I use a different pan size?
You can use an 8×8-inch pan, but the bars will be thicker and may require a longer baking time (check at 45 minutes). Alternatively, you can make half the recipe for an 8×8 pan. Keep in mind that baking times will vary based on the pan size and material.
Pin This Recipe!
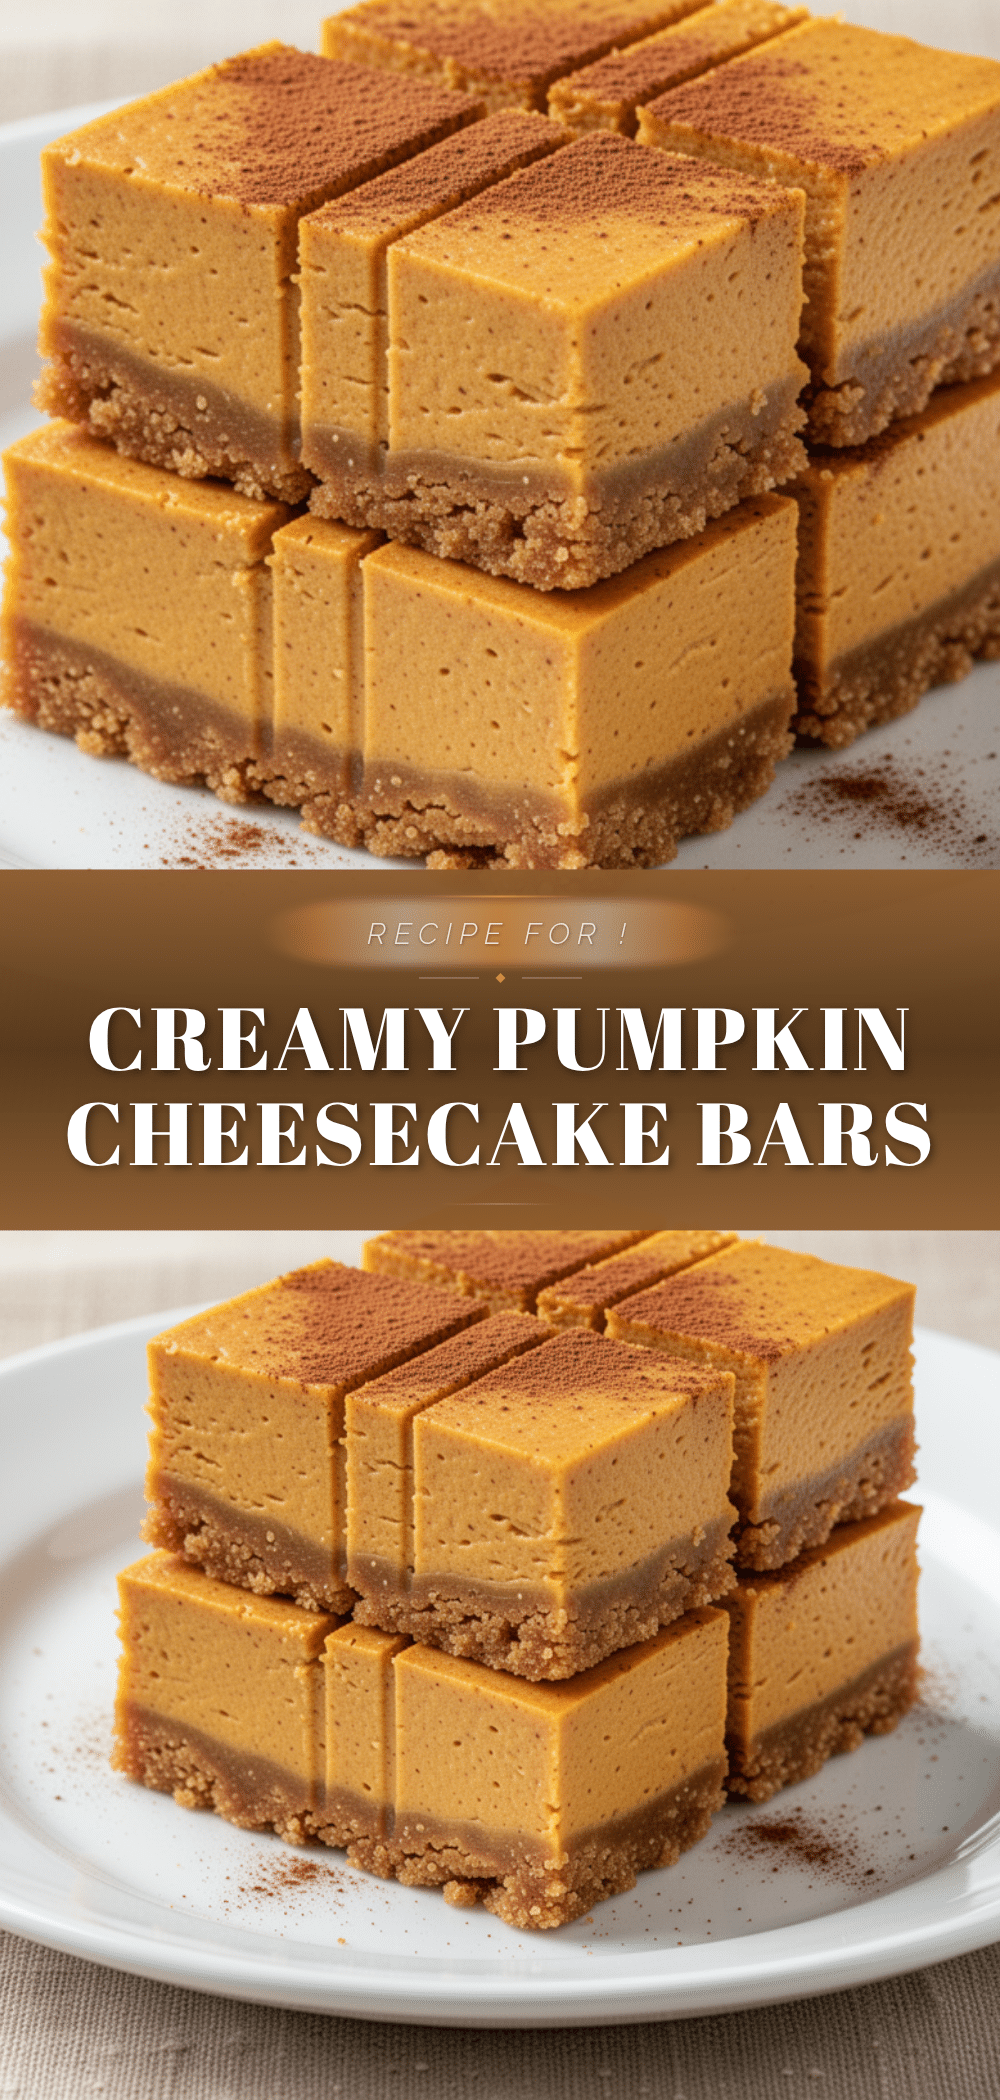
Creamy Pumpkin Cheesecake Bars: 3-Step Easy Dessert
A nostalgic and creamy pumpkin cheesecake bar with a graham cracker crust. This forgiving recipe delivers a silky, custard-like texture with a perfect balance of sweet and spiced flavors, making it an ideal fall dessert.
- Prep Time: 15 minutes
- Cook Time: 50 minutes
- Total Time: 4 hours 55 minutes
- Yield: 16 servings 1x
- Category: Dessert
- Cuisine: American
Ingredients
- For the Graham Cracker Crust:
- 1 ½ cups graham cracker crumbs (honey or regular)
- 6 tablespoons unsalted butter, melted
- 2 tablespoons granulated sugar
- ½ teaspoon cinnamon
- For the Pumpkin Cheesecake Filling:
- 24 ounces full-fat cream cheese, softened to room temperature
- 1 cup granulated sugar
- 3 large eggs, room temperature
- 15 ounces (1 standard can) 100% pure pumpkin puree
- ½ cup heavy cream
- 2 teaspoons pumpkin pie spice
- 1 teaspoon pure vanilla extract
- ½ teaspoon salt
- Optional Toppings:
- Whipped cream
- Extra cinnamon for sprinkling
- Toasted pecans
Instructions
- Preheat oven to 350°F (175°C). Line a 9×13-inch baking pan with parchment paper, leaving an overhang on the long sides, and lightly grease.
- In a medium bowl, combine graham cracker crumbs, melted butter, sugar, and cinnamon. Mix until it resembles wet sand.
- Press the crust mixture firmly into the bottom of the prepared pan. Bake for 8-10 minutes until lightly golden. Remove and let cool while making the filling. Leave oven on.
- In a large mixing bowl, beat softened cream cheese on medium speed until smooth and creamy (2-3 minutes). Scrape down sides and bottom.
- Add 1 cup granulated sugar to the cream cheese. Beat on low speed until just combined. Do not overmix.
- Add eggs one at a time, beating on low speed after each addition until the yellow disappears. Mix gently to avoid incorporating air.
- Add pumpkin puree, heavy cream, pumpkin pie spice, vanilla extract, and salt. Mix on low speed until smooth and combined.
- Pour filling over the cooled crust and spread evenly. Tap the pan gently on the counter to release air bubbles.
- Bake at 350°F (175°C) for 35-40 minutes. Edges should be set, but the center should have a slight jiggle.
- Cool completely in the pan on a wire rack for at least 1 hour, then refrigerate for at least 4 hours (preferably overnight) before cutting.
- Cut into squares using a sharp knife, wiping the knife between cuts. Serve chilled with whipped cream if desired.
Notes
Ensure cream cheese and eggs are at room temperature to prevent lumps. Do not overmix the batter after adding eggs to avoid cracks. For best results, chill bars overnight. Bars can be stored in the refrigerator for up to 5 days or frozen for up to 2 months.
Nutrition
- Serving Size: 1 bar
- Calories: 280
- Sugar: 18
- Sodium: 250
- Fat: 18
- Saturated Fat: 10
- Carbohydrates: 25
- Fiber: 1
- Protein: 5
Keywords: pumpkin cheesecake bars, fall dessert, graham cracker crust, easy baking, pumpkin spice, cream cheese bars, holiday dessert