It was 1998. The windows were fogged up from the humidity of boiling water, and the air smelled like wet leaves and brown sugar. I was maybe eight years old, standing on a stool that wobbled just enough to be exciting. Grandma wasn’t measuring anything. She didn’t have a recipe card for this. She just grabbed a bowl, dumped in the canned pumpkin she’d bought on sale, cracked eggs with one hand, and stirred until it looked like mud. I remember thinking it looked messy. I remember thinking it looked impossible.
But then the smell changed. It shifted from raw vegetable to something warm, spiced, and deeply comforting. That’s when I knew. It wasn’t just food. It was a hug in loaf form. She didn’t use fancy flours or expensive vanilla beans. She used what she had. She used one bowl. And honestly, that’s why it works. Simplicity has a flavor all its own. It tastes like trust. It tastes like you don’t need to be a chef to make something that feeds the soul.
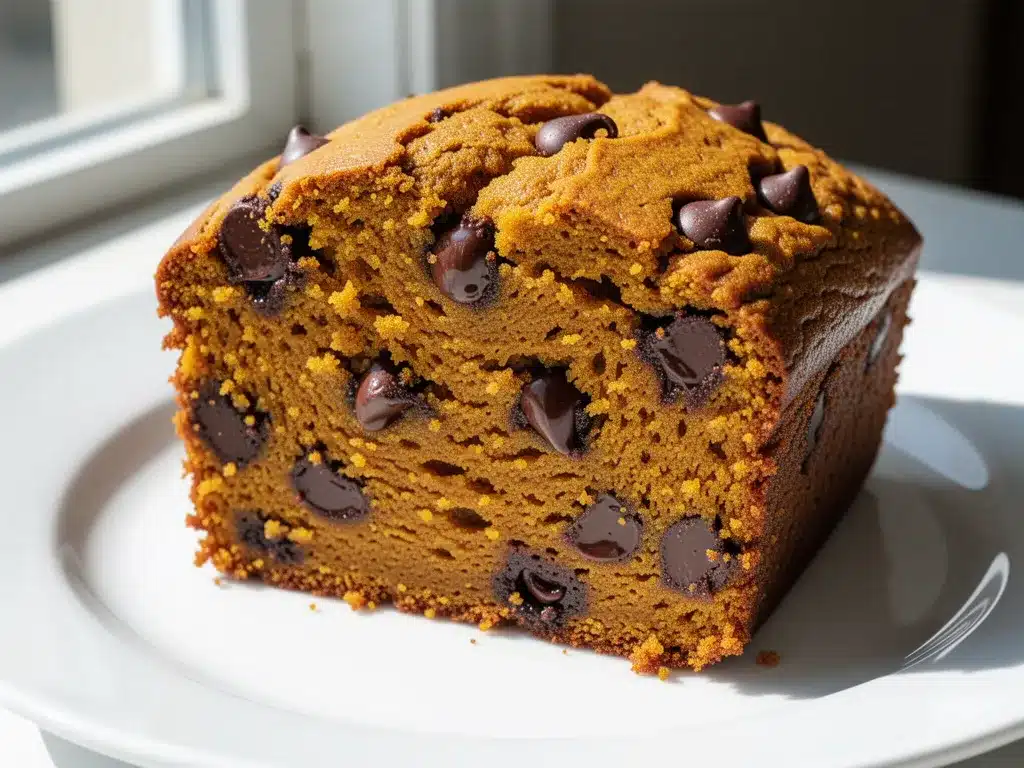
I’ve made this Moist One-Bowl Chocolate Chip Pumpkin Bread hundreds of times since. Some days I add walnuts. Some days I skip the chips because I’m feeling wild. But the base? It’s always the same. The batter comes together in minutes. No mixer. No fuss. Just a spoon, a bowl, and a whole lot of patience while it bakes. You know how some recipes feel like a project? This one feels like a friend. It doesn’t ask for much. It just asks to be shared.
There’s a quiet magic in mixing ingredients by hand. You can feel the texture change. You can smell the cinnamon wake up. It’s slow. It’s deliberate. And in a world that moves too fast, that’s a gift. I still make it on rainy days. I still stand in my kitchen, smelling that same spiced air, and I feel that same eight-year-old wonder. This recipe isn’t just about bread. It’s about coming home. It’s about knowing that no matter how hard the week was, you can bake something sweet, something soft, something that tastes like love. And that’s enough.
Why You’ll Love This Recipe
Let’s be real for a second. Most pumpkin bread recipes out there are dry. They’re crumbly. They taste like cardboard that’s been soaked in cinnamon water. I’ve tested dozens of versions. Some require a stand mixer. Some need three cups of flour and a degree in chemistry. This one? It’s different. It’s the kind of recipe that makes you close your eyes after the first bite and just sigh. It’s comfort food reimagined—healthier, faster, but with the same soul-soothing satisfaction.
- Quick & Easy: Comes together in under 15 minutes of prep time. Perfect for busy weeknights or last-minute cravings when you need a fix fast.
- Simple Ingredients: No fancy grocery trips needed. You likely already have everything in your kitchen, including that can of pumpkin puree hiding in the back of your pantry.
- Perfect for Gifting: Great for neighbor gifts, teacher presents, or potlucks. It travels well and stays moist for days.
- Crowd-Pleaser: Always gets rave reviews from kids and adults alike. Even the picky eaters who claim they “don’t like pumpkin” will ask for seconds.
- Unbelievably Delicious: The texture is dense yet tender, and the flavor combo of warm spices and melted chocolate is next-level comfort food.
What makes this recipe stand out isn’t a secret technique. It’s the ratio. I’ve found that using full-fat pumpkin puree (not the pie filling, please) creates a moisture barrier that keeps the bread soft for days. Adding chocolate chips isn’t just for sweetness; the fat in the chocolate helps tenderize the crumb. It’s a small detail that makes a huge difference. Whether you’re a novice baker or a seasoned pro, this loaf delivers every single time. It’s reliable. It’s forgiving. And it’s genuinely the best version I’ve ever made.
What Ingredients You Will Need
This recipe uses simple, wholesome ingredients to deliver bold flavor and satisfying texture without the fuss. The beauty of this Moist One-Bowl Chocolate Chip Pumpkin Bread lies in its accessibility. You don’t need a specialty store. You don’t need expensive imports. Just good basics, handled with care.
- 1 cup all-purpose flour: The foundation. I use regular all-purpose because it gives that perfect tender crumb. For a lighter texture, you can swap half for cake flour, but it’s not necessary.
- 1 tsp baking soda: Essential for rise. Make sure it’s fresh. Old baking soda means flat bread. I keep a fresh tin at all times because I’ve learned the hard way.
- 1 tsp baking powder: Works with the soda to ensure the loaf rises evenly. It’s a backup system for your bread.
- 1 tsp cinnamon: The star of the show. Use ground cinnamon, not sticks. I recommend McCormick or Simply Organic for their consistent potency. If your spice jar has been sitting since last Christmas, toss it and buy new. It matters.
- 1/2 tsp nutmeg: Adds warmth. Freshly grated is best, but pre-ground works fine. It’s subtle but crucial for that “fall” smell.
- 1/2 tsp ginger: A pinch of heat. It wakes up the palate. Don’t skip it. It balances the sweetness.
- 1/4 tsp salt: Enhances flavor. Sweet things taste flat without salt. It’s the unsung hero of baking.
- 1 cup canned pumpkin puree: Not pumpkin pie filling. Puree. Look for brands like Libby’s or Steinbrenner. Ensure it’s thick and not watery. If it’s runny, drain it in a cheesecloth for 10 minutes.
- 1 cup granulated sugar: Provides sweetness and moisture. I use white sugar because it keeps the crumb tender. Brown sugar can make it denser, but you can use half-and-half if you want a deeper flavor.
- 1/2 cup vegetable oil: Oil keeps bread moister than butter. Butter can make it hard when cold. Oil stays soft. I use a neutral oil like canola or grapeseed.
- 1 large egg: Binds everything together. Room temperature is best, but straight from the fridge works too. Don’t stress over it.
- 1 tsp vanilla extract: Flavor booster. Use real vanilla, not imitation. It makes a noticeable difference in the aroma.
- 1 cup semi-sweet chocolate chips: The fun part. I use Ghirardelli chips because they melt beautifully. Dark chocolate chips work too if you prefer less sweetness.
Do I need to sift the dry ingredients?
Not for this recipe. Since it’s a one-bowl mix, whisking them together in the bowl is enough. Sifting is for delicate cakes. This bread is rustic and forgiving. Whisking aerates the flour just enough without overworking it.
Can I use pumpkin pie filling?
Please don’t. Pie filling has extra sugar and spices already. It will throw off the balance of your bread. Stick to pure pumpkin puree. It’s a different product, and the result will be much better.
Equipment Needed
You don’t need a fancy kitchen to make this. A few basic tools will get you to the finish line. Here’s what you’ll need:
- One large mixing bowl: Ideally glass or ceramic. It needs to be big enough to hold all the ingredients without splattering. I use a 4-quart bowl. It’s perfect.
- Whisk: A standard balloon whisk is fine. You’re not whipping egg whites. You’re just combining ingredients. A fork works in a pinch, but a whisk is faster and more efficient.
- Measuring cups and spoons: Accuracy matters in baking. Use standard US cups. If you have a kitchen scale, that’s even better for precision, but cups are traditional here.
- 9×5 inch loaf pan: Standard size. If you don’t have one, you can use a smaller 8×4 pan, but you’ll need to adjust the baking time. It will take longer. Grease it well.
- Parchment paper: Optional but highly recommended. It makes cleanup a breeze. Just line the bottom and sides. No sticky bread stuck to the pan ever again.
- Cooling rack: Lets air circulate so the bottom doesn’t get soggy. If you don’t have one, a clean wire rack or even the upside-down bottom of a pan works.
I’ve tried silicone loaf pans before. They’re cheap and flexible, but they don’t conduct heat well. The crust stays pale. For this recipe, I prefer metal pans. They give you that nice, golden-brown crust. If you must use silicone, grease it generously. It helps.
Preparation Method
Let’s get into the nitty-gritty. This is where the magic happens. It’s simple, but there are details that matter. Pay attention. Your taste buds will thank you.
- Preheat your oven to 350°F (175°C). This is crucial. If your oven isn’t ready, the bread won’t rise properly. Use an oven thermometer if you can. Ovens lie. They often run hot or cold. Knowing your true temperature saves you from burnt edges or raw middles.
- Prepare your loaf pan. Grease it with butter or non-stick spray. Line it with parchment paper if you’re using it. This step ensures easy removal later. Trust me. You don’t want to fight your bread when it’s hot.
- Whisk the dry ingredients. In your large bowl, combine the flour, baking soda, baking powder, cinnamon, nutmeg, ginger, and salt. Whisk them together for about 30 seconds. This distributes the leavening agents evenly. You don’t want clumps of baking soda in your final loaf. That tastes bitter. And nobody wants that.
- Add the wet ingredients. To the same bowl, add the pumpkin puree, sugar, oil, egg, and vanilla extract. Now, here’s the trick. Don’t mix it yet. Just dump it all in. The pumpkin is wet. The sugar is dry. The oil is slippery. Let them sit for a minute. It helps the sugar start to dissolve.
- Mix until just combined. Use your whisk or a sturdy spoon. Mix gently. Stop when you no longer see streaks of flour. Overmixing is the enemy. It develops gluten, which makes bread tough. You want tender. You want soft. Stop while the batter still looks a little thick. It will finish mixing as it rests.
- Fold in the chocolate chips. Gently stir in the chocolate chips. Be careful not to crush them. You want pockets of melted chocolate, not a uniform brown mess. Save a small handful to sprinkle on top later. It looks pretty and gives you a crunchier bite.
- Pour into the pan. Scrape the batter into your prepared loaf pan. Smooth the top with a spatula. Sprinkle the reserved chocolate chips on top. Press them in slightly so they stick. This is the presentation step. Make it look nice. You’ll be proud of it.
- Bake for 55-65 minutes. Place the pan in the center of the oven. Do not open the door for the first 40 minutes. The heat needs to be consistent. After 40 minutes, you can check. Insert a toothpick into the center. It should come out with a few moist crumbs, not wet batter. If it’s wet, give it 5 more minutes. If it’s clean, it’s done. The top should be golden and spring back when touched.
- Cool completely. This is the hardest part. Let the bread cool in the pan for 10 minutes. Then transfer it to a wire rack. Let it cool completely before slicing. If you cut it hot, it will be gummy. The structure needs to set. Patience is key. Wait at least an hour. Ideally, wait until it’s room temperature.
I usually make this on Sunday morning. I let it cool while I drink my coffee and read the paper. By the time I’m ready to slice, it’s perfect. The steam has escaped. The crumb has set. It’s ready to be shared.
Cooking Tips & Techniques
Baking is science, but it’s also intuition. Here are some tips I’ve learned through trial, error, and a few burnt loaves.
- Don’t overmix the batter. I cannot stress this enough. When you mix flour and liquid, gluten forms. Gluten gives structure, but too much makes bread chewy. For pumpkin bread, you want a cake-like texture. Mix until the flour disappears. That’s it. If there are small lumps, leave them. They’ll disappear in the oven.
- Check your oven temperature. I once made this bread in an oven that ran 25 degrees hot. The outside burned. The inside was raw. I wasted a whole can of pumpkin. Buy an inexpensive oven thermometer. It’s the best $10 you’ll spend.
- Use room temperature ingredients. While I said the egg doesn’t have to be room temp, it helps. Cold ingredients can shock the batter. If you’re in a rush, just drop the egg in warm water for 5 minutes. It works.
- Test for doneness early. Ovens vary. Start checking at 50 minutes. If the toothpick comes out clean, it’s done. If it has wet batter, cover the top with foil to prevent burning and bake for another 5-10 minutes. The foil protects the crust while the center finishes cooking.
- Let it rest. I know it’s tempting. But hot bread is messy. It falls apart. Let it cool on the rack. The residual heat continues to cook the center. It’s a gentle finish.
One time, I tried using applesauce instead of oil. It was lighter, but it lacked richness. The bread dried out faster. Oil is important for moisture. Don’t skip it unless you have to. If you do, use Greek yogurt. It adds moisture and protein. But oil is traditional for a reason.
Variations & Adaptations
This recipe is a canvas. You can paint it however you like. Here are some ideas that have worked for me.
- Walnut or Pecan Addition: Add 1/2 cup of chopped walnuts or pecans. Toast them first in a dry pan for 2 minutes. It brings out their oils and makes them crunchier. It adds a nice contrast to the soft bread.
- White Chocolate Chip: Swap the semi-sweet chips for white chocolate. It’s sweeter and creamier. It pairs beautifully with the cinnamon. It’s like a pumpkin cheesecake in bread form.
- Spice It Up: Add a pinch of cardamom or allspice. It changes the profile subtly. Cardamom is floral. Allspice is warm. Experiment with small amounts. You can always add more, but you can’t take it out.
- Gluten-Free Option: Use a 1:1 gluten-free flour blend. It works surprisingly well. Just make sure it contains xanthan gum. If it doesn’t, add 1/2 tsp. The texture will be slightly denser, but still delicious.
- Vegan Version: Use flax eggs (1 tbsp ground flax + 3 tbsp water) instead of the egg. Use maple syrup instead of sugar. Use coconut oil instead of vegetable oil. It holds together well. Don’t doubt it. It works.
I once made this with butterscotch chips. It was weird. But good. Weirdly good. Don’t be afraid to experiment. Baking is fun. It’s allowed to be playful. Just remember the base ratios. They’re the anchor.
Serving & Storage Suggestions
How you serve it matters. How you store it matters too. Let’s talk about both.
Serving: Slice it thick. About 1/2 inch. Thick slices feel substantial. Serve it warm with a pat of butter. The butter melts into the crumb. It’s decadent. Pair it with a hot cup of coffee or tea. Chai tea is a perfect match. The spices echo each other. It’s a cozy combo. You can also serve it for breakfast with cream cheese. It’s sweet enough to be dessert, but savory enough to be breakfast.
Storage: This bread stays moist for days. Store it in an airtight container at room temperature for up to 3 days. If your kitchen is hot, put it in the fridge. It will last up to a week. The cold will dry it out slightly, so let it come to room temp before eating. You can also freeze it. Wrap it tightly in plastic wrap, then in foil. It lasts up to 3 months. Thaw it overnight in the fridge. It tastes almost as good as fresh.
Flavors develop over time. The spices meld. The bread gets softer. Day two is often better than day one. It’s a phenomenon. Let it rest. Let it mature. It’s worth the wait.
Nutritional Information & Benefits
Let’s talk about what’s in it. This isn’t a health food. It’s a treat. But it’s a decent treat.
Each slice (1/12 of the loaf) contains approximately 220 calories. It has 8g of fat, 35g of carbohydrates, and 3g of protein. The pumpkin adds vitamin A and fiber. It’s not a superfood, but it’s better than a cookie. The chocolate adds antioxidants. The spices aid digestion. It’s a balanced indulgence.
If you’re watching sugar, reduce the sugar to 3/4 cup. It will still be sweet enough. The pumpkin and chocolate provide enough sweetness. You don’t need to overload it. Listen to your body. Adjust as needed. This recipe is flexible. It’s not rigid. It’s yours.
I make this for my family because it’s comforting. It’s not about macros. It’s about moments. It’s about sitting on the couch, eating a slice, and feeling good. That’s the nutrition that matters. The emotional kind.
Conclusion
This Moist One-Bowl Chocolate Chip Pumpkin Bread is more than just a recipe. It’s a tradition. It’s a memory. It’s a way to bring warmth into your kitchen. It’s easy. It’s forgiving. And it tastes amazing. I hope you make it. I hope you share it. I hope you find your own memories in it.
Try it your way. Add nuts. Skip chips. Change spices. Make it yours. That’s the beauty of baking. It’s personal. It’s intimate. And it’s shared. When you bring this bread to a table, you’re bringing love. You’re bringing care. You’re bringing a piece of yourself. That’s worth more than any ingredient list.
Please, try it. Let me know how it turns out. Did you add nuts? Did you use white chocolate? Did it burn? (It probably didn’t.) Share your stories. Share your photos. I love hearing from you. Baking is better together. It’s a community. It’s a conversation. And I’m glad you’re part of it.
So, preheat your oven. Grab a bowl. Mix it up. And let the smell fill your home. You’ll be glad you did. It’s simple. It’s sweet. And it’s perfect.
Frequently Asked Questions
Can I use fresh pumpkin instead of canned?
Yes, but you need to roast and puree it yourself. Canned pumpkin is cooked and strained, so it’s thick. Fresh pumpkin has more water. If you use fresh, roast it first, then mash it. You may need to drain it in a cheesecloth to remove excess moisture. Otherwise, the bread will be too wet.
Why is my pumpkin bread dense?
Overmixing is the most common cause. When you mix too much, you develop gluten, which makes bread tough. Also, check your baking soda. If it’s old, it won’t rise properly. Make sure you’re using fresh leavening agents. And don’t skip the resting time. Let the batter sit for 5 minutes before baking. It helps the flour hydrate.
Can I freeze this bread?
Absolutely. Wrap it tightly in plastic wrap, then in foil. It will last up to 3 months. Thaw it overnight in the fridge. You can also warm individual slices in the microwave for 20 seconds. It tastes fresh. It’s a great way to have pumpkin bread all winter.
Can I make mini loaves?
Yes. Use mini loaf pans. They’re cute and perfect for gifts. Bake time will be shorter. Check at 30 minutes. Use a toothpick to test. They’re done when the toothpick comes out clean. They’re great for portion control too.
What if I don’t have nutmeg?
You can skip it. The bread will still be good. But nutmeg adds warmth. If you have allspice or cloves, you can use a pinch of those instead. They’re similar. Just use less. Spices are potent. A little goes a long way. Don’t overdo it.
Pin This Recipe!
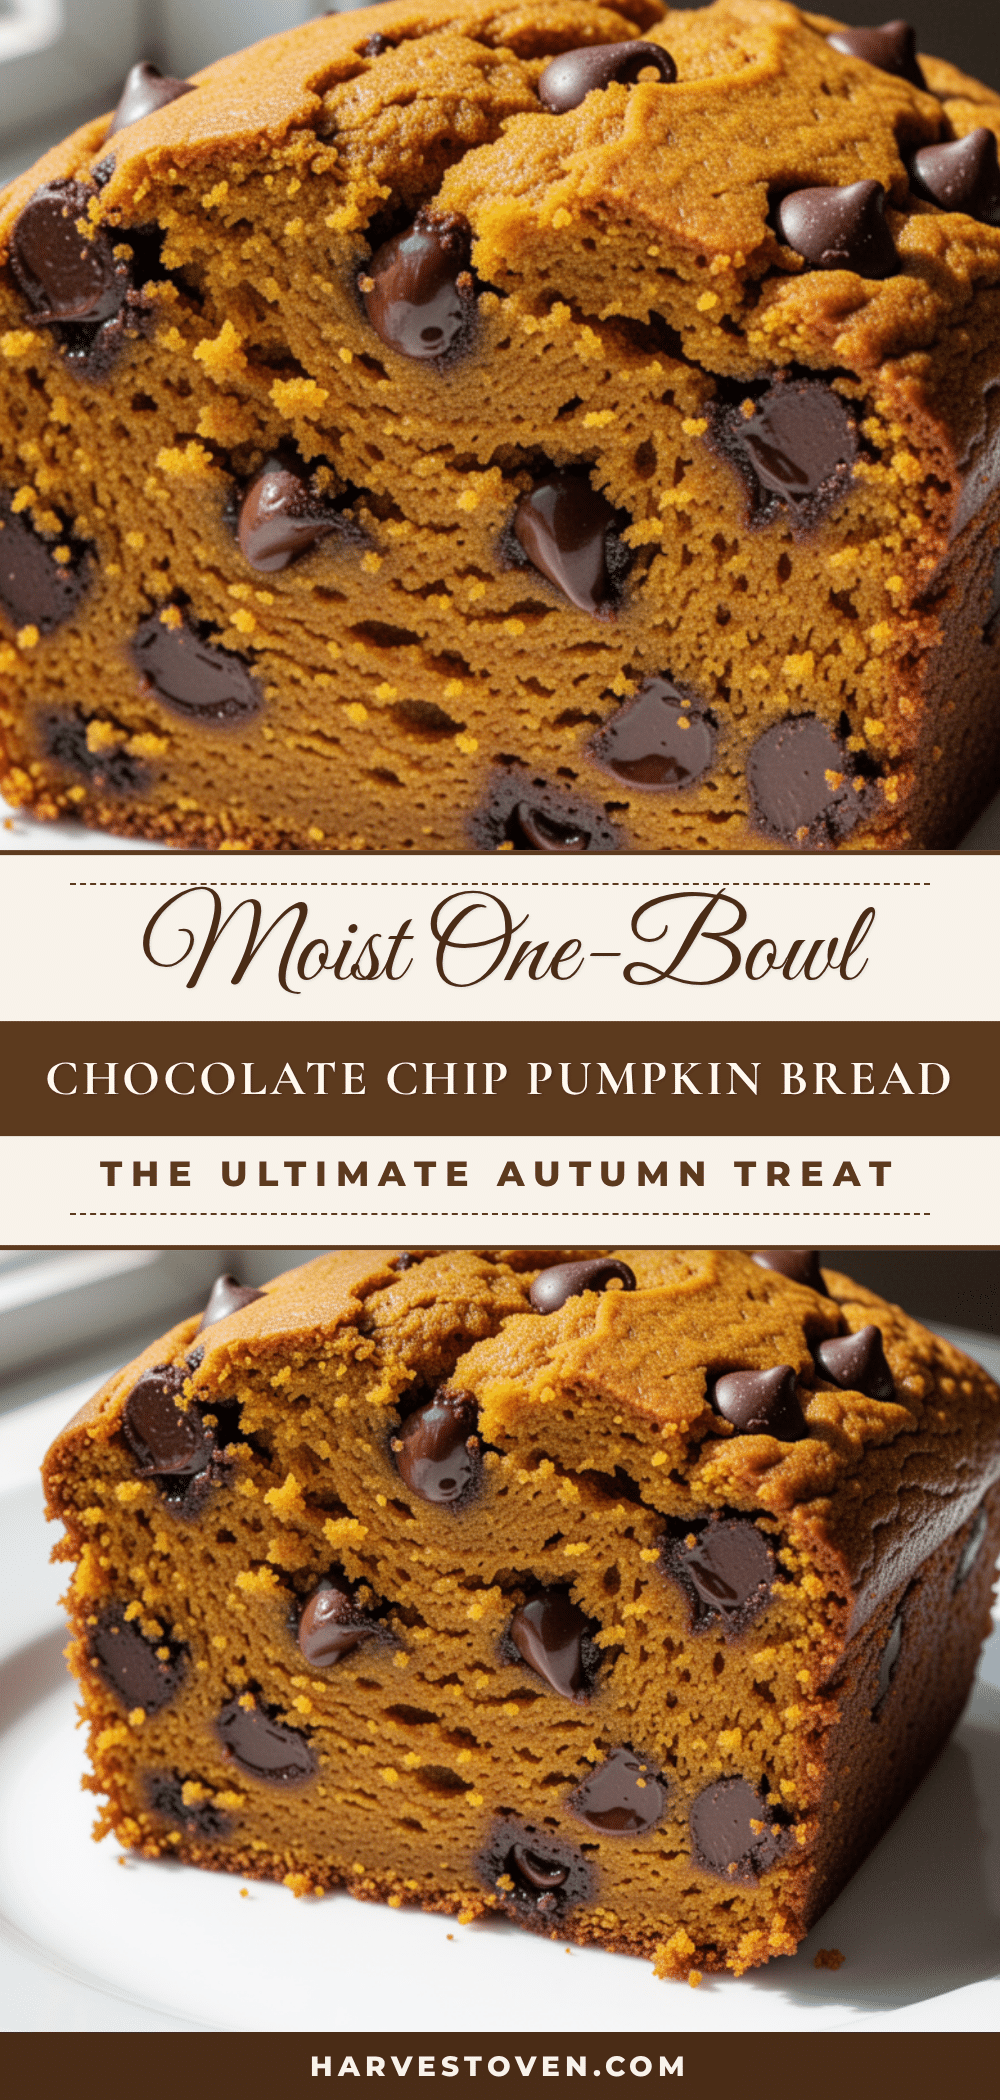
Moist One-Bowl Chocolate Chip Pumpkin Bread
A simple, one-bowl pumpkin bread recipe that is moist, tender, and packed with warm spices and chocolate chips. Perfect for fall baking and requires no mixer.
- Prep Time: 15 minutes
- Cook Time: 55-65 minutes
- Total Time: 1 hour 10 minutes
- Yield: 12 servings 1x
- Category: Dessert
- Cuisine: American
Ingredients
- 1 cup all-purpose flour
- 1 tsp baking soda
- 1 tsp baking powder
- 1 tsp cinnamon
- 1/2 tsp nutmeg
- 1/2 tsp ginger
- 1/4 tsp salt
- 1 cup canned pumpkin puree
- 1 cup granulated sugar
- 1/2 cup vegetable oil
- 1 large egg
- 1 tsp vanilla extract
- 1 cup semi-sweet chocolate chips
Instructions
- Preheat oven to 350°F (175°C).
- Grease a 9×5 inch loaf pan and line with parchment paper.
- In a large bowl, whisk together flour, baking soda, baking powder, cinnamon, nutmeg, ginger, and salt.
- Add pumpkin puree, sugar, oil, egg, and vanilla extract to the dry ingredients.
- Mix gently until just combined; do not overmix.
- Fold in chocolate chips, reserving a small handful for the top.
- Pour batter into the prepared pan, smooth the top, and sprinkle reserved chips on top.
- Bake for 55-65 minutes, or until a toothpick inserted in the center comes out with moist crumbs.
- Cool in the pan for 10 minutes, then transfer to a wire rack to cool completely before slicing.
Notes
Ensure you use canned pumpkin puree, not pumpkin pie filling. Do not overmix the batter to avoid a tough texture. Let the bread cool completely before slicing to prevent it from being gummy. For a gluten-free version, use a 1:1 gluten-free flour blend. For a vegan version, substitute the egg with a flax egg, sugar with maple syrup, and oil with coconut oil.
Nutrition
- Serving Size: 1 slice (1/12 of the
- Calories: 220
- Sugar: 22
- Sodium: 250
- Fat: 8
- Saturated Fat: 3
- Carbohydrates: 35
- Fiber: 2
- Protein: 3
Keywords: pumpkin bread, chocolate chip, one bowl, fall recipe, easy baking, moist bread, gluten-free option, vegan option