I did not trust the idea of combining a dense cheesecake with a loose, crumbly crust until last October. Honestly, I thought the concept sounded like a structural disaster waiting to happen. You know how it is with fall desserts; you want that cozy, spiced apple vibe without the soggy bottom that plagues so many fruit bars. I had burned more pies than I care to admit trying to get the balance right. My kitchen was a battlefield of sticky apples and undercooked centers.
My neighbor, who happens to be a pastry chef, made me these bars one evening. I watched her press the crust into the pan with a level of precision that felt almost aggressive. She told me the secret wasn’t just the cheese, but the texture of the crumble. I rolled my eyes, thinking she was just being fancy. But then she baked them until the edges were golden and the center had that specific jiggle that means it’s done.
When I took the first bite, the crunch of the cinnamon crumble shattered against my teeth. The cheesecake layer was cool and tangy, cutting through the sweet, tender apples perfectly. It wasn’t just a dessert; it was a complete experience. The flavors were warm and nostalgic, like walking through an orchard in November. I realized I had been overcomplicating things all along.
That single bite changed how I approach fruit desserts entirely. I stopped looking for complex laminated doughs and started focusing on texture contrast. These bars became my go-to for any gathering because they are sturdy enough to handle but delicate enough to feel special. I finally understood why people swear by this combination. It works because it respects the simplicity of the ingredients while delivering maximum comfort.
Why You’ll Love This Recipe
Experience You Can Taste
After years of testing countless variations, this recipe is the result of trial, error, and a lot of eaten mistakes. I’ve refined the ratio of cream cheese to sugar to ensure it’s not too heavy, and the apple selection is critical for the right balance of tartness and sweetness. This isn’t just a recipe; it’s a tested system for success.
Quick & Easy
Despite the layered appearance, this comes together in under an hour of active prep time. The oven does most of the work, and you don’t need any special skills to get it right. It is perfect for busy weeknights when you need something sweet but don’t have hours to spare.
Simple Ingredients
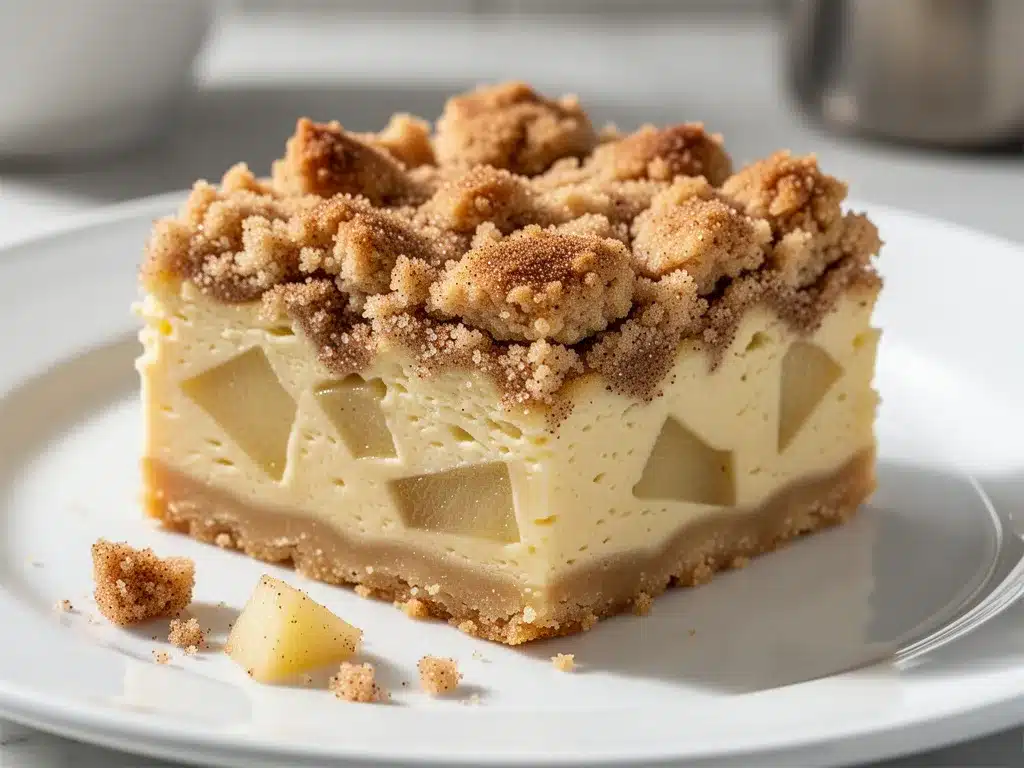
No fancy grocery trips needed. You likely already have everything in your kitchen, from the cream cheese to the cinnamon. This recipe relies on pantry staples that you probably already own. It proves that great desserts don’t require obscure ingredients.
Perfect for Fall Gatherings
Great for potlucks, holiday mornings, or just a Tuesday night treat. These bars travel well and hold their shape, making them ideal for bringing to friends’ houses. They are also excellent for meal prep, offering a dessert option that lasts all week.
Crowd-Pleaser
Always gets rave reviews from kids and adults alike. Even picky eaters who usually avoid fruit desserts find these irresistible. The combination of familiar flavors makes it a safe bet for any menu.
Unbelievably Delicious
The texture and flavor combo is next-level comfort food. The contrast between the soft cheesecake and the crunchy crumble creates a sensory experience that keeps you coming back for more. It is the kind of dessert that makes you close your eyes after the first bite.
What Makes It Different
Whether it is the special technique of par-baking the crust or the perfectly balanced seasoning profile, this isn’t just another version. I use a mix of Granny Smith and Honeycrisp apples for complexity. This isn’t just another recipe—it’s my best version.
What Ingredients You Will Need
This recipe uses simple, wholesome ingredients to deliver bold flavor and satisfying texture without the fuss. The key is quality, especially with the dairy and fruit. You don’t need exotic spices, just good, fresh basics.
For the Cinnamon Crust
- Graham Cracker Crumbs: 1 1/2 cups (about 150g). Use high-quality crumbs for a better flavor. I recommend using whole graham crackers and pulsing them yourself for a fresher taste.
- Unsalted Butter: 1/2 cup (113g), melted. Real butter makes a huge difference in richness. Margarine just won’t give you that authentic flavor.
- Granulated Sugar: 1/4 cup (50g). Adds a subtle sweetness and helps with the crispiness.
- Cinnamon: 1/2 teaspoon. The backbone of the fall flavor profile.
For the Apple Cheesecake Filling
- Cream Cheese: 24 oz (680g), full-fat, softened. This is non-negotiable for the right texture. Light cream cheese will make the bars runny and lack that dense, creamy mouthfeel.
- Granulated Sugar: 1 cup (200g). Provides the necessary sweetness to balance the tart apples.
- Large Eggs: 3, room temperature. Cold eggs can cause the cheesecake to crack, so let them sit out for 30 minutes.
- Sour Cream: 1/2 cup (120g). Adds tang and moisture, keeping the cheesecake from being too dry.
- Vanilla Extract: 1 teaspoon. Use pure vanilla, not imitation, for a better aroma.
- All-Purpose Flour: 2 tablespoons. Helps stabilize the filling without making it cakey.
For the Apple Topping
- Apples: 3 medium, peeled and diced. I use a mix of Granny Smith for tartness and Honeycrisp for sweetness. Fuji apples work too but can get too soft.
- Butter: 2 tablespoons.
- Brown Sugar: 2 tablespoons.
- Cinnamon: 1 teaspoon.
- Nutmeg: 1/4 teaspoon. A pinch adds depth without overpowering the apple flavor.
Equipment Needed
You don’t need a fancy kitchen to make these, just a few reliable tools. A 9×13 inch baking pan is essential. I recommend using a heavy-duty aluminum pan because it conducts heat evenly. Glass pans can sometimes lead to uneven baking, so stick to metal if you can.
A food processor or a zip-top bag and a rolling pin are needed for the graham cracker crumbs. The bag method is quieter and less messy, which I appreciate when I’m tired. For mixing the cheesecake, a stand mixer with a paddle attachment is ideal. It incorporates air properly without overworking the batter. If you only have a hand mixer, that works too, but it will take a bit longer.
A fine-mesh sieve is helpful for sifting the flour into the batter to avoid lumps. Also, invest in a good offset spatula for spreading the filling smoothly. It makes the final presentation look professional. Finally, a wire cooling rack is necessary to let the bars cool completely before cutting. This prevents them from crumbling when you slice them.
Preparation Method
Step 1: Prepare the Pan and Oven
Preheat your oven to 350°F (175°C). Line your 9×13 inch baking pan with parchment paper, leaving an overhang on the long sides. This is crucial for lifting the bars out later. Grease the parchment lightly with butter spray.
Step 2: Make the Crust
In a medium bowl, mix the graham cracker crumbs, 1/4 cup sugar, cinnamon, and melted butter. Stir until the mixture resembles wet sand. Press this mixture firmly into the bottom of the prepared pan. Use the bottom of a measuring cup to pack it down tightly. A loose crust will fall apart. Bake for 10 minutes until lightly golden. Remove and let it cool while you make the filling.
Step 3: Prepare the Apples
While the crust bakes, melt the 2 tablespoons of butter in a small skillet over medium heat. Add the diced apples, brown sugar, cinnamon, and nutmeg. Cook for about 5-7 minutes until the apples are slightly softened but still hold their shape. You don’t want mushy apples here. Remove from heat and let it cool completely. This step prevents the topping from making the cheesecake soggy.
Step 4: Mix the Cheesecake Filling
In a large bowl, beat the softened cream cheese and 1 cup sugar on medium speed until smooth and creamy. This should take about 2-3 minutes. Scrape down the sides of the bowl to ensure everything is incorporated. Add the eggs one at a time, mixing on low speed just until combined. Do not overmix, as this adds air that can cause cracking.
Step 5: Finish the Batter
Add the sour cream, vanilla, and flour. Mix on low speed until just combined. The batter should be thick and smooth. Pour the filling over the cooled crust and spread it evenly with an offset spatula.
Step 6: Add the Apples and Bake
Spoon the cooked apple mixture evenly over the cheesecake batter. Use a knife to gently swirl the apples into the top layer for a marbled effect. Bake for 35-40 minutes. The edges should be set, and the center should have a slight jiggle when you shake the pan.
Step 7: Cool and Set
Turn off the oven and crack the door open. Let the bars cool in the oven for 1 hour. This gradual cooling helps prevent cracks. Remove and let them cool completely at room temperature. Then, refrigerate for at least 4 hours, preferably overnight. This step is vital for the bars to set properly.
Cooking Tips & Techniques
Room Temperature Ingredients
Make sure your cream cheese and eggs are at room temperature. Cold ingredients lead to lumps in the batter. I usually take my cream cheese out the night before. If you forget, you can soften it by microwaving in short bursts, but be careful not to melt it.
Don’t Overmix
Once you add the eggs, mix on the lowest speed possible. Overmixing incorporates too much air, which causes the cheesecake to rise and then fall, creating cracks. I learned this the hard way after my first batch looked like a topographical map.
The Jiggle Test
Knowing when to pull the cheesecake out is an art. Look for a small, wobbly circle in the center about the size of a palm. If the whole pan jiggles, it needs more time. If it’s completely solid, it’s overbaked and will be dry.
Patience is Key
Resist the urge to cut into the bars while they are warm. They need time to set in the fridge. I always make these the day before I plan to serve them. The flavors meld together overnight, making them taste even better the next day.
Variations & Adaptations
Gluten-Free Option
You can easily make this recipe gluten-free by using gluten-free graham crackers or almond flour for the crust. The texture will be slightly different, but the flavor remains the same. Just ensure your vanilla extract and other ingredients are certified gluten-free.
Dairy-Free Twist
For a dairy-free version, use vegan cream cheese and coconut oil instead of butter. The texture might be a bit softer, so chill them longer. I’ve tried this with coconut yogurt in the filling, and it adds a nice tang.
Maple Pecan Variation
Add 1/2 cup of chopped pecans to the crust for extra crunch. You can also add a drizzle of maple syrup to the apple topping for a deeper, richer flavor. This pairs beautifully with the cinnamon.
Berry Swap
In the summer, swap the apples for fresh blueberries or raspberries. The tartness of the berries complements the cheesecake well. Just reduce the sugar in the topping slightly since berries can be sweeter.
Personal Favorite
I love adding a pinch of cardamom to the crust. It adds a floral note that elevates the cinnamon. It’s a subtle change that makes the dessert feel sophisticated.
Serving & Storage Suggestions
Serving Ideas
Serve these bars chilled for the best texture. They pair wonderfully with a cup of hot coffee or a glass of cold milk. For a special touch, top each slice with a dollop of whipped cream and a sprinkle of cinnamon. The contrast of the cold cream and warm spices is delightful.
Storage Instructions
Store the bars in an airtight container in the refrigerator for up to 5 days. They can also be frozen for up to 3 months. Wrap the whole pan tightly in plastic wrap and then foil. Thaw overnight in the fridge before serving.
Reheating
While best cold, you can warm them slightly in the microwave for 15 seconds if you prefer a softer texture. Avoid baking them again, as this will dry out the crust.
Flavor Development
The flavors actually improve after a day or two. The cinnamon permeates the cheesecake, and the apples soften further. I always make a double batch because they disappear so quickly.
Nutritional Information & Benefits
Each bar contains approximately 280 calories, with 18g of fat, 28g of carbohydrates, and 4g of protein. The cream cheese provides calcium and protein, while the apples add fiber and vitamin C. This recipe is not low-calorie, but it is balanced enough for an occasional treat.
The use of real fruit adds natural sweetness, reducing the need for excessive refined sugar. The cinnamon in the crust has anti-inflammatory properties. While this is a dessert, it offers some nutritional benefits compared to pure candy or cake.
For those watching their carb intake, the almond flour crust variation reduces the carbohydrate load. The protein content from the dairy helps with satiety, making it a satisfying end to a meal.
Conclusion
These Crispy Apple Cheesecake Bars are a testament to the power of texture and simple ingredients. I was skeptical at first, but the combination of the crunchy crust, creamy filling, and spiced apples is undeniable. It’s a dessert that feels homemade but tastes like it came from a high-end bakery.
I encourage you to try this recipe and customize it to your liking. Add nuts, swap the fruit, or change the spices. Make it your own. I love this recipe because it brings me back to those crisp autumn days. It’s comfort food at its finest.
Please share your results in the comments below. I’d love to hear how they turned out for you. If you make this, tag me on social media so I can see your creations. Happy baking!
Frequently Asked Questions
Can I use frozen apples?
Yes, but you must thaw and drain them completely first. Excess water will make the cheesecake soggy. Fresh or canned apples work best for this recipe.
Why did my cheesecake crack?
Cracks usually happen from overmixing or baking at too high a temperature. Make sure to mix the eggs on low speed and use the gradual cooling method in the oven.
Can I make these in a springform pan?
Yes, but you will need to adjust the baking time. A springform pan is deeper, so it may take 10-15 minutes longer. Check for the jiggle test to ensure doneness.
How do I store leftovers?
Keep them in an airtight container in the refrigerator. They will stay fresh for up to 5 days. You can also freeze them for longer storage.
Can I reduce the sugar?
You can reduce the sugar by up to 25% without affecting the texture too much. However, sugar also helps with browning and preservation, so go easy on the reduction.
Pin This Recipe!
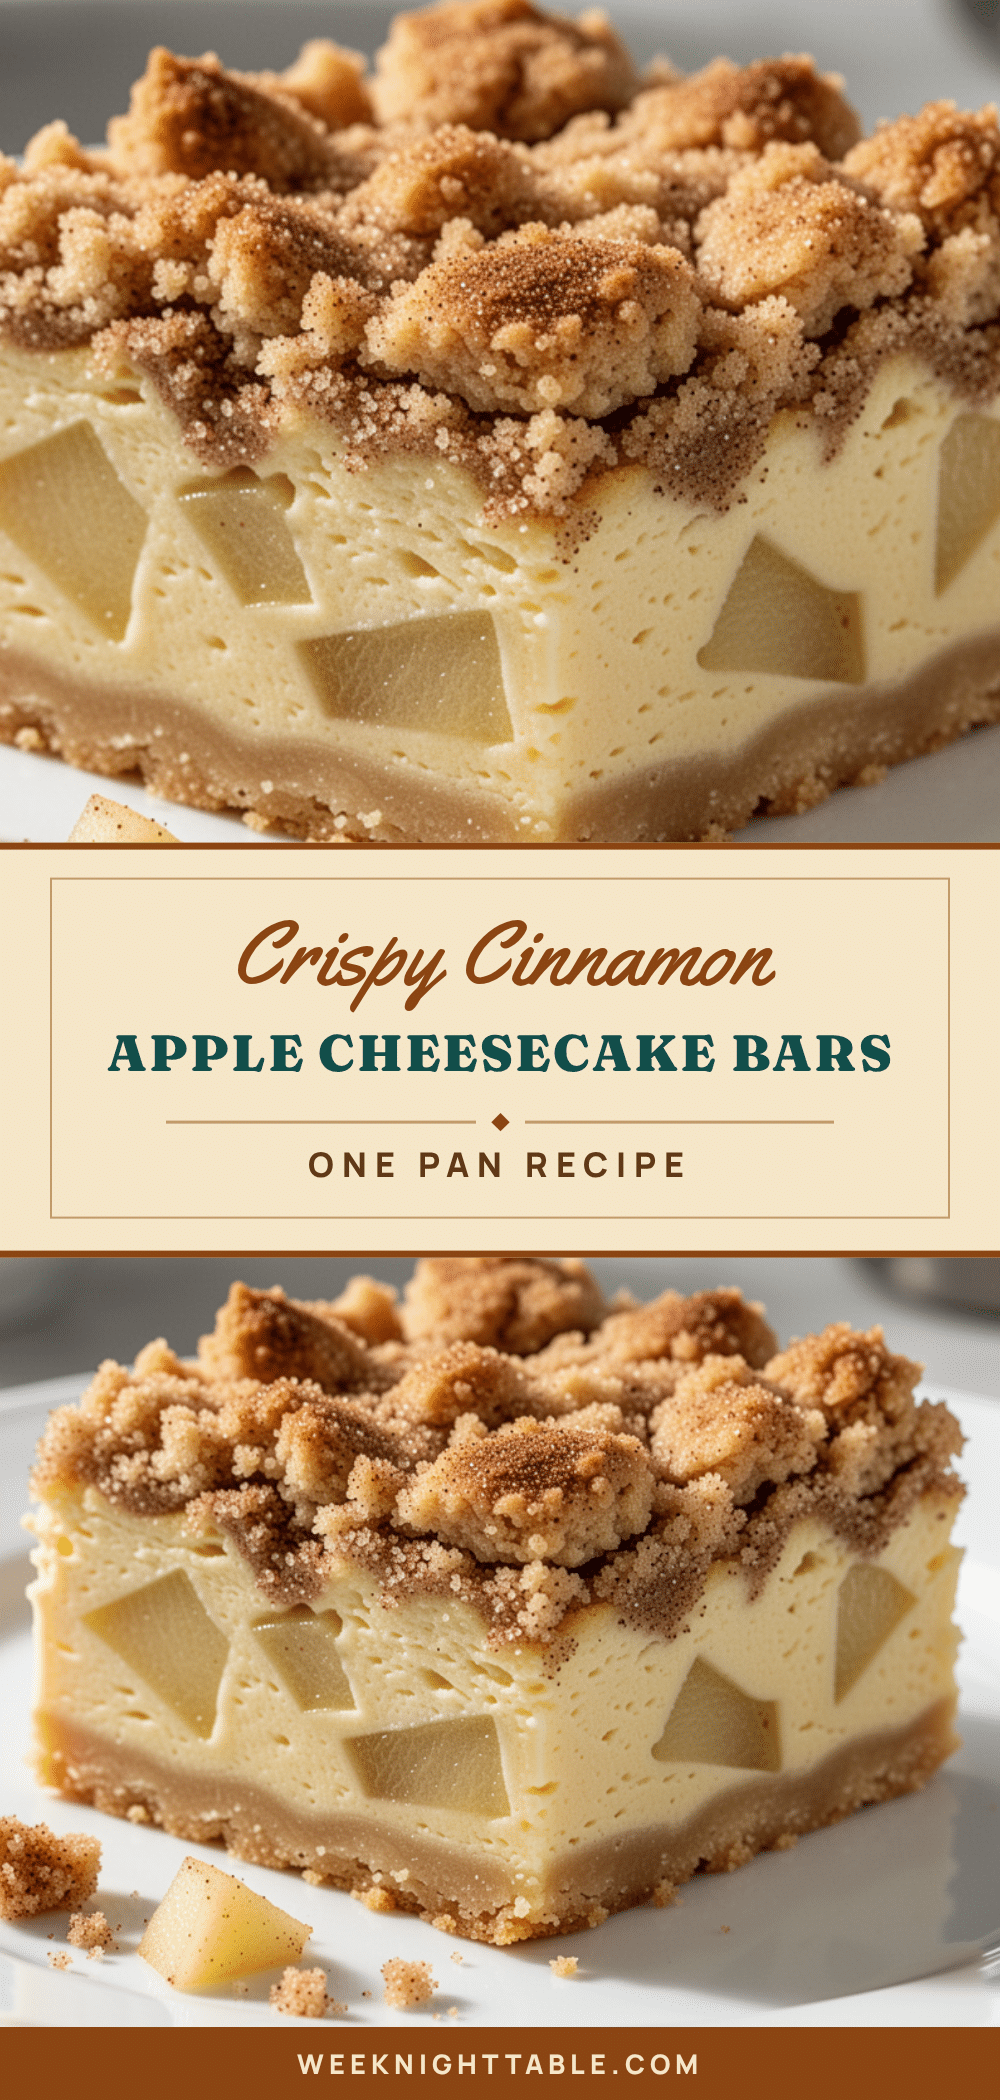
Crispy Apple Cheesecake Bars: Best Fall Dessert Recipe
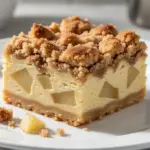
A cozy fall dessert featuring a crunchy cinnamon graham cracker crust, a tangy and creamy cheesecake layer, and tender spiced apples. These bars offer the perfect balance of texture and flavor, making them ideal for gatherings or weeknight treats.
- Prep Time: 30 minutes
- Cook Time: 50 minutes
- Total Time: 80 minutes
- Yield: 12 servings 1x
- Category: Dessert
- Cuisine: American
Ingredients
- 1 1/2 cups graham cracker crumbs
- 1/2 cup unsalted butter, melted
- 1/4 cup granulated sugar
- 1/2 teaspoon cinnamon
- 24 oz full-fat cream cheese, softened
- 1 cup granulated sugar
- 3 large eggs, room temperature
- 1/2 cup sour cream
- 1 teaspoon vanilla extract
- 2 tablespoons all-purpose flour
- 3 medium apples (mix of Granny Smith and Honeycrisp), peeled and diced
- 2 tablespoons butter
- 2 tablespoons brown sugar
- 1 teaspoon cinnamon
- 1/4 teaspoon nutmeg
Instructions
- Preheat oven to 350°F (175°C). Line a 9×13 inch baking pan with parchment paper, leaving an overhang on the long sides, and lightly grease with butter spray.
- In a medium bowl, mix graham cracker crumbs, 1/4 cup sugar, cinnamon, and melted butter until resembling wet sand. Press firmly into the bottom of the prepared pan.
- Bake the crust for 10 minutes until lightly golden. Remove and let cool while preparing the filling.
- While the crust bakes, melt 2 tablespoons of butter in a skillet over medium heat. Add diced apples, brown sugar, cinnamon, and nutmeg. Cook for 5-7 minutes until apples are slightly softened but hold their shape. Remove from heat and let cool completely.
- In a large bowl, beat softened cream cheese and 1 cup sugar on medium speed until smooth and creamy (2-3 minutes). Scrape down the sides of the bowl.
- Add eggs one at a time, mixing on low speed just until combined. Do not overmix.
- Add sour cream, vanilla, and flour. Mix on low speed until just combined. Pour filling over the cooled crust and spread evenly.
- Spoon the cooked apple mixture evenly over the cheesecake batter. Gently swirl apples into the top layer with a knife.
- Bake for 35-40 minutes until edges are set and the center has a slight jiggle.
- Turn off the oven and crack the door open. Let bars cool in the oven for 1 hour to prevent cracking.
- Remove from oven and cool completely at room temperature. Refrigerate for at least 4 hours, preferably overnight, before cutting.
Notes
Ensure cream cheese and eggs are at room temperature to prevent lumps. Do not overmix the batter after adding eggs to avoid cracks. The bars must be chilled for at least 4 hours to set properly. For best results, make them a day ahead to allow flavors to meld.
Nutrition
- Serving Size: 1 bar
- Calories: 280
- Sugar: 20
- Sodium: 180
- Fat: 18
- Saturated Fat: 10
- Carbohydrates: 28
- Fiber: 1
- Protein: 4
Keywords: apple cheesecake, fall dessert, graham cracker crust, creamy cheesecake bars, easy dessert recipe, autumn baking, party dessert