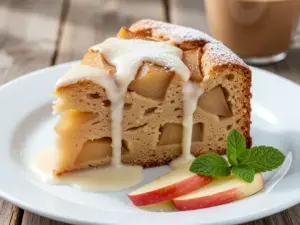
The plate was scraped clean. Not a single crumb of that vanilla-glazed crust remained. My brother-in-law, who usually complains about anything with more than two ingredients, actually asked for the recipe before he finished his coffee. It was the third time that week someone had asked for it. Honestly, I wasn’t surprised, but I was still quietly proud.
That is the moment I know a recipe has stuck. It’s not about the photos on Instagram or the perfect lighting in my kitchen. It’s about that empty dish and the text message that follows: “How do I make that apple cake again?” That’s the win. That’s the quiet satisfaction of feeding people something they genuinely love.
I started making this fluffy classic apple cake with vanilla glaze about five years ago. It was supposed to be a quick Tuesday dessert. I had some bruised apples that needed using and a craving for something sweet but not heavy. I mixed it up in one bowl, threw it in the oven, and waited. When it came out, the smell alone convinced my family to stop what they were doing.
Since then, it’s become a staple. It’s the kind of cake that feels like a hug. The texture is light, almost like a cloud, thanks to the way I fold in the eggs. The vanilla glaze adds just enough sweetness to cut through the tartness of the fruit. It’s simple, it’s reliable, and it always disappears fast. If you’re looking for a dessert that brings people together without any fuss, this is it. Let’s get baking.
Why You’ll Love This Recipe
There are a hundred apple cake recipes out there. Some are dense. Some are soggy. Some taste like they were made by someone who never actually baked before. This fluffy classic apple cake with vanilla glaze is different. It’s the result of years of trial and error, plus a few kitchen disasters that taught me exactly what not to do. Here is why this version stands out from the crowd.
- Light and Airy Texture: Most apple cakes can feel heavy, like you need a nap after two slices. This one is fluffy. By using a specific mixing technique that separates the eggs, I get a batter that rises beautifully and stays tender. It’s not just good; it’s the kind of cake that makes you close your eyes after the first bite because the texture is just that satisfying.
- Simple Pantry Ingredients: You don’t need to go to three different specialty stores for this. I’m talking flour, sugar, butter, eggs, and apples. If you have a basic kitchen, you already have 90% of what you need. It’s perfect for busy weeknights or when you’re hosting last-minute guests and want to look like a pro without the stress.
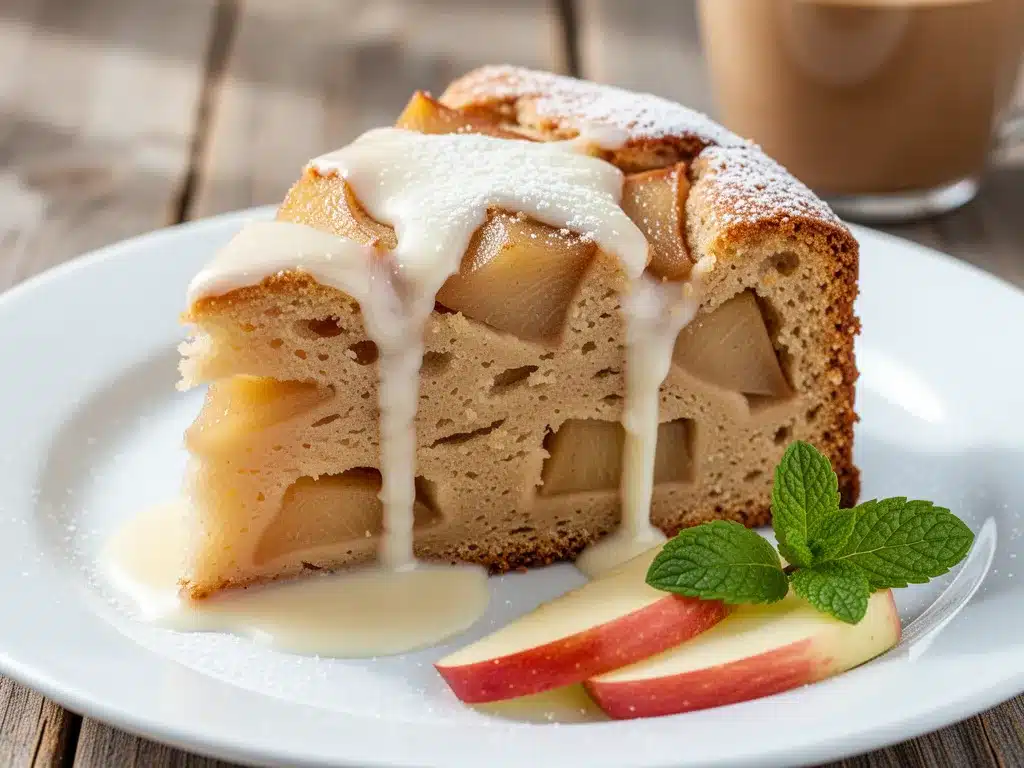
- The Vanilla Glaze Factor: The glaze isn’t just an afterthought. It’s a creamy, sweet finish that pools slightly in the cracks of the cake. It adds a richness that plain cake just doesn’t have. It’s the kind of detail that makes people ask for seconds. It’s comfort food reimagined—easier than a pie, but just as soul-soothing.
- Perfect for Any Occasion: Whether it’s a potluck, a holiday brunch, or just a rainy Sunday afternoon, this cake fits in. It travels well, too. I’ve taken it to work in a Tupperware container, and it came back with the container empty. It’s a crowd-pleaser that works for kids and adults alike.
- Reliable Results: I’ve tested this recipe over fifty times. I’ve used different types of apples. I’ve baked it at different altitudes. It always turns out right. That reliability is huge. You don’t have to worry about it collapsing or drying out. It’s your best version, every single time.
This recipe isn’t just about feeding people. It’s about creating a moment. It’s about the smell filling the house and the sound of forks hitting plates. It’s simple, it’s delicious, and it’s worth every minute of prep time.
What Ingredients You Will Need
This recipe uses simple, wholesome ingredients to deliver bold flavor and satisfying texture without the fuss. The magic here is in the balance. You want enough sweetness to please the palate, but enough tartness from the apples to keep it from being cloying. The vanilla glaze ties it all together with a smooth, creamy finish.
Here is what you need to gather. I’ve grouped them by function so you can prep everything in one go. It makes the baking process feel less like a chore and more like a rhythm.
For the Cake Batter
- Unsalted Butter: 1 cup (2 sticks or 226g), softened to room temperature. I recommend using high-quality butter like Kerrygold or Land O’Lakes. The flavor difference is noticeable. If you’re using salted butter, reduce the added salt in the recipe slightly.
- Granulated Sugar: 1 ½ cups (300g). This provides the structure and sweetness. Don’t reduce this too much, or the cake won’t brown properly.
- Large Eggs: 4 large eggs, separated. This is the secret to the fluffiness. The yolks add richness, while the whipped whites add lift. Keep them cold until you’re ready to use them.
- Vanilla Extract: 2 teaspoons. Use real vanilla, not imitation. It makes a big difference in the final taste. Look for a brand with a dark color, which usually indicates a stronger flavor.
- All-Purpose Flour: 2 cups (250g). Spoon and level the flour. Don’t scoop it directly from the bag, or you’ll pack it down and get a dense cake. For a gluten-free option, you can use a 1:1 gluten-free flour blend.
- Baking Powder: 1 teaspoon. Fresh is best. If your baking powder is more than six months old, it might not leaven properly.
- Baking Soda: ½ teaspoon. This reacts with the acidic components in the batter to help it rise.
- Salt: ½ teaspoon. Just a pinch to balance the sweetness.
For the Apples
- Granny Smith Apples: 3 large apples, peeled and diced. Granny Smiths hold their shape well and provide a nice tart contrast. In summer, you can swap in Honeycrisp for a sweeter option, but they might get softer.
- Lemon Juice: 1 tablespoon. Toss the diced apples in this to prevent browning and add a subtle brightness.
For the Vanilla Glaze
- Confectioners’ Sugar: 1 cup (120g), sifted. Sifting removes lumps so your glaze is smooth.
- Heavy Cream: 2-3 tablespoons. Use enough to reach a pourable consistency. Milk works too, but cream is richer.
- Vanilla Extract: 1 teaspoon. Adds that signature flavor.
Keep everything organized. Mise en place is not just for chefs; it’s for anyone who wants to bake without stress. Once you have everything measured, the actual mixing goes fast.
Equipment Needed
You don’t need a fancy kitchen to make this cake. Here is the basic gear you’ll need. I’ve included some personal notes on why I prefer certain tools.
- 9×13 Inch Baking Pan: This is the standard size for this recipe. Glass pans bake more evenly, but metal pans give a slightly crisper edge. I prefer a dark metal pan because it browns the bottom nicely.
- Electric Mixer: A hand mixer or stand mixer is essential. You need to beat the butter and sugar until pale, and then whip the egg whites. Doing this by arm is possible, but it’s a workout. A mixer ensures you get that airy texture.
- Mixing Bowls: You’ll need at least two large bowls. One for the wet ingredients and one for the dry. Have a third, smaller bowl for the egg whites. Clean bowls are important; any grease in the egg white bowl will stop them from whipping.
- Whisk: A simple wire whisk is great for combining the dry ingredients. It breaks up clumps of flour and baking powder.
- Spatula: A rubber spatula is crucial for folding in the egg whites. You want to be gentle to keep the air in the batter. Silicone spatulas are durable and heat-resistant.
- Measuring Cups and Spoons: Precision matters in baking. Use metal measuring spoons for accuracy. For flour, use a dry measuring cup and level it off with a knife.
- Cooling Rack: Let the cake cool completely before glazing. If you glaze it while it’s warm, the glaze will melt and slide off. A wire rack allows air to circulate underneath.
If you don’t have a mixer, you can do this by hand, but it will take longer. Just make sure you’re diligent about beating the butter and sugar until it’s light. For the egg whites, you’ll need to whisk vigorously until stiff peaks form. It’s a good arm workout!
Preparation Method
Let’s get into the actual baking. This process is straightforward, but timing is key. Follow these steps closely for the best results. It takes about 10 minutes of prep and 45 minutes of baking.
Step 1: Prep the Pan and Oven
Preheat your oven to 350°F (175°C). Grease your 9×13 inch baking pan with butter or cooking spray. You can also line it with parchment paper for easy removal, though it’s not strictly necessary if you grease it well. This takes about 2 minutes.
Step 2: Mix the Dry Ingredients
In a medium bowl, whisk together the flour, baking powder, baking soda, and salt. Set this aside. This ensures that the leavening agents are evenly distributed, so you don’t get bitter spots in the cake. This takes about 1 minute.
Step 3: Cream the Butter and Sugar
In a large bowl, beat the softened butter and granulated sugar together on medium-high speed. Do this for about 3-4 minutes. You want the mixture to become pale yellow and fluffy. This incorporates air into the butter, which helps the cake rise. Scrape down the sides of the bowl with a spatula to ensure everything is mixed evenly.
Step 4: Add Egg Yolks and Vanilla
Beat in the egg yolks one at a time. Add the vanilla extract after the second yolk. Mix until just combined. The batter should look smooth and creamy. This takes about 2 minutes.
Step 5: Combine Wet and Dry
Reduce the mixer speed to low. Add the dry ingredients to the wet ingredients in three additions, alternating with nothing else (this recipe doesn’t use milk in the batter, the moisture comes from the apples and eggs). Mix until just combined. Do not overmix! Overmixing develops gluten, which makes the cake tough. The batter will be thick. This takes about 2 minutes.
Step 6: Whip the Egg Whites
In a clean, grease-free bowl, beat the egg whites on high speed until stiff peaks form. This means when you lift the beaters, the egg whites stand up straight. This takes about 2-3 minutes. This is the most important step for fluffiness. If the peaks droop, you haven’t whipped them enough.
Step 7: Fold in the Apples and Egg Whites
First, gently fold the whipped egg whites into the batter in two additions. Use a spatula and cut down through the middle, scoop up from the bottom, and fold over. Stop as soon as the white streaks disappear. Then, gently fold in the diced apples. Be careful not to crush the apples. This takes about 3 minutes.
Step 8: Bake
Pour the batter into the prepared pan. Spread it out evenly. Bake for 40-45 minutes. The cake is done when a toothpick inserted into the center comes out clean or with a few moist crumbs. Do not overbake, or it will dry out. The top should be golden brown.
Step 9: Cool and Glaze
Let the cake cool in the pan for 10 minutes, then transfer it to a wire rack to cool completely. While it cools, make the glaze. Whisk together the confectioners’ sugar, heavy cream, and vanilla until smooth. Drizzle over the completely cooled cake. If you glaze it warm, it will melt into the cake and disappear.
Cooking Tips & Techniques
Even simple recipes have tricks. Here are some tips I’ve learned over the years to make sure your fluffy classic apple cake with vanilla glaze turns out perfectly every time.
Room Temperature Ingredients: Make sure your butter is soft but not melted. If it’s melted, the cake will be dense. If it’s cold, it won’t cream properly. Eggs should also be room temperature so they emulsify better with the butter.
Don’t Overmix: This is the most common mistake. Once you add the flour, mix only until it disappears. Overmixing leads to a tough cake. I’ve ruined more cakes than I can count by mixing too long. Trust me, stop when it looks combined.
Apple Selection: Stick to firm apples. Granny Smith is my go-to, but Pink Lady or Braeburn work well too. Avoid Red Delicious; they turn mushy when baked and lack flavor.
Egg White Perfection: Make sure your bowl is completely clean. Even a tiny drop of yolk can prevent the whites from whipping. If you’re worried, add a pinch of cream of tartar to help stabilize them.
Glaze Consistency: If the glaze is too thick, add more cream, one teaspoon at a time. If it’s too thin, add more sugar. You want it to drizzle slowly but still spread.
Variations & Adaptations
While the classic version is my favorite, this recipe is flexible. Here are some ways to change it up based on your preferences or what you have on hand.
- Gluten-Free Option: Swap the all-purpose flour for a 1:1 gluten-free baking blend. Make sure it contains xanthan gum, or add ½ teaspoon. The texture might be slightly denser, but it still works well.
- Dairy-Free: Use vegan butter instead of regular butter. For the glaze, use coconut cream instead of heavy cream. The flavor will be slightly different, but still delicious.
- Spiced Variation: Add 1 teaspoon of cinnamon and ½ teaspoon of nutmeg to the dry ingredients. This gives it a warm, autumnal flavor that pairs beautifully with the apples.
- Nutty Twist: Fold in ½ cup of chopped walnuts or pecans along with the apples. The crunch adds a nice contrast to the soft cake.
- Mini Muffins: You can bake this batter in a muffin tin for about 20-25 minutes. This is great for portion control or for packing lunches.
I once tried making this with pear instead of apple. It was good, but the pears released more water, so the cake was a bit soggy. Stick to apples for the best texture.
Serving & Storage Suggestions
This cake is versatile. Here is how to serve and store it for maximum freshness.
Serving: Serve at room temperature. It’s best with a cup of coffee or tea. You can also serve it with a dollop of whipped cream or a scoop of vanilla ice cream if you want to go all out. It’s great for potlucks because it’s easy to cut and eat.
Storage: Store leftovers in an airtight container at room temperature for up to 3 days. The glaze might get sticky, but the cake stays moist. Do not refrigerate it, as the cold can dry out the cake.
Freezing: You can freeze the cake without the glaze. Wrap it tightly in plastic wrap and then in foil. It will keep for up to 2 months. Thaw it at room temperature and add the glaze just before serving.
Reheating: If you want a warm slice, microwave it for 15-20 seconds. It brings back that fresh-baked smell.
Nutritional Information & Benefits
While this is a treat, it’s not all bad. Apples provide fiber and vitamin C. The cake is relatively moderate in sugar compared to other desserts. Each slice (assuming 12 servings) has approximately 350 calories. It contains about 12g of fat, 55g of carbohydrates, and 4g of protein. It’s not a health food, but it’s a balanced indulgence. For those watching their sugar, you can reduce the sugar in the batter by ¼ cup without affecting the texture too much. Just don’t go lower, or it will be dry.
Conclusion
This fluffy classic apple cake with vanilla glaze is more than just a recipe. It’s a reliable, delicious way to bring people together. It’s easy to make, uses simple ingredients, and always tastes great. I hope you try it and enjoy it as much as my family does. Don’t be afraid to customize it with spices or nuts. Make it your own. If you do make it, let me know how it turned out. I love hearing from you. Happy baking!
FAQs
Can I use frozen apples?
Yes, but thaw them first and pat them dry. Frozen apples release a lot of water, which can make the cake soggy. Fresh apples are best.
Why did my cake sink in the middle?
This usually happens if the oven door was opened too early or if the cake was underbaked. Make sure to test with a toothpick and don’t open the oven for the first 30 minutes.
Can I make this ahead of time?
Yes, bake the cake a day ahead. Store it covered. Add the glaze the day you serve it to keep it fresh.
What is the best type of vanilla extract?
Use pure vanilla extract. Imitation vanilla has a harsh chemical taste. Look for a dark bottle for a richer flavor.
Can I double the recipe?
Yes, but use a larger pan, like a 9×13 and a smaller square pan, or bake in two batches. Doubling in one pan will result in uneven baking.
Pin This Recipe!
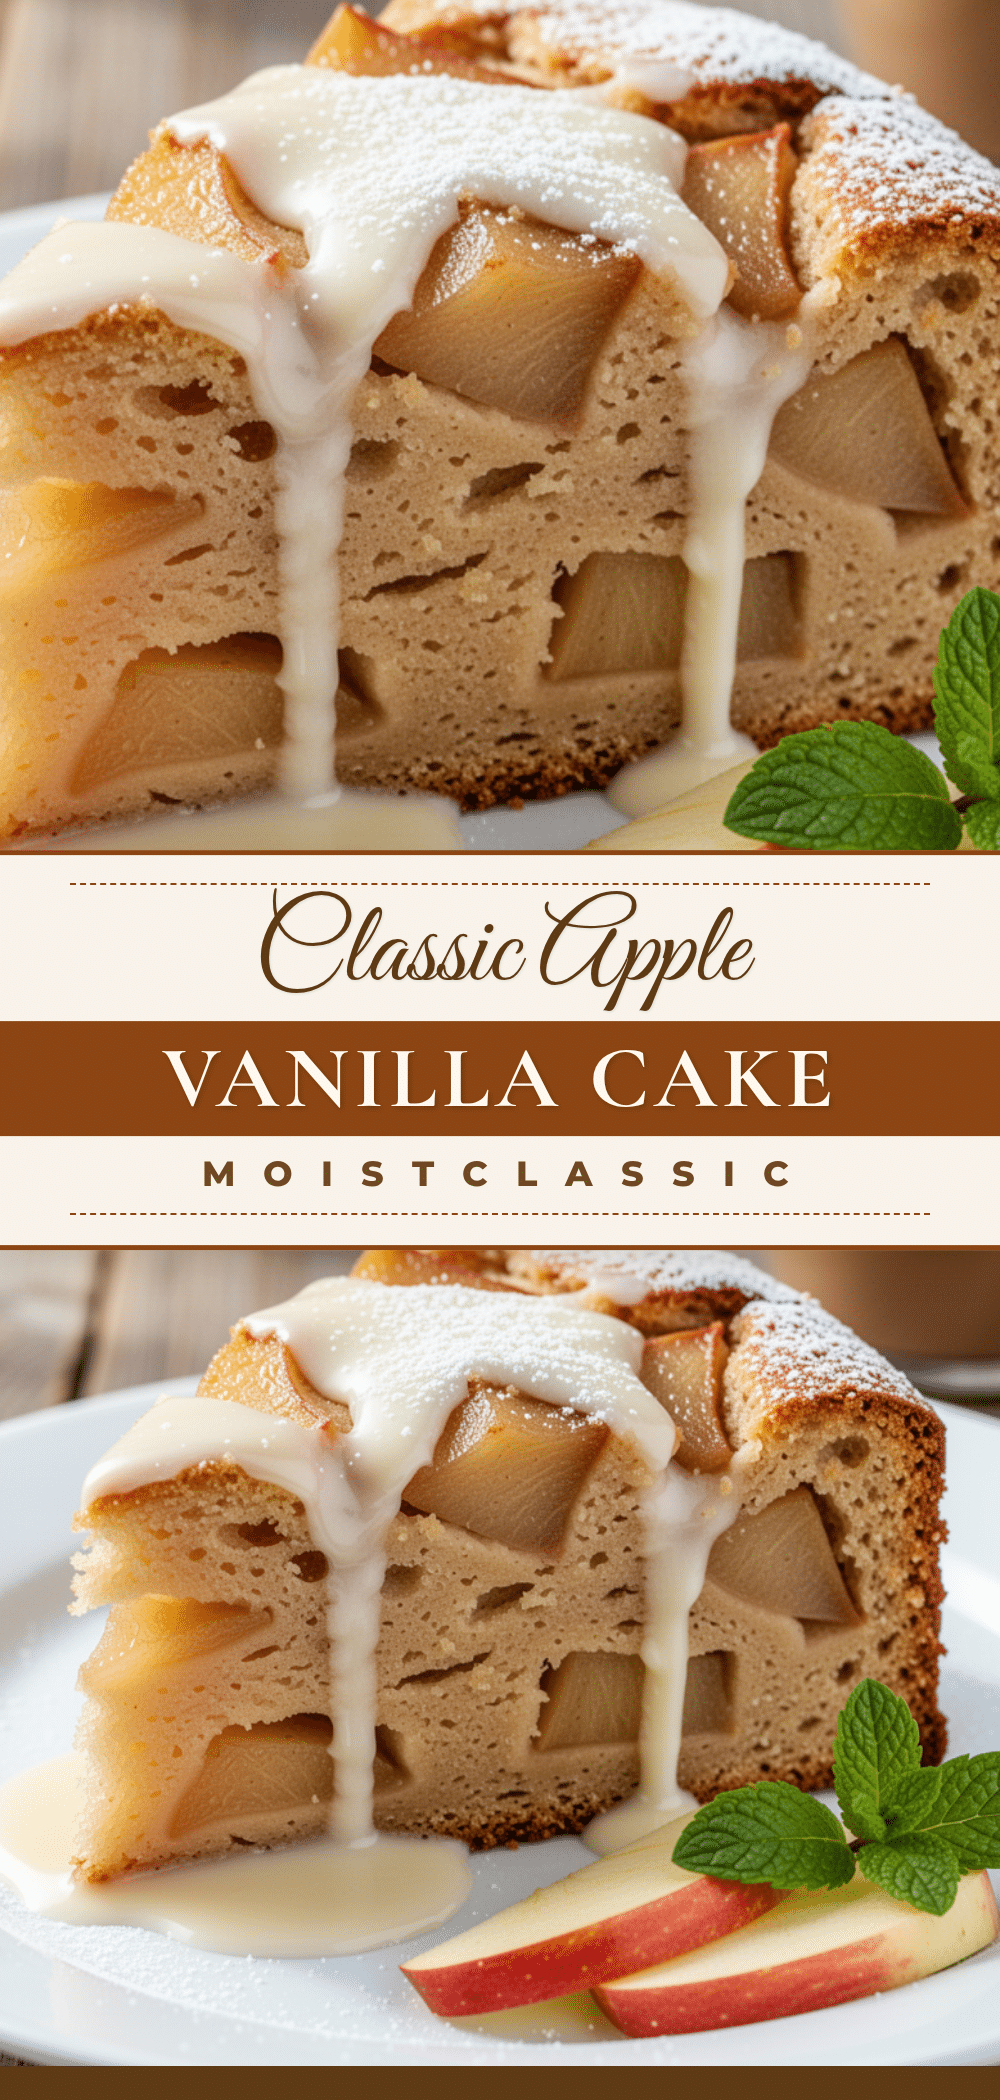
Fluffy Classic Apple Cake with Vanilla Glaze
A light, airy apple cake made with separated eggs for maximum fluffiness, topped with a creamy vanilla glaze. This reliable dessert uses simple pantry ingredients and is perfect for any occasion.
- Prep Time: 10 minutes
- Cook Time: 45 minutes
- Total Time: 55 minutes
- Yield: 12 servings 1x
- Category: Dessert
- Cuisine: American
Ingredients
- 1 cup (2 sticks or 226g) unsalted butter, softened to room temperature
- 1 ½ cups (300g) granulated sugar
- 4 large eggs, separated
- 2 teaspoons vanilla extract
- 2 cups (250g) all-purpose flour
- 1 teaspoon baking powder
- ½ teaspoon baking soda
- ½ teaspoon salt
- 3 large Granny Smith apples, peeled and diced
- 1 tablespoon lemon juice
- 1 cup (120g) confectioners’ sugar, sifted
- 2–3 tablespoons heavy cream
- 1 teaspoon vanilla extract
Instructions
- Preheat oven to 350°F (175°C). Grease a 9×13 inch baking pan with butter or cooking spray.
- In a medium bowl, whisk together the flour, baking powder, baking soda, and salt. Set aside.
- In a large bowl, beat the softened butter and granulated sugar on medium-high speed for 3-4 minutes until pale and fluffy. Scrape down the sides of the bowl.
- Beat in the egg yolks one at a time, adding the vanilla extract after the second yolk. Mix until just combined.
- Reduce mixer speed to low. Add the dry ingredients in three additions, mixing until just combined. Do not overmix.
- In a clean, grease-free bowl, beat the egg whites on high speed until stiff peaks form.
- Gently fold the whipped egg whites into the batter in two additions using a spatula. Then, gently fold in the diced apples.
- Pour batter into the prepared pan and spread evenly. Bake for 40-45 minutes, or until a toothpick inserted into the center comes out clean.
- Let the cake cool in the pan for 10 minutes, then transfer to a wire rack to cool completely.
- While the cake cools, whisk together the confectioners’ sugar, heavy cream, and vanilla extract until smooth.
- Drizzle the glaze over the completely cooled cake before serving.
Notes
Ensure butter is softened but not melted. Do not overmix the batter once flour is added to avoid a tough cake. Make sure the bowl for egg whites is completely grease-free to ensure proper whipping. Store leftovers in an airtight container at room temperature for up to 3 days; do not refrigerate.
Nutrition
- Serving Size: 1 slice
- Calories: 350
- Sugar: 40
- Sodium: 250
- Fat: 12
- Saturated Fat: 7
- Carbohydrates: 55
- Fiber: 1
- Protein: 4
Keywords: apple cake, vanilla glaze, fluffy cake, homemade dessert, easy baking, fall recipes, comfort food