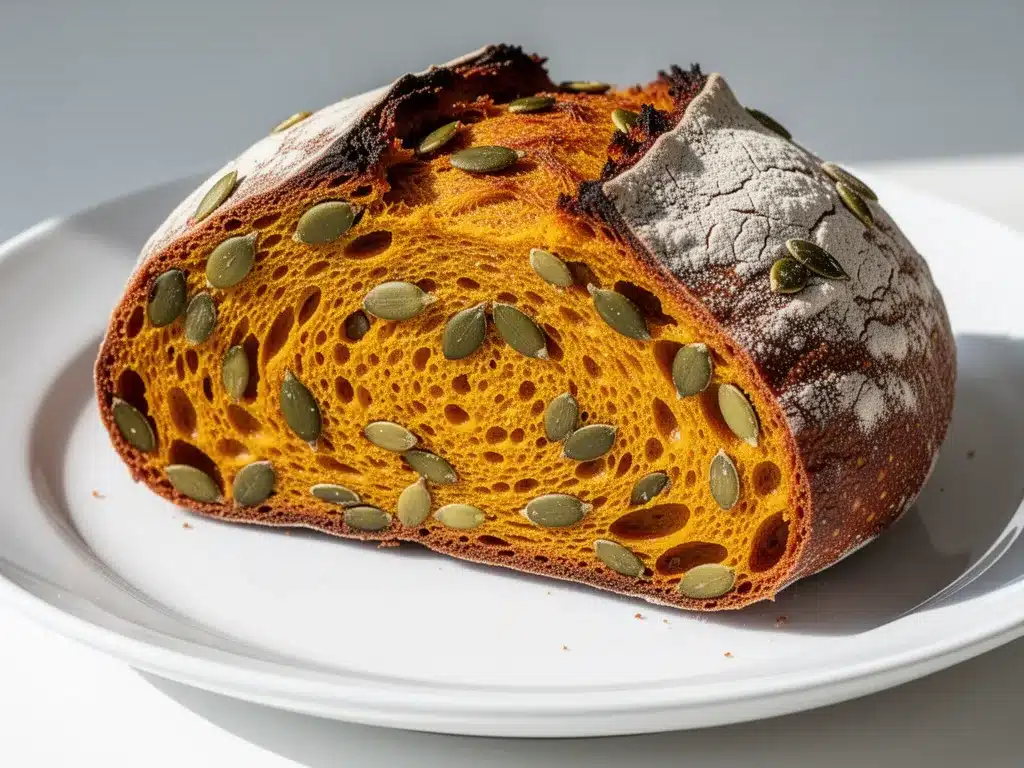
My partner stared at the loaf cooling on the counter, then looked at me, then back at the loaf, and quietly asked if I had swapped my usual sourdough starter for a pumpkin puree canister. It wasn’t a question born of suspicion, but of genuine confusion because the bread smelled like a Thanksgiving dinner that had decided to live in a loaf pan. He took a slice, still warm from the oven, and chewed slowly, his eyes closing for a second too long. That was the moment I knew this recipe had crossed the line from “interesting experiment” to “permanent fixture.”
I had been struggling with a flat, dense loaf for weeks. My starter was sluggish, the kitchen was cold, and I was ready to give up on the whole artisan bread thing. Then I decided to try something reckless. I swapped out a portion of the flour and water for canned pumpkin and warm spices. I wasn’t trying to make a cake. I was trying to save my sourdough game. The result was this cozy pumpkin sourdough bread with pepitas, which is moist, tangy, and holds its shape better than any loaf I’ve made in years.
There is something deeply satisfying about feeding a living culture ingredients that usually belong in a dessert. The pumpkin adds moisture that keeps the crumb tender for days, while the pepitas add a necessary crunch against the soft, spiced interior. It’s not just bread. It’s a hug in slice form.
This recipe stuck because it solved two problems at once: it made use of the pumpkin puree I already had, and it produced a loaf that my family actually begged for. Not just “thanks for dinner,” but “can we have this again tomorrow?” That is the highest praise a home baker can receive. If you are looking for a way to bring autumn into your kitchen without the stress of complex techniques, this is the path.
Why You’ll Love This Recipe
This isn’t just another fall bread recipe that tastes like cinnamon sugar and nothing else. This is sourdough bread, properly fermented, with the subtle tang that only a wild yeast culture can provide. I spent months testing ratios to get the hydration right, because pumpkin adds a lot of liquid weight. Too much, and you get a gummy mess. Too little, and it dries out fast. The balance here is precise.
Here is why this loaf stands out from the crowd:
- Quick & Easy for Sourdough: Most sourdough recipes require days of waiting. This one uses a mix of long fermentation and active mixing to deliver results in about 24 hours. It fits into a weekend schedule without demanding your entire Saturday.
- Simple Ingredients: You likely have the base ingredients. Flour, water, salt, starter, pumpkin, and spices. No fancy flours or obscure additives. The pepitas are optional but highly recommended for texture.
- Perfect for Cozy Evenings: This bread is ideal for those gray, rainy afternoons when you just want to sit by the window with a mug of tea. It toasts beautifully and pairs well with soup or cheese.
- Crowd-Pleaser: Even people who usually avoid “healthy” or “dense” breads love this. The pumpkin masks the sourness slightly, making it approachable for kids and picky eaters, while the spices keep adults interested.
- Unbelievably Delicious: The texture is the real winner. It is dense enough to feel substantial but soft enough to pull apart easily. The crunch of the toasted pepitas against the soft crumb is a sensory experience you don’t get with plain white bread.
What makes this recipe different is the hydration management. I use a high-hydration starter and fold the dough several times to build strength without overworking it. The pumpkin puree acts as a tenderizer, breaking down gluten strands just enough to create a fine, even crumb. It’s not a cake. It’s bread. But it’s bread that feels luxurious.
I remember making my first batch when the leaves were just starting to turn. I was worried it would fail. Instead, the whole apartment smelled like nutmeg and toasted grains. My partner came home and didn’t even say hello. He just opened the oven door and inhaled. That is the kind of reaction that tells you you’ve got the recipe right. It’s comfort food, but it has soul. It’s the kind of loaf that makes you feel like you’ve accomplished something, even if you’re just sitting on your couch eating it.
What Ingredients You Will Need
This recipe relies on the quality of your pumpkin and the activity of your starter. You don’t need fancy ingredients, but you do need the right types. The pumpkin provides moisture and structure, so using the right kind matters. Avoid pumpkin pie filling, which is full of sugar and spices. You want plain, unsweetened puree.
- Bread Flour (500g / 3 3/4 cups): I recommend using a high-protein bread flour like King Arthur or Gold Medal. The protein content helps build the gluten network needed to hold the extra moisture from the pumpkin. All-purpose flour works, but the texture will be slightly denser.
- Pumpkin Puree (200g / 1 cup): Use canned 100% pure pumpkin. It is consistent and reliable. Fresh pumpkin puree can be used, but it often has higher water content, which can throw off the hydration. If you must use fresh, strain it through a cheesecloth to remove excess liquid.
- Active Sourdough Starter (100g / 1/2 cup): Your starter should be at its peak activity. Feed it 4-6 hours before mixing. It should be bubbly and have doubled in size. A sluggish starter will result in a flat loaf.
- Water (220g / 1 cup + 1 tbsp): Lukewarm water helps activate the starter faster. Use filtered water if your tap water has a strong chlorine taste, as chlorine can inhibit yeast growth.
- Fine Sea Salt (10g / 1 3/4 tsp): Salt controls fermentation and strengthens gluten. Use fine sea salt for easy dissolution. Kosher salt works too, but measure by weight if possible, as volume measurements can vary.
- Ground Cinnamon (2 tsp): Adds warmth and depth. Use fresh cinnamon if you can, as old spice loses its punch.
- Ground Ginger (1 tsp): Adds a subtle spicy kick that complements the pumpkin without overwhelming it.
- Ground Nutmeg (1/2 tsp): Use freshly grated nutmeg if you have a microplane. Pre-ground nutmeg is fine, but it can be dusty and less aromatic.
- Ground Cloves (1/4 tsp): A little goes a long way. Too much clove can make the bread taste medicinal. Be sparing.
- Toasted Pepitas (50g / 1/2 cup): Pepitas are shelled pumpkin seeds. Toasting them beforehand brings out their nutty flavor and adds crunch. You can buy them pre-toasted or toast them yourself in a dry pan over medium heat for 3-5 minutes until they pop.
- Optional: Maple Syrup (1 tbsp): If you prefer a slightly sweeter loaf, add a tablespoon of maple syrup. It also helps with browning.
I always keep a jar of toasted pepitas in my pantry. They are great for salads, oatmeal, and this bread. If you can’t find pepitas, sunflower seeds or pecans work as substitutes, though the flavor profile will change slightly. The key is to add crunch to contrast the soft, spiced bread.
Equipment Needed
You don’t need a lot of fancy gear to make this bread, but having the right tools makes the process smoother. A digital kitchen scale is essential for baking, especially with sourdough. Volume measurements for flour can vary wildly, leading to inconsistent results. Weighing your ingredients ensures accuracy every time.
- Digital Kitchen Scale: Accurate weighing is non-negotiable for sourdough. Invest in a scale that measures in grams.
- Banneton (Proofing Basket): A banneton helps the dough hold its shape during the final rise. If you don’t have one, a bowl lined with a floured kitchen towel works fine.
- Dutch Oven or Heavy Pot: Baking in a covered Dutch oven creates steam, which helps the bread rise and develop a crisp crust. Enameled cast iron is ideal. A ceramic casserole dish also works.
- Large Mixing Bowl: A wide bowl makes folding easier. Glass or stainless steel is best.
- Scraper: A bench scraper helps handle sticky dough and clean your work surface.
- Sharp Blade (Lame or Razor): For scoring the dough before baking. A sharp knife works in a pinch.
If you don’t have a Dutch oven, you can bake on a sheet pan with a pan of water in the oven to create steam. However, the crust won’t be as crisp. I prefer the Dutch oven method because it’s simpler and yields better results. Just make sure your pot is oven-safe to 450°F (230°C).
Preparation Method
Making this bread is a process of patience and observation. The dough will be sticky at first, but it will come together with folding. Here is how to do it step by step.
Step 1: Mix the Dough (15 Minutes)
In a large bowl, combine the lukewarm water and active sourdough starter. Whisk until the starter is dissolved. Add the pumpkin puree, salt, cinnamon, ginger, nutmeg, and cloves. Mix until well combined.
Add the bread flour gradually. Mix with a sturdy spoon or your hands until no dry flour remains. The dough will be shaggy and sticky. Cover the bowl with a lid or plastic wrap. Let it rest for 30 minutes. This is called autolyse, and it helps the flour hydrate fully.
Step 2: First Fold (10 Minutes)
After 30 minutes, wet your hands to prevent sticking. Grab the dough from one side, stretch it up, and fold it over the center. Repeat on all four sides. This builds gluten strength. Cover and rest for another 30 minutes.
Step 3: Second Fold (10 Minutes)
Repeat the folding process. You should notice the dough becoming smoother and more elastic. Cover and rest for 30 minutes.
Step 4: Add Pepitas (5 Minutes)
After the second fold, sprinkle the toasted pepitas over the dough. Perform a third fold, incorporating the pepitas into the dough. You may need to do a few stretches and folds to distribute them evenly. Cover and rest for 30 minutes.
Step 5: Bulk Fermentation (4-6 Hours)
Let the dough rise at room temperature. Perform one more fold after 2 hours if the dough feels weak. After 4-6 hours, the dough should have risen by about 50% and look jiggly. It is ready for shaping if it has passed the float test (drop a small piece in water; if it floats, it’s ready).
Step 6: Shape and Proof (8-12 Hours)
Turn the dough out onto a lightly floured surface. Shape it into a round boule or an oval batard. Place it seam-side up in a floured banneton or bowl. Cover and refrigerate for 8-12 hours. This cold proof develops flavor and makes scoring easier.
Step 7: Bake (45 Minutes)
Preheat your oven and Dutch oven to 450°F (230°C) for at least 30 minutes. Take the dough out of the fridge. Turn it out onto parchment paper. Score the top with a sharp blade. Place the dough in the hot Dutch oven. Cover and bake for 20 minutes. Remove the lid and bake for another 20-25 minutes until the crust is deep golden brown.
Step 8: Cool (1 Hour)
Let the bread cool completely on a wire rack. This is the hardest part. Cutting it too soon will result in a gummy texture. Wait at least one hour before slicing.
Cooking Tips & Techniques
Getting sourdough right takes practice. Here are some tips to avoid common mistakes.
- Check Your Starter: If your starter doesn’t double in 4 hours after feeding, it’s not ready. Feed it again or use a more active starter. A weak starter means a weak loaf.
- Don’t Overmix: Overmixing can develop too much gluten, making the bread tough. Mix just until combined.
- Fold, Don’t Knead: Sourdough benefits from folds rather than kneading. Folds build strength gently without tearing the gluten.
- Watch the Dough, Not the Clock: Fermentation time varies with temperature. In a warm kitchen, bulk fermentation may take only 3 hours. In a cold kitchen, it may take 8. Look for signs of readiness, not just time.
- Steam is Key: Baking with steam creates a crisp crust. A Dutch oven traps steam naturally. If baking on a sheet pan, place a pan of water in the bottom of the oven.
I once baked a loaf without steam and the crust was pale and soft. It tasted fine, but it lacked that satisfying crunch. Since then, I always use a Dutch oven. It’s worth the investment.
Variations & Adaptations
This recipe is versatile. Here are some ways to change it up.
- Gluten-Free: Use a gluten-free flour blend with xanthan gum. The texture will be different, but it will still be delicious.
- Dairy-Free: This recipe is naturally dairy-free. Just ensure your starter is fed with water and flour, not milk.
- Sweet Variation: Add a swirl of cinnamon-swirl filling (butter, brown sugar, cinnamon) before shaping for a sweeter loaf.
- Spice Variation: Add cardamom or allspice for a different flavor profile. Cardamom pairs well with pumpkin.
- Seed Swap: If you don’t like pepitas, use walnuts or pecans. They add a nice buttery crunch.
I’ve tried adding chocolate chips to this recipe, and it was surprisingly good. The bitterness of dark chocolate balanced the sweetness of the pumpkin. It’s a nice treat for breakfast.
Serving & Storage Suggestions
This bread is best served slightly warm. Toast it for breakfast with butter or jam. It pairs well with soups, stews, or salads.
- Storage: Store in an airtight container or plastic bag at room temperature for up to 3 days. It stays moist due to the pumpkin.
- Freezing: Slice the bread and freeze in a freezer bag. Toast slices directly from the freezer for a fresh taste.
- Reheating: To refresh a stale loaf, spray the crust with water and bake at 350°F (175°C) for 10 minutes.
The flavors deepen over the first two days. Day three might be the best day to eat it.
Nutritional Information & Benefits
This bread is a good source of complex carbohydrates and fiber from the whole wheat flour and pumpkin. Pumpkin adds vitamins A and C. Pepitas provide healthy fats and magnesium.
- Calories: Approximately 180 per slice (1/12 of loaf).
- Carbohydrates: 30g per slice.
- Fiber: 3g per slice.
- Protein: 4g per slice.
- Fat: 4g per slice (from pepitas).
Sourdough fermentation reduces the glycemic index of the bread, making it a better choice for blood sugar management compared to commercial yeast breads. It’s easier to digest for many people.
Conclusion
This cozy pumpkin sourdough bread with pepitas is a testament to the joy of baking. It’s simple, delicious, and rewarding. I hope you try it and find your own moments of quiet satisfaction while making it. Customize it to your taste, share it with friends, and enjoy the process. If you make this recipe, I’d love to hear how it turns out. Leave a comment below and let me know your thoughts. Happy baking!
FAQs
Can I use fresh pumpkin instead of canned?
Yes, but you need to strain it well. Fresh pumpkin has more water, which can make the dough too wet. Cook the pumpkin, mash it, and strain it through cheesecloth to remove excess liquid before using.
Why did my bread turn out dense?
This could be due to an inactive starter, over-proofing, or under-baking. Ensure your starter is active and double in size before using. Also, check the internal temperature with a thermometer; it should reach 205°F (96°C).
Can I make this recipe vegan?
Yes, this recipe is naturally vegan. Just ensure your sourdough starter is fed with water and flour, not milk or butter. The pumpkin and pepitas are plant-based.
How do I know when the bread is done baking?
The crust should be deep golden brown, and the internal temperature should reach 205°F (96°C). If you tap the bottom and it sounds hollow, it’s likely done.
Can I freeze the dough?
It’s better to freeze the baked bread. If you must freeze the dough, do so after the final proof. Thaw it in the fridge overnight and bake as usual. The texture may be slightly different, but it will still be good.
Pin This Recipe!
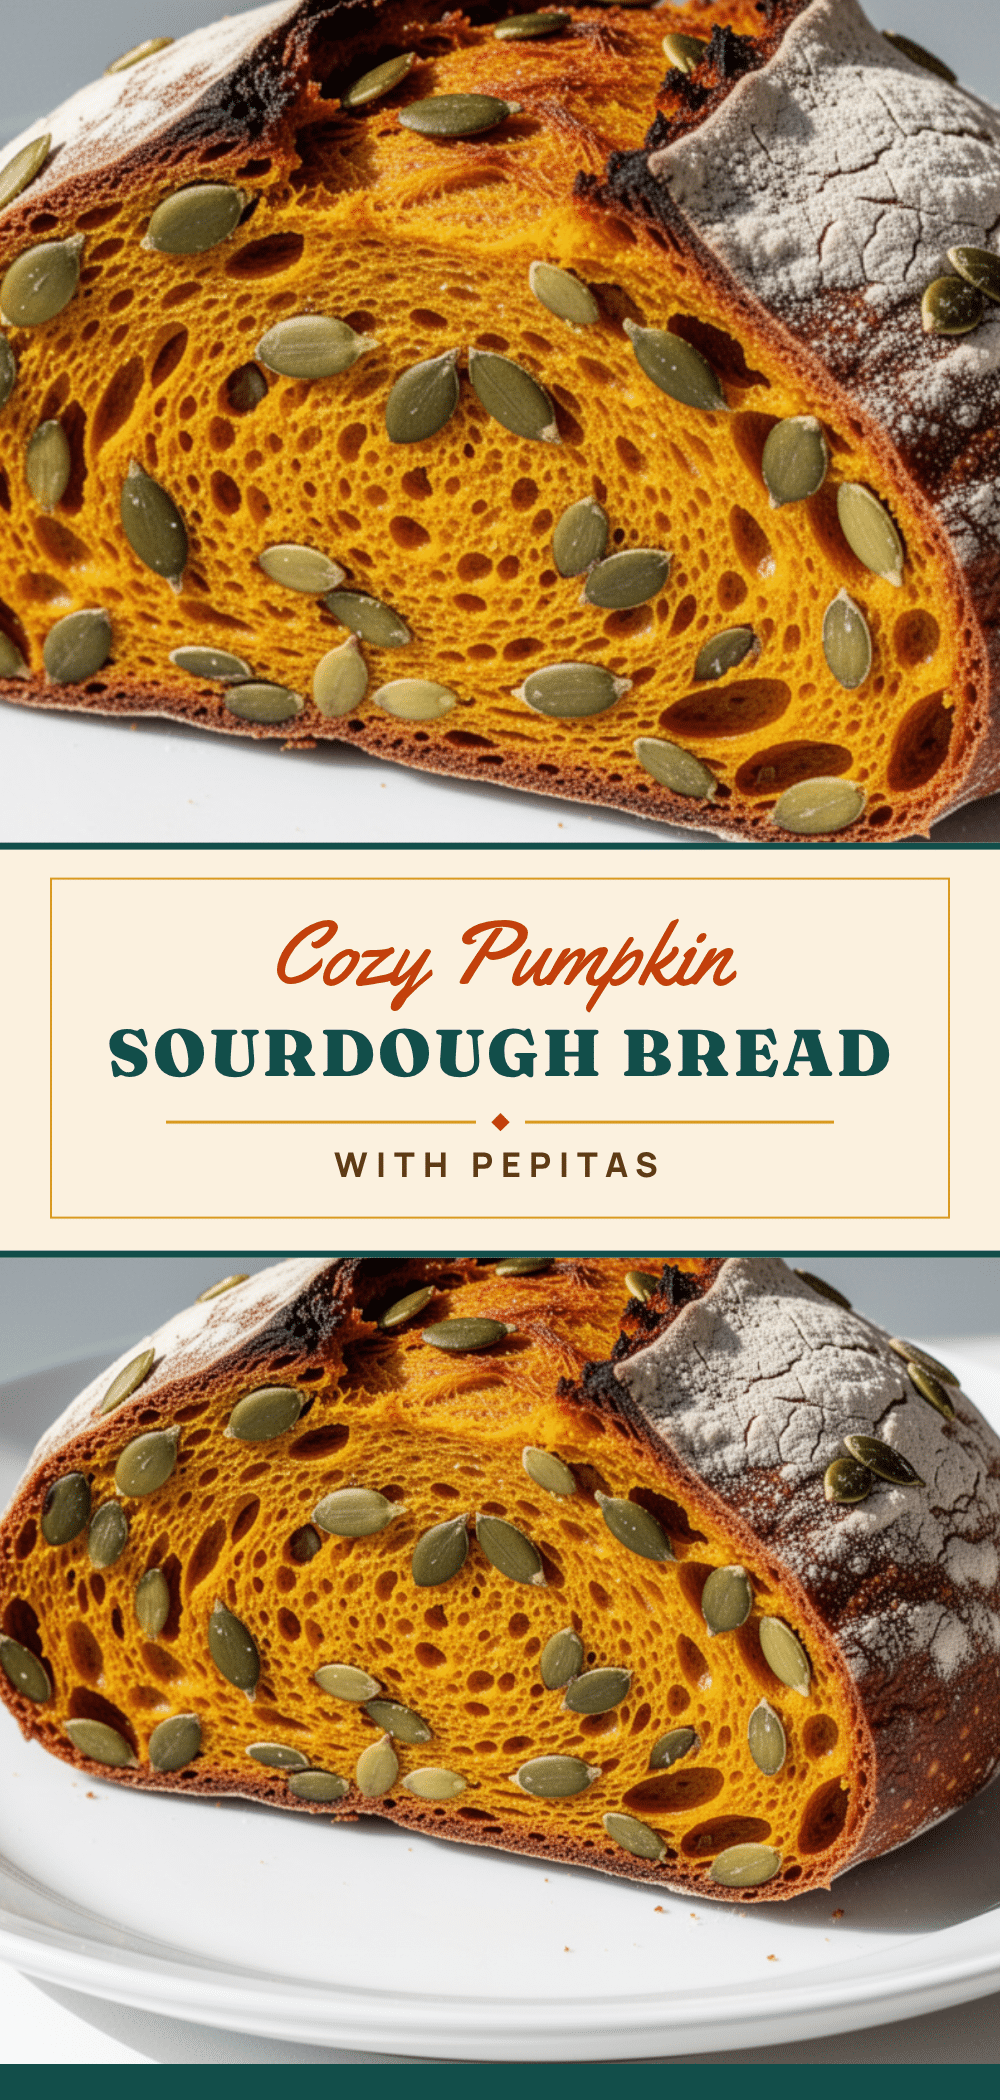
Cozy Pumpkin Sourdough Bread with Pepitas
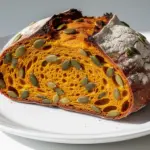
A moist, tangy sourdough bread infused with pumpkin puree and warm spices, topped with crunchy toasted pepitas. This recipe offers a perfect balance of texture and flavor, ideal for autumn baking.
- Prep Time: 15 minutes
- Cook Time: 45 minutes
- Total Time: 24 hours
- Yield: 12 servings 1x
- Category: Breakfast
- Cuisine: American
Ingredients
- 500g (3 3/4 cups) Bread Flour
- 200g (1 cup) Pumpkin Puree (unsweetened)
- 100g (1/2 cup) Active Sourdough Starter
- 220g (1 cup + 1 tbsp) Lukewarm Water
- 10g (1 3/4 tsp) Fine Sea Salt
- 2 tsp Ground Cinnamon
- 1 tsp Ground Ginger
- 1/2 tsp Ground Nutmeg
- 1/4 tsp Ground Cloves
- 50g (1/2 cup) Toasted Pepitas
- 1 tbsp Maple Syrup (Optional)
Instructions
- In a large bowl, whisk lukewarm water and active sourdough starter until dissolved.
- Add pumpkin puree, salt, cinnamon, ginger, nutmeg, and cloves. Mix until well combined.
- Add bread flour gradually and mix with a spoon or hands until no dry flour remains. The dough will be shaggy and sticky.
- Cover the bowl and let it rest for 30 minutes (autolyse).
- Wet hands and perform the first fold: stretch dough from one side and fold over center. Repeat on all four sides. Cover and rest for 30 minutes.
- Repeat the folding process. Cover and rest for another 30 minutes.
- Sprinkle toasted pepitas over the dough. Perform a third fold to incorporate them evenly. Cover and rest for 30 minutes.
- Let the dough rise at room temperature for 4-6 hours (bulk fermentation). Perform one more fold after 2 hours if needed. Dough should rise 50% and pass the float test.
- Turn dough onto a floured surface. Shape into a round boule or oval batard. Place seam-side up in a floured banneton or bowl.
- Cover and refrigerate for 8-12 hours (cold proof).
- Preheat oven and Dutch oven to 450°F (230°C) for at least 30 minutes.
- Turn dough out onto parchment paper and score the top with a sharp blade.
- Place dough in hot Dutch oven. Cover and bake for 20 minutes.
- Remove lid and bake for another 20-25 minutes until crust is deep golden brown.
- Let bread cool completely on a wire rack for at least 1 hour before slicing.
Notes
Ensure your sourdough starter is active and has doubled in size before using. If using fresh pumpkin, strain it through cheesecloth to remove excess liquid. The bread is best served slightly warm or toasted. Store in an airtight container at room temperature for up to 3 days.
Nutrition
- Serving Size: 1 slice (1/12 of loa
- Calories: 180
- Sugar: 2
- Sodium: 350
- Fat: 4
- Carbohydrates: 30
- Fiber: 3
- Protein: 4
Keywords: pumpkin sourdough, fall bread, pepitas, sourdough recipe, autumn baking, pumpkin bread, gluten-free option