Second time this week and the oven smells like toasted nuts and salt. Honestly, I didn’t plan on making these crispy roasted pumpkin seeds with sea salt again so soon. The first batch disappeared in two days. I thought that was just because they were good. It wasn’t. It was because I couldn’t stop eating them straight from the baking sheet while watching TV.
I started cleaning the guts out of a small sugar pumpkin on a rainy Tuesday. The seeds were slimy and cold. I spent twenty minutes scrubbing them clean under cold water. That part is tedious, I know. But it’s the only way to get them truly crispy later. I tossed them in olive oil and sea salt. I put them in the oven at 300°F for about 45 minutes.
By Wednesday night, I had already bought another pumpkin. My kitchen counter looked like a graveyard of orange pulp. My partner asked if I was trying to make pumpkin pie for every meal. I didn’t answer. I was too busy separating the viable seeds from the stringy bits.
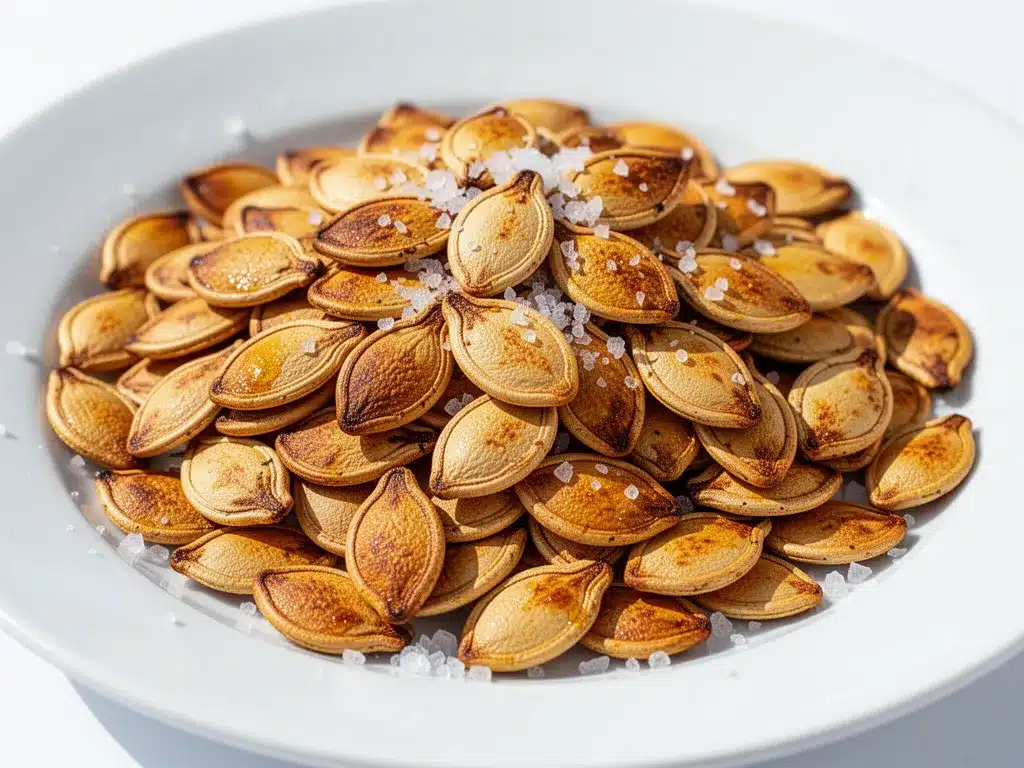
There is something compulsive about the roasting process. You watch them change color. They go from pale and wet to golden and crunchy. The smell fills the whole house. It’s warm and earthy. It makes you feel like you’re sitting by a fireplace, even if you’re just in your apartment kitchen.
I tried adding chili powder once. It was too spicy for my morning coffee snack. I stuck to just salt. Simple is better. The crunch is the main event. You hear it when you bite down. It’s satisfying in a way that chips aren’t. Chips are airy. These are dense and nutty.
I’ve made them three times now. Each time, I tweak the salt amount slightly. Too little, and they taste bland. Too much, and they’re inedible. It’s a balance. I’m still figuring it out. But the result is always the same. A bowl of golden seeds that vanish quickly.
This recipe stuck with me because it turns waste into treasure. Most people throw away pumpkin guts. I save them. It feels like a small rebellion against food waste. Plus, they are healthy. High in zinc and magnesium. Good for you and tasty.
I’m not sure why I keep making them. Maybe it’s the ritual. Maybe it’s the smell. Or maybe it’s just that once you try them, you can’t go back to boring snacks.
Why You’ll Love This Recipe
Let’s face it, snacks are usually either too sugary or too salty. These crispy roasted pumpkin seeds with sea salt hit a perfect middle ground. They are savory, crunchy, and surprisingly filling. I’ve tested this method over and over to get the texture right. You want them crisp all the way through, not chewy in the middle.
- Quick & Easy: Once you clean the seeds, the roasting takes about 45 minutes. It’s mostly hands-off time. You can do other chores while they roast. It’s perfect for busy weeknights when you want something healthy but don’t want to cook a full meal.
- Simple Ingredients: You only need pumpkin seeds, oil, and salt. No fancy spices or hard-to-find items. You likely already have everything in your pantry. This makes it a great last-minute snack idea.
- Perfect for Fall: These are ideal for autumn gatherings. Serve them in a bowl at a party, or pack them in lunchboxes. They keep well for days, so you can make a big batch and snack on them all week long.
- Crowd-Pleaser: Kids love the crunch. Adults appreciate the healthy fats. Everyone likes salty snacks. This recipe works for all ages. It’s a safe bet for potlucks or game days.
- Unbelievably Delicious: The texture is key. When done right, they snap when you bite them. The flavor is nutty and rich. It’s comfort food without the heaviness of bread or cheese.
What makes this recipe different is the cleaning process. Many people skip this step and end up with soggy seeds. I spend time scrubbing them. It pays off. The result is a professional-level crunch that you can’t get from store-bought packets. Store-bought versions are often over-oiled and stale. These are fresh and vibrant.
It’s the kind of snack that makes you close your eyes after the first bite. It’s simple, but it’s soul-soothing. You feel good eating them. They aren’t junk food. They are real food. That matters more than we think. I love having a bowl of these on my desk while I write. They keep me focused.
What Ingredients You Will Need
This recipe relies on simple, wholesome ingredients to deliver bold flavor and satisfying texture without the fuss. The quality of your pumpkin seeds matters. Fresh seeds from a sugar pumpkin are best. They are smaller and sweeter than seeds from a carving pumpkin.
- Pumpkin Seeds (Pepitas): You will need about 1 cup of raw, shelled pumpkin seeds. If you are using seeds from a fresh pumpkin, you will need a large one. Look for seeds that are plump and green. Avoid shriveled ones. They won’t roast well. I prefer organic seeds if possible, to avoid pesticide residue.
- Extra Virgin Olive Oil: Use about 1 tablespoon. Olive oil helps the salt stick and promotes even browning. It adds a subtle fruity note. You can use melted butter for a richer taste, but olive oil is healthier. Coconut oil works too, but it has a distinct flavor.
- Fine Sea Salt: Use ½ teaspoon. Fine salt distributes more evenly than coarse salt. It coats every seed. If you use kosher salt, you might need a bit more. Taste as you go. Don’t over-salt, or they will be too salty to eat later.
- Water: You need enough cold water for cleaning. A large bowl or sink full is best. This helps separate the good seeds from the pulp. The good seeds sink. The bad ones float. It’s a handy trick.
I recommend using a brand like Wholesome Sweeteners for organic cane sugar if you decide to add a sweet glaze later. But for this basic recipe, just salt is enough. Keep it simple. The natural flavor of the seed should shine through.
If you can’t find fresh pumpkin seeds, you can buy raw pepitas at most grocery stores. They are often in the baking or health food aisle. They work just as well. Just check the expiration date. Old seeds can taste rancid.
For a gluten-free option, this recipe is naturally gluten-free. Just make sure your salt and oil are pure. Some flavored salts have anti-caking agents that might contain gluten. Stick to pure sea salt to be safe.
Equipment Needed
You don’t need fancy tools for this. A few basic items will do the job.
- Large Bowl: You need a big bowl for washing. The seeds expand in water. A salad spinner is great for drying them quickly. If you don’t have one, use a clean kitchen towel. Pat them dry thoroughly. Wet seeds steam instead of roast.
- Baking Sheet: Use a standard half-sheet pan. Line it with parchment paper. This prevents sticking and makes cleanup easy. You can use a silicone mat, but parchment is cheaper and disposable.
- Spatula: A silicone spatula is best for stirring. It won’t scratch your pan. You need to stir the seeds every 15 minutes. This ensures even cooking. Some seeds burn if they sit still.
- Colander: A fine-mesh colander helps drain the seeds after washing. It catches the small bits of pulp that float to the top. Rinse under cold water until the water runs clear.
I’ve tried using non-stick pans without parchment. It’s a mess. The seeds stick and burn. Parchment paper is worth the few cents. It keeps the seeds moving freely. You get a more even roast.
If you have a dehydrator, you can use that too. It takes longer, about 8 hours, but the texture is very consistent. No burning. But the oven is faster. For most people, the oven is the better choice.
Preparation Method
- Extract the Seeds (5 minutes): Cut your pumpkin in half. Scoop out the insides. Use a spoon to scrape the seeds away from the pulp. Get them into a large bowl. Don’t worry about getting every bit of pulp off yet. Just get the seeds out.
- Clean the Seeds (10 minutes): Fill the bowl with cold water. Swirl the seeds around. The good, heavy seeds will sink to the bottom. The light pulp and bad seeds will float. Skim off the floating debris. Repeat this until the water is mostly clear. This step is crucial for crunchiness.
- Dry the Seeds (10 minutes): Pour the seeds into a colander. Shake off excess water. Spread them on a clean kitchen towel. Pat them dry with another towel. You want them as dry as possible before adding oil. Moisture is the enemy of crispness.
- Season (2 minutes): Transfer the dried seeds to a mixing bowl. Drizzle with olive oil. Sprinkle with sea salt. Toss them well. Make sure every seed is coated. If they look dry, add a little more oil. If they look wet, add a few more seeds.
- Preheat Oven (10 minutes): Preheat your oven to 300°F (150°C). This low temperature is key. High heat burns the outside before the inside is dry. Low and slow is the way to go. It takes longer, but the result is better.
- Spread on Pan (2 minutes): Line a baking sheet with parchment paper. Spread the seeds in a single layer. Do not overlap them. Crowding causes steaming. If you have a lot of seeds, use two pans. Rotate them halfway through baking.
- Roast (45 minutes): Put the pan in the oven. Roast for 45 minutes. Stir the seeds every 15 minutes. This ensures even browning. They are done when they are golden brown and smell nutty. They will continue to crisp up as they cool.
- Cool Completely (30 minutes): Remove the pan from the oven. Let the seeds cool on the pan. Do not eat them hot. They will be soft. As they cool, they harden. This is when the crunch happens. Patience is required.
Watch them closely in the last 10 minutes. They go from golden to burnt very quickly. If they start to smoke, take them out immediately. Burnt seeds taste bitter. You can’t fix that.
Cooking Tips & Techniques
I learned this the hard way. I used to roast seeds at 350°F. They burned on the edges and stayed soft in the middle. It was frustrating. Lowering the temperature to 300°F solved the problem. It takes longer, but the texture is perfect.
Drying is the most important step. If you skip drying, the seeds will steam. They will be chewy. I always pat them dry with a towel. You can also let them air dry for an hour. But the towel is faster.
Stirring is vital. Seeds stick to the pan. If you don’t stir, they burn. I set a timer for every 15 minutes. It’s a small habit that makes a big difference. Use a silicone spatula to scrape the bottom. This lifts the seeds that are sticking.
Don’t overcrowd the pan. If seeds touch each other, they don’t crisp well. Space them out. Use two pans if needed. Overlapping leads to uneven cooking. You want air circulation around every seed.
Seasoning while warm helps the salt stick. But don’t add wet spices like garlic powder until the end. Dry spices can burn. Salt is fine. Oil is fine. Wet ingredients like soy sauce or maple syrup need extra time and lower heat. Start simple.
Test a seed. Take one out after 40 minutes. Let it cool for a minute. Bite it. If it’s crunchy, you’re done. If it’s soft, keep roasting. Check every 5 minutes after that.
Variations & Adaptations
You can change the flavor profile easily. Here are a few ideas I’ve tried.
- Spicy: Add cayenne pepper and chili powder. Use ¼ teaspoon of each. Toss with the oil. This is great for game day. It adds a kick without being too hot.
- Sweet: Mix 1 tablespoon of maple syrup with the oil. Add a pinch of cinnamon. These taste like dessert. They are good with coffee. But they burn faster. Watch them closely.
- Garlic Parmesan: Add garlic powder and grated Parmesan cheese in the last 10 minutes. The cheese melts and sticks. It’s rich and savory. Good with wine.
- Herb: Use dried rosemary or thyme. Crush the herbs in your hand before adding. This releases the oils. It gives an earthy, woodland flavor.
I tried a curry powder version once. It was interesting. But it stained my fingers yellow. Not ideal for a snack you eat with your hands. Stick to dry spices for best results.
For a low-carb option, skip the sugar glaze. These are naturally low-carb. They are high in protein and healthy fats. Perfect for keto diets. Just check your salt for anti-caking agents.
You can also roast other seeds. Sunflower seeds work the same way. Just reduce the time to 30 minutes. They are smaller. They cook faster. Be careful not to burn them.
Serving & Storage Suggestions
Serve these at room temperature. They are best after they have cooled completely. Hot seeds are soft. Cold seeds are crunchy. I keep a bowl on my counter. I snack on them throughout the day.
Pair them with a glass of red wine. Or have them with a cup of black coffee. They balance the bitterness of coffee. They add texture to your morning routine.
Store them in an airtight container. A mason jar works well. Keep them in a cool, dry place. They last for up to two weeks. If they lose crunch, put them back in the oven at 200°F for 10 minutes. They will crisp up again.
Do not store them in the fridge. Moisture from the fridge makes them soggy. Room temperature is best. If you live in a humid climate, add a silica gel packet to the jar. It absorbs moisture.
I’ve found that they taste better on day two. The flavors meld together. The salt penetrates the seed. It’s worth waiting. But I rarely wait. They disappear too fast.
For parties, put them in small cups. Or mix them with other nuts. A trail mix version is always a hit. Add dried cranberries or dark chocolate chips. But keep them separate until serving. The seeds stay crunchy longer if they aren’t mixed with wet ingredients.
Nutritional Information & Benefits
These seeds are packed with nutrients. They are high in magnesium. This is good for muscle function. They also have zinc. Zinc supports your immune system. Iron is present too. It helps with energy levels.
One cup of roasted seeds has about 160 calories. It’s a moderate amount. The fats are healthy. They are mostly unsaturated. This is good for your heart. Protein content is high. About 9 grams per cup. It keeps you full.
They are gluten-free. They are vegan. They are non-GMO if you buy organic. No additives. Just real food. This is important to me. I want to know what I’m eating.
Compared to potato chips, these are far superior. Chips have empty calories. Seeds have vitamins. They satisfy your craving for salt and crunch. But they nourish your body. It’s a win-win.
I eat them when I’m tired. They give me a boost. Not a sugar rush. A steady energy. My focus improves. I feel better overall. It’s a small habit with big benefits.
If you have nut allergies, these are safe. They are seeds, not nuts. But always check labels. Cross-contamination can happen in factories. Stick to trusted brands if you have severe allergies.
Conclusion
These crispy roasted pumpkin seeds with sea salt are simple. But they are worth the effort. The crunch is addictive. The flavor is clean. They turn pumpkin waste into a premium snack. I make them every fall. It’s a tradition now.
Try them your way. Add spices. Change the salt. Make them your own. The base recipe is flexible. It’s a canvas for your creativity. Don’t be afraid to experiment. You might find a new favorite flavor.
I love this recipe because it’s honest. It doesn’t hide behind complex techniques. It’s just seeds, oil, and salt. But it’s done with care. That care shows in the taste. I hope you feel it too.
Please leave a comment below. Tell me how you made them. Did you add spices? Did you use a different pumpkin? I read every comment. I love hearing your stories. Share this recipe with friends. They will thank you.
Enjoy the crunch. It’s a small pleasure that lasts. Happy roasting.
Frequently Asked Questions
Why are my pumpkin seeds chewy instead of crunchy?
This usually happens if the seeds weren’t dried enough before roasting. Moisture prevents crisping. Make sure you pat them very dry with a towel. Also, check your oven temperature. If it’s too low, they might steam. If it’s too high, they might burn outside while staying soft inside. 300°F is the sweet spot.
Can I use seeds from a carving pumpkin?
Yes, but they are larger and have thicker shells. They take longer to roast. You might need to increase the roasting time by 10-15 minutes. Sugar pumpkins have smaller, sweeter seeds that roast faster. I prefer sugar pumpkins for this recipe.
How long do roasted pumpkin seeds last?
They last up to two weeks in an airtight container at room temperature. If they lose their crunch, you can revive them in the oven at 200°F for 10 minutes. Do not store them in the fridge, as humidity will make them soggy.
Can I add sugar to make them sweet?
Yes, you can add maple syrup or sugar. Toss them with 1 tablespoon of syrup and a pinch of cinnamon before roasting. Be careful, as sugar burns easily. Watch them closely in the last 10 minutes. Sweet seeds have a shorter shelf life because sugar attracts moisture.
Are pumpkin seeds healthy?
Yes, they are very healthy. They are rich in magnesium, zinc, iron, and healthy fats. They are a good source of protein. They are gluten-free and vegan. Eating them in moderation is a great way to boost your nutrient intake without adding empty calories.
Pin This Recipe!
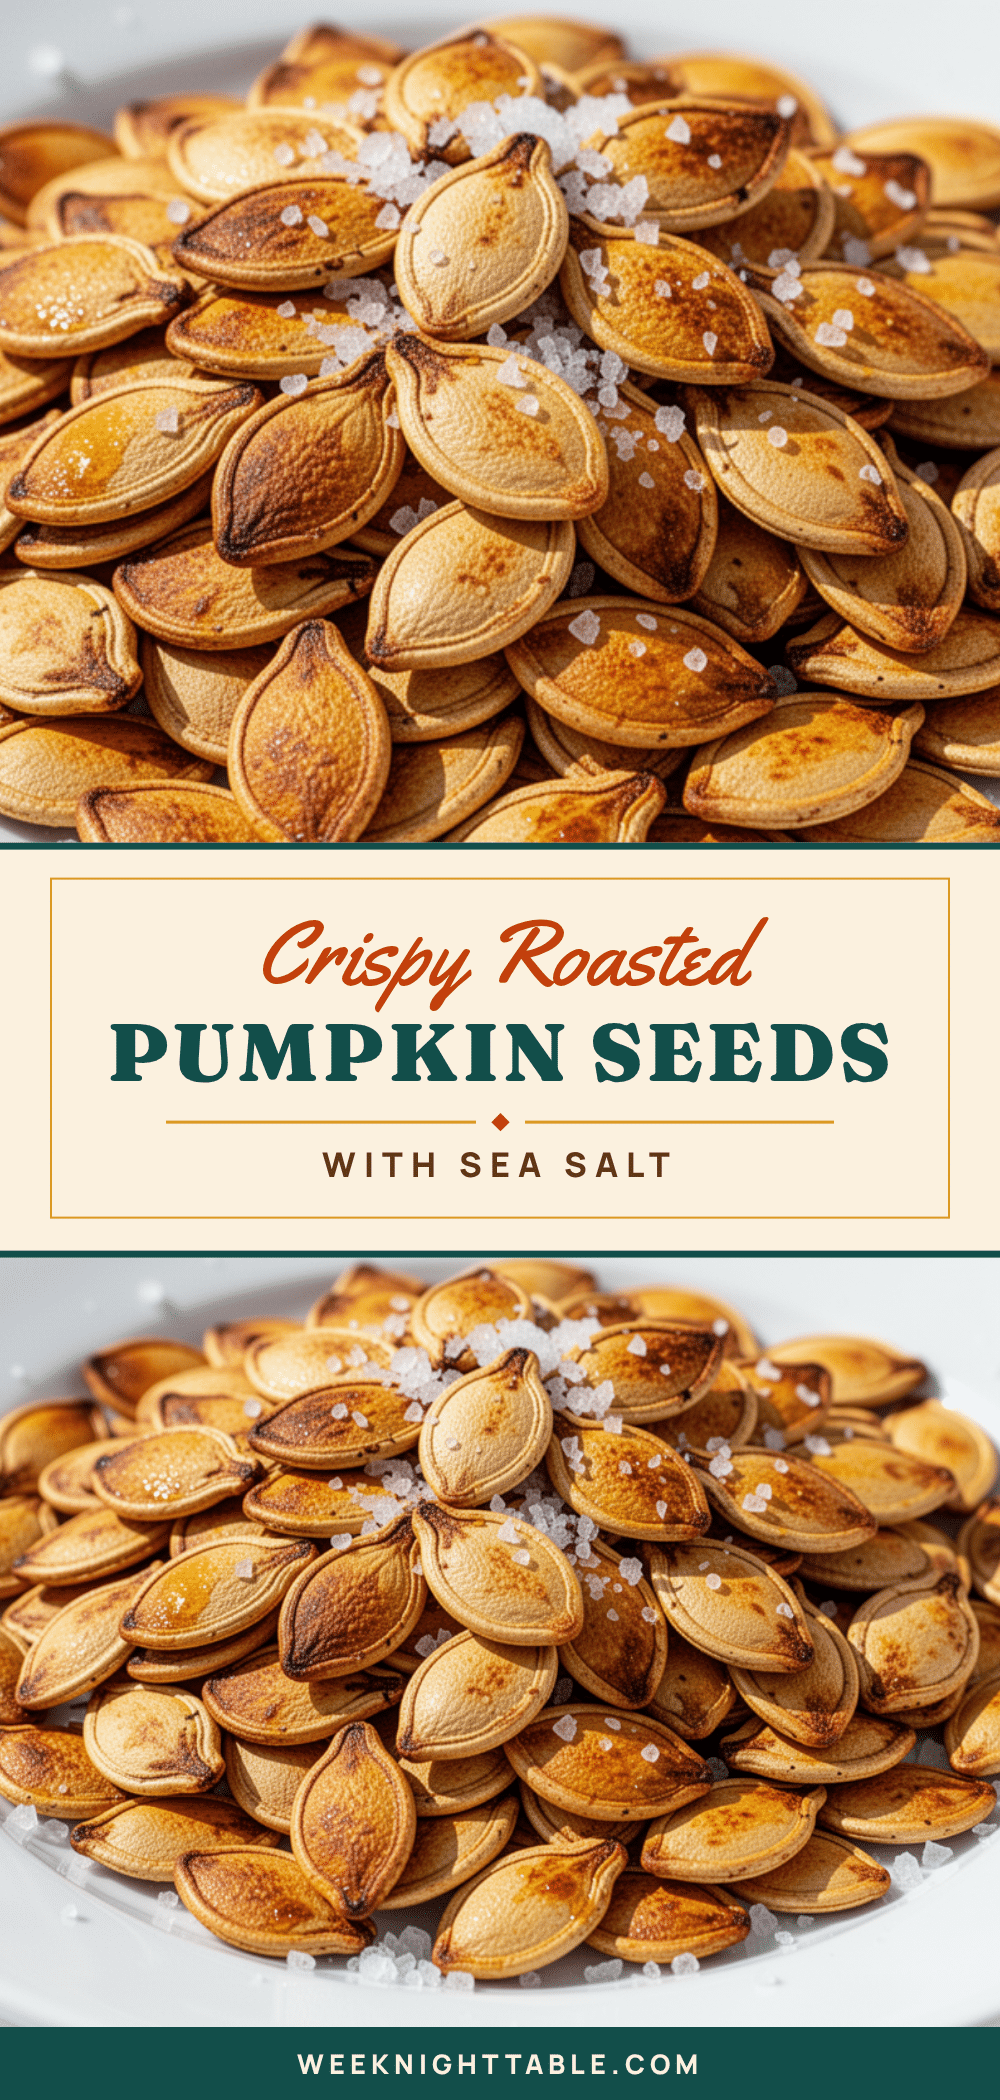
Crispy Roasted Pumpkin Seeds with Sea Salt
A simple, healthy, and addictive snack made by roasting pumpkin seeds with olive oil and sea salt until golden and crunchy. This recipe turns pumpkin waste into a nutritious treat.
- Prep Time: 25 minutes
- Cook Time: 45 minutes
- Total Time: 70 minutes
- Yield: 1 cup 1x
- Category: Snack
- Cuisine: American
Ingredients
- 1 cup raw pumpkin seeds (pepitas)
- 1 tablespoon extra virgin olive oil
- 1/2 teaspoon fine sea salt
- Cold water (for cleaning)
Instructions
- Extract seeds from the pumpkin and place them in a large bowl.
- Fill the bowl with cold water and swirl the seeds. Remove floating pulp and bad seeds. Repeat until water is clear.
- Drain seeds in a colander and pat them completely dry with a clean kitchen towel.
- Transfer dried seeds to a mixing bowl. Drizzle with olive oil and sprinkle with sea salt. Toss to coat evenly.
- Preheat oven to 300°F (150°C).
- Line a baking sheet with parchment paper. Spread seeds in a single layer without overlapping.
- Roast for 45 minutes, stirring every 15 minutes to ensure even browning.
- Remove from oven when golden brown and nutty smelling. Let cool completely on the pan to crisp up.
Notes
Ensure seeds are thoroughly dried before roasting to prevent steaming. Stirring every 15 minutes is crucial for even cooking. Do not store in the fridge as moisture will make them soggy. They can be revived in the oven at 200°F for 10 minutes if they lose crunch.
Nutrition
- Serving Size: 1 cup
- Calories: 160
- Sodium: 200
- Fat: 14
- Saturated Fat: 2
- Carbohydrates: 2
- Fiber: 2
- Protein: 9
Keywords: pumpkin seeds, pepitas, roasted seeds, healthy snack, gluten-free, vegan, fall recipe, zero waste, keto snack