I did not trust soda bread to be anything more than a dense, brick-like souvenir from a tourist trap in Dublin.
Honestly, I thought the whole concept sounded like a mistake until the day I burned my first loaf and realized I was doing it wrong. You know how it is when you hear about a recipe that claims to be “easy” and “traditional” but turns out to be a culinary gamble? That was my relationship with Irish soda bread for years. I assumed it was just a quick fix for people who didn’t have time to wait for yeast to rise, a sort of culinary shortcut that sacrificed flavor for speed.
My grandmother, bless her heart, used to make a version that was more like a flat disc of regret. It was hard enough to use as a doorstop and tasted faintly of cardboard and hope. I avoided it for decades, sticking to my sourdough and brioche habits, convinced that real bread required time, patience, and a lot of kneading.
Then, last winter, I was stuck in a cabin in County Clare with no bakery within fifty miles. The local shop had run out of everything except a bag of plain flour and a carton of sour milk. I had no choice. I had to make it. I followed a recipe I found on a crumpled napkin, mixing the ingredients roughly, as I’d been told to do, and baking it in a cast-iron skillet.
When I broke that first crust open, steam hit my face. It smelled like toasted wheat and warm buttermilk. The interior was tender, with a crumb that looked like a honeycomb. I took a bite, plain, with nothing but a square of salted butter. It was tangy, slightly sweet, and incredibly comforting. It wasn’t just bread; it was a hug in food form.
I was wrong about it being a mistake. It’s actually a masterpiece of simplicity. That loaf changed how I view quick breads forever. I still love my sourdough, but there is something magical about a bread that comes together in minutes and tastes like it took hours. If you’ve been skeptical, like I was, give it a chance. The proof is in the crust.
Why You’ll Love This Recipe
There is a reason this recipe has survived for over a century in Ireland, and it’s not just because it’s cheap. It’s because it works, every single time, when you respect the chemistry. Here is why this classic traditional Irish soda bread belongs in your weekly rotation:
- Quick & Easy: This comes together in under 15 minutes of active prep time. No kneading, no rising, no waiting. It is perfect for busy weeknights or when you just need bread immediately. You can have it in the oven in the time it takes to boil water for tea.
- Simple Ingredients: No fancy grocery trips needed. You likely already have everything in your kitchen. Flour, baking soda, salt, and buttermilk are staples that rarely go bad. It is pantry-friendly in the best way possible.
- Perfect for St. Patrick’s Day: Great for holiday mornings, family gatherings, or just any day you want to feel a bit festive. It is the unofficial star of March celebrations, but it is good year-round.
- Crowd-Pleaser: Always gets rave reviews from kids and adults alike. Even people who claim they “don’t like bread” usually admit they like this one because it isn’t chewy or yeasty.
- Unbelievably Delicious: The texture and flavor combo is next-level comfort food. The tang from the buttermilk cuts through the richness of the butter, creating a balance that is hard to beat.
What makes this recipe different from the rest is the ratio of acid to base. Baking soda reacts with the lactic acid in the buttermilk to create carbon dioxide bubbles, which leaven the bread. If you use regular milk, it doesn’t work as well. If you overmix, the gluten develops and it gets tough. I have tested this recipe with various flours, and all-purpose is the sweet spot. It isn’t just another version of soda bread—it’s the one that gets the crumb right every time.
This recipe isn’t just good—it is the kind that makes you close your eyes after the first bite. It’s comfort food reimagined—healthier, faster, but with the same soul-soothing satisfaction. Perfect for impressing guests without stress, or turning a simple meal into something memorable.
What Ingredients You Will Need
This recipe uses simple, wholesome ingredients to deliver bold flavor and satisfying texture without the fuss. The beauty of this bread lies in its minimalism. You don’t need yeast, eggs, or sugar. Just four core ingredients that interact in a specific chemical dance.
Here is what you need to get started:
- Self-rising flour (450g / 3 ½ cups): This is the traditional choice in Ireland. It already contains the baking powder and salt needed. If you can’t find it, see the substitution notes below. I recommend using a high-protein variety for a better crumb structure.
- Baking soda (1 teaspoon / 5g): Even if using self-rising flour, a teaspoon of baking soda ensures a good rise and helps with browning. It reacts with the acid in the buttermilk.
- Salt (1 teaspoon / 6g):** This is crucial. It brings out the flavor of the wheat. Do not skip this, or the bread will taste flat. Kosher salt works best, but table salt is fine.
- Buttermilk (450ml / 1 ¾ cups): This is the most important ingredient. The acid in the buttermilk activates the baking soda. Use full-fat buttermilk for the best texture. If you are out, mix 1 tablespoon of lemon juice or white vinegar into regular milk and let it sit for 10 minutes.
Substitution Guidance:
If you cannot find self-rising flour, you can make your own. For every 450g (3 ½ cups) of all-purpose flour, add 2 teaspoons of baking powder and 1 teaspoon of salt. Whisk them together thoroughly before using. This is a common hack for bakers in the US who don’t stock self-rising flour.
Optional Add-ins:
While the traditional recipe is plain, some people like to add a handful of raisins or caraway seeds. I personally prefer the plain version to appreciate the tang of the buttermilk, but if you want a sweeter loaf, add 100g of raisins. Toss them in a little flour first so they don’t sink to the bottom.
The quality of your flour matters. I like to use a standard all-purpose flour with a protein content around 10-12%. Too much protein, and the bread gets tough. Too little, and it falls apart. Buttermilk should be cold. This keeps the fat in the flour from melting too early, which helps with texture.
Equipment Needed
You don’t need a lot of fancy gadgets to make this bread. In fact, keeping it simple is part of the charm. Here is what you will need:
- A large mixing bowl: Something wide enough to mix the dough comfortably. A ceramic or glass bowl works well, but stainless steel is fine too.
- A baking sheet or tray: To catch any drips and provide a flat surface for the loaf. Line it with parchment paper for easy cleanup.
- A sharp knife or dough scraper: You need this to score the top of the loaf before baking. A sharp chef’s knife works best for clean cuts.
- A wire cooling rack: Essential for letting the bread cool evenly. If you leave it on the hot pan, the bottom will get soggy.
- Optional: Cast-iron skillet: If you want a thicker, crispier crust, bake it in a preheated cast-iron skillet. This is a pro move for that rustic bakery look.
If you don’t have a wire rack, you can balance the bread across two inverted mugs. It’s a bit makeshift, but it works in a pinch. The most important tool is your hands. You need to mix this quickly and gently. A spoon or your fingers will do. Just avoid using a stand mixer, as the mechanical action will overwork the gluten and make the bread tough.
Preparation Method
Making this bread is straightforward, but timing is everything. Once you add the buttermilk, the clock starts ticking. Here is how to do it right.
- Preheat the oven to 220°C (425°F). This high heat is crucial for the initial rise and crust formation. Make sure the oven is fully heated before you put the bread in. Place a rack in the center of the oven.
- Prepare your baking surface. Line a baking sheet with parchment paper. Dust it lightly with flour. This prevents sticking and helps the bread hold its shape.
- Mix the dry ingredients. In your large bowl, whisk together the self-rising flour, baking soda, and salt. Make sure the baking soda is evenly distributed. If you see clumps of baking soda in the final bread, it will taste bitter. Whisking helps prevent this.
- Add the buttermilk. Make a well in the center of the flour mixture. Pour in the cold buttermilk. Use all of it. The dough should be soft and slightly sticky, but not wet like a cake batter. If it seems too dry, add a splash more buttermilk. If too wet, add a sprinkle of flour.
- Mix quickly and gently. Use a fork or your hands to bring the dough together. Stop as soon as the flour is moistened. There will still be some dry bits. This is intentional. Overmixing develops gluten, which makes the bread dense and tough. You want a tender crumb. Do not knead it.
- Shape the loaf. Turn the dough out onto a lightly floured surface. Gently pat it into a round loaf about 5cm (2 inches) thick. Handle it as little as possible. Fold any dry bits into the center. Shape it into a neat circle.
- Transfer to the baking sheet. Place the loaf on the prepared baking sheet. It should be about 10cm (4 inches) wide.
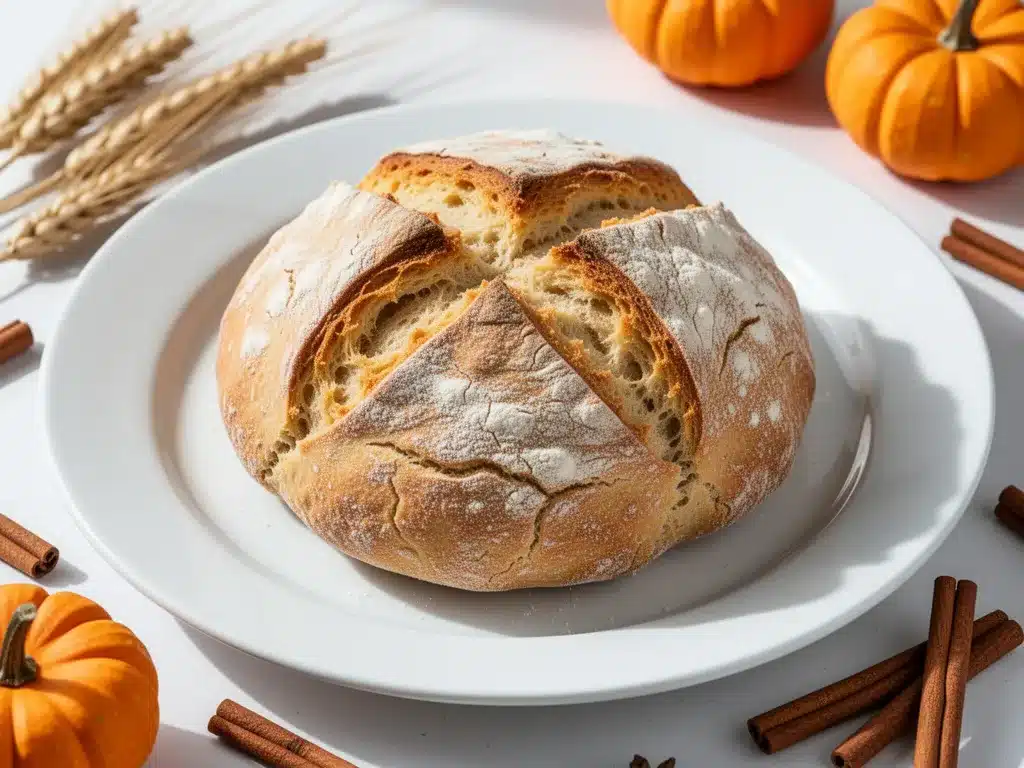
- Score the top. This is a traditional step with symbolic meaning, but it also helps the bread expand evenly. Use a sharp knife to cut a deep cross into the top of the loaf. The cut should go almost to the bottom. This is said to let the fairies out, but practically, it helps the center cook through.
- Bake. Put the bread in the oven and bake for 20-25 minutes. The crust should be golden brown and sound hollow when you tap the bottom. If it sounds dull, it needs more time.
- Cool. Remove the bread from the oven and transfer it to a wire rack. Let it cool for at least 10 minutes before slicing. If you cut it hot, the steam escapes too fast, and the crumb can become gummy.
Pro Tip: If your kitchen is cold, the buttermilk might get too cold too fast. Let it sit out for 5 minutes before adding it to the flour. This ensures a better reaction with the baking soda.
Cooking Tips & Techniques
Getting the texture right takes a little practice. Here are some tips from my own kitchen failures and successes.
- Don’t overmix: This is the number one mistake. When you mix the dough, it should look shaggy and uneven. If it looks smooth, you’ve mixed it too long. The goal is to just bring it together, not to make it elastic.
- Keep it cold: Use cold buttermilk. This helps keep the fat in the flour solid until it hits the oven, creating steam pockets that lift the bread. If your kitchen is warm, chill your bowl and flour beforehand.
- Use a hot oven: Soda bread relies on rapid expansion. A lower oven temperature will result in a flat, dense loaf. Make sure your oven is at 220°C (425°F) before you put the bread in.
- Check for doneness: The color of the crust is a good indicator, but the sound is better. Tap the bottom of the loaf. It should sound hollow. If it sounds solid, bake for another 5 minutes.
- Storage: Soda bread is best eaten fresh. It does not store well for more than a day or two because it lacks preservatives. If you need to keep it longer, slice it and freeze it. Toast slices directly from the freezer.
I once tried to make this with yogurt instead of buttermilk. It worked, but the flavor was slightly different. Buttermilk has a unique tang that yogurt doesn’t quite match. Stick to buttermilk for the authentic taste. Also, don’t be afraid of the cross. It’s not just for show. It helps the heat penetrate the center of the loaf, which is thick and dense. Without the cross, the center might remain undercooked.
Variations & Adaptations
While the classic recipe is perfect, there are fun ways to tweak it.
- Raisin Soda Bread: Add 100g of raisins to the dry ingredients before adding the buttermilk. This is a popular variation, especially in the US. The raisins add sweetness and chewiness.
- Caraway Seed Bread: Add 1 teaspoon of caraway seeds to the flour. This gives it an earthy, slightly anise-like flavor that pairs well with savory toppings.
- Gluten-Free Option: Use a 1:1 gluten-free flour blend. Make sure it contains xanthan gum, or add ½ teaspoon yourself. The texture will be slightly more crumbly, but it still works.
- Vegan Version: Use plant-based buttermilk. Mix 1 tablespoon of lemon juice into 1 cup of soy milk or oat milk. Soy milk works best because it has a higher protein content, which helps with structure.
- Whole Wheat: Substitute half the all-purpose flour with whole wheat flour. This adds a nuttier flavor and more fiber. The bread will be denser, so don’t overmix.
I tried a version with cheddar cheese and chives once. It was surprisingly good, almost like a savory scone. But for the true classic experience, stick to the plain version. The simplicity allows the quality of the ingredients to shine.
Serving & Storage Suggestions
This bread is best served warm, fresh from the oven.
- Serving: Slice it thickly. Spread it with salted butter. The butter should melt into the warm crumb. It is also great with soup, stew, or a simple salad. The tangy flavor cuts through rich foods beautifully.
- Storage: Store leftovers in an airtight container or a bread bag at room temperature for up to 2 days. It will dry out after that. Do not refrigerate it, as this makes it go stale faster.
- Freezing: Slice the bread before freezing. Wrap slices in plastic wrap and place them in a freezer bag. Freeze for up to 3 months. Toast slices directly from the freezer for a fresh-baked taste.
- Reheating: If you have a whole loaf, wrap it in foil and warm it in a 180°C (350°F) oven for 10 minutes. This restores the softness of the crumb.
The flavor of soda bread is best on the day it is made. It doesn’t improve with age like sourdough. So, make it when you plan to eat it. It’s a bread for now, not later.
Nutritional Information & Benefits
This bread is relatively simple in its nutritional profile.
- Calories: Approximately 250 calories per slice (1/8th of the loaf).
- Carbohydrates: High in carbs, primarily from the flour.
- Protein: Moderate protein content from the flour.
- Fat: Low in fat, unless you add butter or oil.
- Fiber: Depends on the flour used. Whole wheat versions have more fiber.
It is naturally free of eggs and dairy (if using vegan buttermilk). It is a good source of energy. The buttermilk adds probiotics, which are good for gut health, though baking may reduce the live cultures. It is a wholesome, unprocessed bread that fits into a balanced diet.
Conclusion
Making classic traditional Irish soda bread is a rewarding experience. It teaches you to appreciate simplicity and the chemistry of baking. It’s a bread that connects you to history, to Ireland, and to the comfort of home baking.
I encourage you to try it. Don’t be afraid of the simplicity. Trust the process. And don’t overmix! Once you taste it fresh with butter, you’ll understand why it has been a staple for so long.
If you make this recipe, I’d love to hear how it turned out. Leave a comment below with your thoughts. Did you add raisins? Did you use self-rising flour or make your own? Share your experiences and variations.
Thanks for reading. Happy baking!
FAQs
Can I use regular milk instead of buttermilk?
You can, but you need to add acid. Mix 1 tablespoon of lemon juice or white vinegar into 1 cup of milk and let it sit for 10 minutes. This creates a buttermilk substitute. Without the acid, the baking soda won’t activate properly, and the bread won’t rise.
Why did my soda bread turn out dense?
This usually happens for two reasons: overmixing or an old baking soda. If you mix the dough too long, you develop gluten, which makes it tough. Also, check the expiration date of your baking soda. If it’s old, it won’t react with the buttermilk.
Can I freeze soda bread?
Yes, but it’s best to freeze it sliced. Wrap the slices in plastic wrap and place them in a freezer bag. Freeze for up to 3 months. Toast slices directly from the freezer for the best texture.
Is Irish soda bread gluten-free?
No, traditional Irish soda bread is made with wheat flour. However, you can make a gluten-free version using a 1:1 gluten-free flour blend. Just make sure the blend contains xanthan gum for structure.
Why do I cut a cross in the top?
Traditionally, the cross is said to let the fairies out. Practically, it helps the heat penetrate the center of the thick loaf, ensuring it cooks evenly. It also helps the bread expand properly in the oven.
Pin This Recipe!
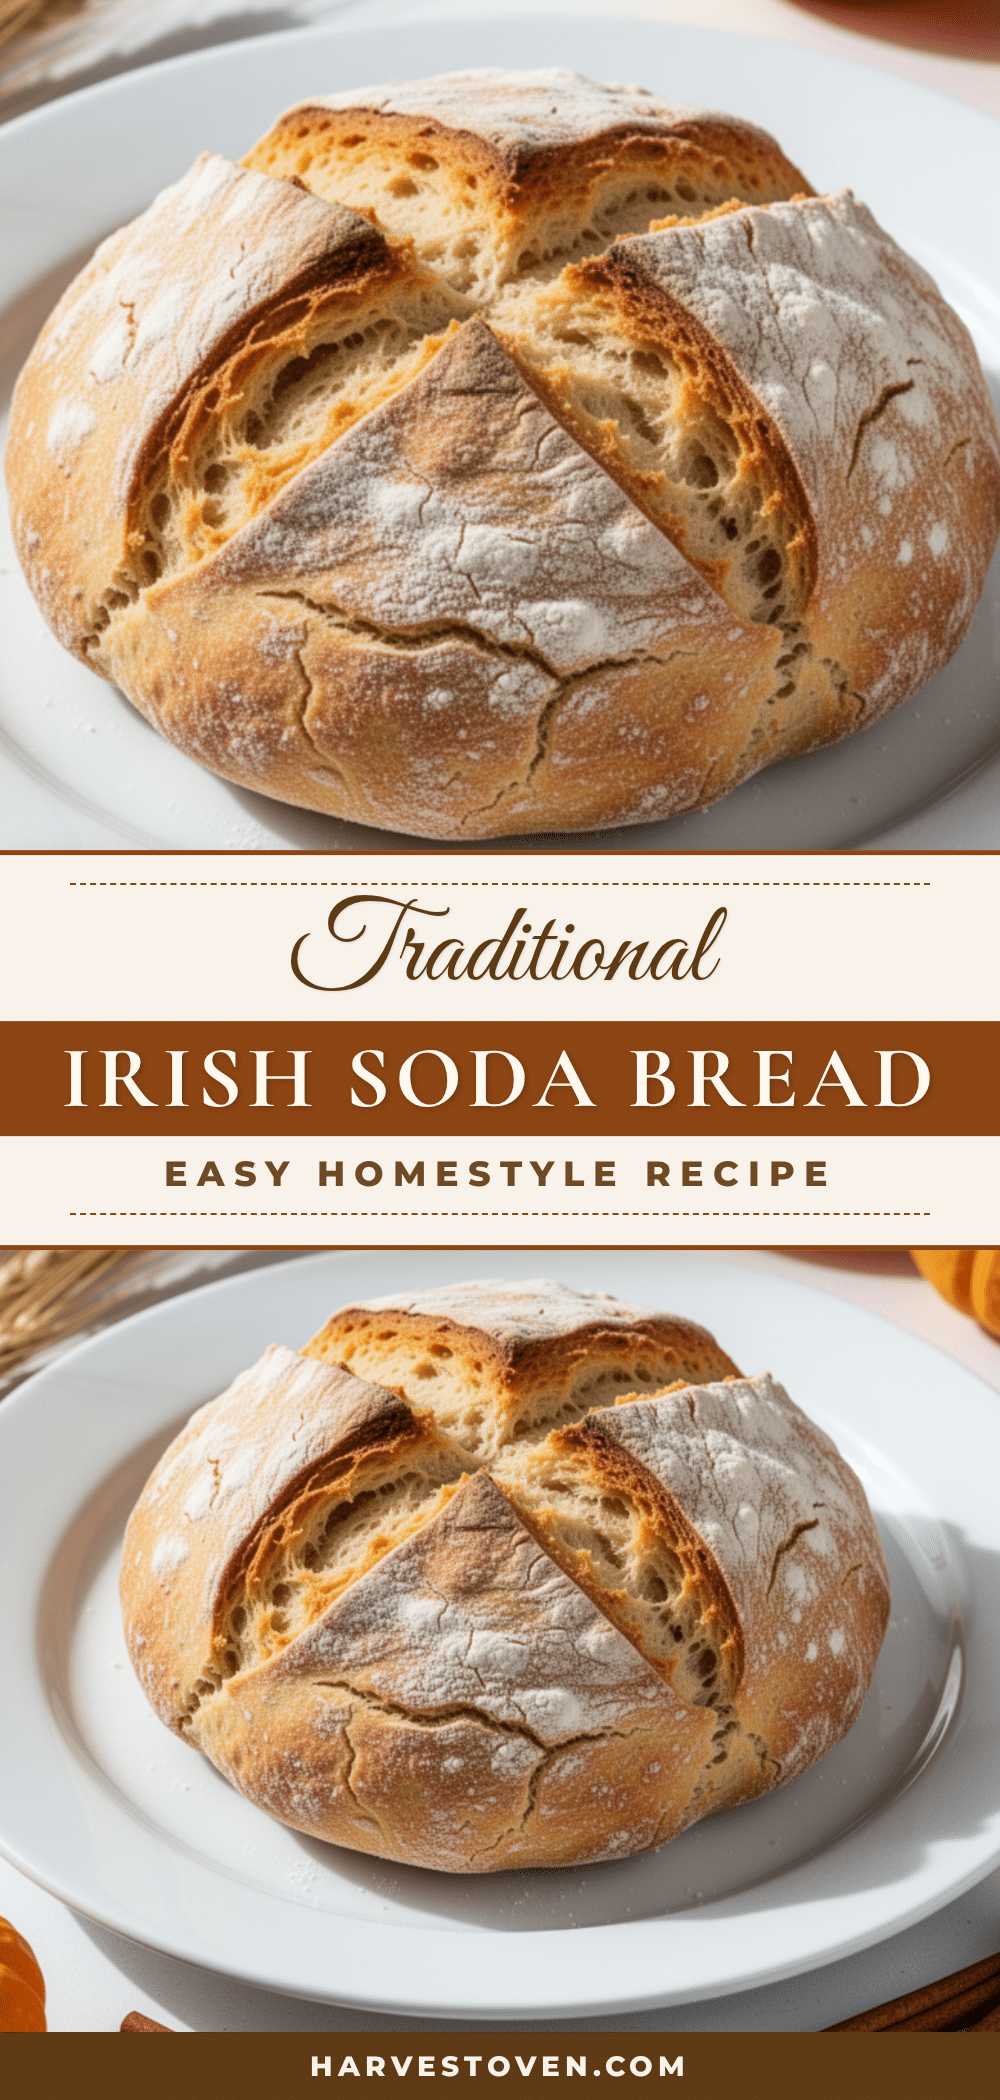
Classic Traditional Irish Soda Bread: Easy Homemade Recipe

A simple, traditional Irish soda bread that requires no yeast or kneading. Made with just four ingredients, this quick bread offers a tender, tangy crumb and a golden crust, perfect for any meal.
- Prep Time: 15 minutes
- Cook Time: 20-25 minutes
- Total Time: 35-40 minutes
- Yield: 1 loaf (8 servings) 1x
- Category: Bread
- Cuisine: Irish
Ingredients
- 450g (3 ½ cups) self-rising flour (or 450g all-purpose flour + 2 tsp baking powder + 1 tsp salt)
- 1 teaspoon baking soda
- 1 teaspoon salt
- 450ml (1 ¾ cups) cold buttermilk
- Optional: 100g raisins or 1 tsp caraway seeds
Instructions
- Preheat the oven to 220°C (425°F) and place a rack in the center.
- Line a baking sheet with parchment paper and dust lightly with flour.
- In a large bowl, whisk together the self-rising flour, baking soda, and salt to ensure even distribution.
- Make a well in the center of the dry ingredients and pour in the cold buttermilk.
- Mix quickly and gently with a fork or hands until the dough is just moistened and shaggy; do not overmix or knead.
- Turn the dough onto a lightly floured surface and gently pat it into a round loaf about 5cm (2 inches) thick.
- Transfer the loaf to the prepared baking sheet.
- Score a deep cross into the top of the loaf with a sharp knife, cutting almost to the bottom.
- Bake for 20-25 minutes until the crust is golden brown and the bottom sounds hollow when tapped.
- Remove from the oven and transfer to a wire rack to cool for at least 10 minutes before slicing.
Notes
Do not overmix the dough to avoid a tough texture. Use cold buttermilk to help create steam pockets for a lighter crumb. If self-rising flour is unavailable, substitute with all-purpose flour, baking powder, and salt. The cross cut helps the bread expand evenly and ensures the center cooks through.
Nutrition
- Serving Size: 1 slice (1/8th of th
- Calories: 250
- Sugar: 1
- Sodium: 600
- Fat: 1
- Saturated Fat: 0.5
- Carbohydrates: 45
- Fiber: 2
- Protein: 6
Keywords: Irish soda bread, traditional bread, quick bread, no yeast bread, St. Patrick's Day, homemade bread, easy baking