Third time this week and I’m still chasing that perfect chew. The first batch came out too crisp, like little sugar shards that snapped when you bit into them. The second time, I underbaked them slightly, hoping for a gooey center, but they just spread into flat, greasy discs. Honestly, it’s embarrassing how many cookies I’ve sent to the trash bin over the last forty-eight hours. But here I am, standing in my kitchen at 10 PM, flour dusting my apron, waiting for the third oven cycle to ding.
There is something compulsive about getting the texture right on a soft batch sugar cookie. It’s not just about the sweetness; it’s about that specific mouthfeel—the kind that yields immediately under your teeth but doesn’t crumble into crumbs on your shirt. I’ve tried swapping butter for oil, using cake flour instead of all-purpose, and even chilling the dough for three full days. Nothing clicked until I stopped overthinking the chemistry and started trusting the visual cues. The edges need to stay pale, almost ghostly white, while the centers look just set enough to hold their shape.
These Soft Batch Iced Sugar Cookies have become my obsession. I made them for a Tuesday night dinner party, then again for my neighbor’s kid’s birthday, and now I’m making them because I simply can’t stop. It’s a weird loop, really. The dough is forgiving, the icing is straightforward, and the result is consistently soft, pillowy, and incredibly flavorful. I don’t know if it’s the extra yolk in the dough or the way I roll them out thick, but something about this batch feels different. Better. More reliable.
I used to think I needed a complicated recipe with five different types of sugar to get that soft texture. Turns out, it’s just about balance and patience. You know how it is when you’re tweaking a recipe? You start questioning your entire life choices. But after these third attempts, I finally got it. The cookies are tender, the icing doesn’t crack when you bite it, and they stay soft for days if you store them right. I’m not saying I’ll never make another batch, but I think I’ve found my forever recipe. At least until I decide to mess with it again.
Why You’ll Love This Recipe
Let’s be real for a second. There are a thousand sugar cookie recipes out there. Some are crisp, some are cakey, and some are just plain dry. This Soft Batch Iced Sugar Cookies recipe is different because it actually delivers on the promise of “soft.” I’ve tested this version more times than I care to admit, tweaking the ratios and baking times until it hit that sweet spot. It’s not just a recipe; it’s a solution to the common problem of cookies that turn into hockey pucks in the oven.
- Quick & Easy: You can have these cookies from bowl to plate in under an hour. No overnight chilling required if you’re in a rush, though a quick chill helps with handling. It’s perfect for last-minute cravings or when guests drop by unexpectedly.
- Simple Ingredients: You likely already have everything you need in your pantry. Flour, sugar, butter, eggs, vanilla, and baking powder. No fancy, hard-to-find ingredients. This makes it accessible for anyone, regardless of their baking skill level.
- Perfect for Decorating: The thick, soft texture provides the perfect canvas for royal icing. The cookies don’t spread too much, so your designs stay crisp and defined. They are ideal for holidays, birthdays, or just because you want to make something pretty.
- Crowd-Pleaser: Kids love them because they are sweet and soft. Adults love them because they aren’t overly sweet or cloying. They strike a balance that appeals to almost everyone. I’ve served these at potlucks and watched the plate disappear in minutes.
- Unbelievably Delicious: The flavor is rich and buttery, with a hint of vanilla that isn’t overpowering. The texture is like a cloud—light, airy, and melt-in-your-mouth. It’s comfort food in its purest form.
What makes this recipe stand out is the technique. We use a combination of butter and a touch of cornstarch to inhibit gluten formation, ensuring that tender crumb. Plus, rolling the dough slightly thicker than you think you need to prevents them from flattting out too much. It’s a small detail, but it makes a huge difference. This isn’t just another sugar cookie recipe; it’s the one that finally solved the “crisp cookie” problem for me. It’s the kind of cookie that makes you close your eyes after the first bite and just sigh. It’s nostalgic, but also modern in its texture. Perfect for impressing guests without the stress of complicated piping techniques, or just turning a boring Tuesday into something special.
What Ingredients You Will Need
This recipe relies on simple, wholesome ingredients to deliver bold flavor and satisfying texture without the fuss. The beauty of soft batch sugar cookies lies in the balance of fats and sugars, which creates that signature chew. You don’t need expensive specialty flours or obscure extracts. Just good quality basics and a few smart choices.
- All-Purpose Flour (2 ¼ cups / 280g): The foundation of the cookie. Don’t use cake flour unless you want them even more tender, but all-purpose gives that perfect balance of structure and softness. Sift it if you’re paranoid about lumps, but honestly, just spooning it in works fine.
- Unsalted Butter (1 cup / 226g, softened): Room temperature butter is key. It needs to be soft enough to indent with your finger but not melted. This helps create an emulsion with the sugar, which traps air and leads to a lighter texture. I prefer European-style butter for a richer flavor, but standard grocery store brands work well too.
- Granulated Sugar (1 cup / 200g): This provides the structure and the classic sugar cookie taste. Don’t substitute with brown sugar here; you want that clean, sweet flavor and the ability to roll the dough in sugar before baking for a little crunch.
- Powdered Sugar (½ cup / 60g): This is the secret weapon for softness. It interferes with gluten development and retains moisture. It also adds a slight tenderness that granulated sugar alone can’t achieve.
- Large Eggs (1 whole + 1 yolk): Using an extra yolk adds fat and richness, contributing to that soft, cake-like crumb. The whole egg provides structure, while the yolk adds luxury. It’s a small detail that makes a big difference.
- Vanilla Extract (2 teaspoons): Use pure vanilla extract, not imitation. The flavor of these cookies is simple, so the vanilla needs to shine. It adds warmth and depth.
- Baking Powder (1 teaspoon): This provides the lift. Since we aren’t using baking soda, the baking powder is what helps these cookies rise slightly and stay soft.
- Salt (½ teaspoon): Never skip the salt. It balances the sweetness and enhances the flavor of the butter and vanilla. It’s the unsung hero of baking.
- Cornstarch (1 tablespoon): This is the game-changer. It softens the gluten strands, resulting in a more tender cookie. It’s the same trick used in shortbread, and it works wonders here.
For the icing, you’ll need powdered sugar, milk or cream, vanilla extract, and food coloring if you want some flair. Keep it simple. The icing is just a vehicle for the fun part—decorating. If you’re allergic to dairy, you can swap the butter for a high-quality vegan butter stick and use plant-based milk in the icing. It won’t be exactly the same, but it will still be delicious.
Equipment Needed
You don’t need a fancy kitchen to make these cookies. A few basic tools will get you through the process smoothly. The most important piece of equipment is a good set of mixing bowls. One large bowl for the wet ingredients and one medium bowl for the dry. If you don’t have a stand mixer, a hand mixer works perfectly fine. I actually prefer using a hand mixer for this dough because it’s easier to control and you don’t overmix as easily.
A silicone baking mat is a huge help. It prevents sticking and ensures even baking. Parchment paper works too, but you might need to re-grease it if you’re making a lot of cookies. I recommend getting a couple of large baking sheets. You’ll need to rotate them in the oven for even browning, so having two sets is useful.
For rolling the dough, a rolling pin is essential. I like a French-style rolling pin without a handle because it gives you better control over the thickness. But any rolling pin will do. A cookie cutter of your choice is next. Round cutters are classic, but don’t be afraid to try shapes for holidays. A sharp knife can also work if you’re cutting freeform shapes.
Finally, a cooling rack is non-negotiable. You need to let the cookies cool completely before icing, or the icing will melt and slide off. A wire rack allows air to circulate underneath, cooling them faster than leaving them on the hot pan. If you’re on a budget, you can skip the fancy tools and just use what you have. The recipe is forgiving, so don’t stress over the equipment.
Preparation Method

Making these Soft Batch Iced Sugar Cookies is straightforward, but precision matters. Here is how you do it step by step.
- Preheat and Prep: Preheat your oven to 350°F (175°C). Line your baking sheets with silicone mats or parchment paper. This ensures easy cleanup and prevents sticking. Take your butter out of the fridge at least an hour before you start so it comes to room temperature.
- Mix Dry Ingredients: In a medium bowl, whisk together the all-purpose flour, baking powder, cornstarch, and salt. Whisking these together ensures that the leavening agents and salt are evenly distributed. This step prevents pockets of baking powder that could make your cookies taste metallic.
- Cream Butter and Sugars: In a large bowl, beat the softened butter, granulated sugar, and powdered sugar together on medium-high speed for about 3-4 minutes. You want this mixture to be light, fluffy, and pale in color. This step incorporates air into the dough, which is crucial for the soft texture. Don’t rush this part.
- Add Eggs and Vanilla: Add the whole egg, egg yolk, and vanilla extract to the butter mixture. Beat on medium speed until fully combined, scraping down the sides of the bowl with a spatula. Make sure there are no streaks of egg white left.
- Combine Wet and Dry: Gradually add the dry ingredients to the wet ingredients. Mix on low speed just until the flour disappears. Overmixing at this stage can develop gluten and make the cookies tough. Stop mixing as soon as you no longer see streaks of flour. The dough should look slightly shaggy.
- Chill the Dough: Divide the dough into two discs and wrap them tightly in plastic wrap. Refrigerate for at least 30 minutes, or up to 24 hours. Chilling firms up the butter, which prevents the cookies from spreading too much in the oven. It also allows the flavors to meld. If you skip this step, your cookies might turn into flat puddles.
- Roll and Cut: Preheat your oven to 350°F (175°C) if you haven’t already. Take one disc of dough out of the fridge. On a lightly floured surface, roll the dough out to about ¼-inch thickness. Use a cookie cutter to cut out shapes. Re-roll the scraps to cut more cookies. Place them on the prepared baking sheets, leaving about 1 inch between each cookie.
- Bake: Bake for 8-10 minutes. The cookies are done when the edges are just barely set but still look soft and pale. They should not brown at all. If you see browning, they are overbaked and will become crisp. The centers will look slightly underdone, but they will firm up as they cool.
- Cool Completely: Let the cookies cool on the baking sheet for 5 minutes, then transfer them to a wire rack to cool completely. This is vital. If you ice them while they are warm, the icing will melt and slide off. Patience is key here.
While the cookies cool, you can make the icing. Mix powdered sugar, vanilla, and milk until you reach a thick but pipeable consistency. Adjust the milk one teaspoon at a time. The icing should be thick enough to hold its shape but thin enough to spread easily.
Cooking Tips & Techniques
Getting the texture right is all about technique. Here are some tips I’ve learned through trial and error.
First, measure your flour correctly. Scooping flour directly from the bag packs it down, leading to dry cookies. Instead, fluff the flour with a spoon, then gently scoop it into your measuring cup and level it off with a knife. This ensures you’re using the right amount of flour. If you use too much flour, your cookies will be dense and hard.
Second, don’t overbake. This is the most common mistake. Sugar cookies continue to cook on the hot baking sheet after you take them out of the oven. So, when you pull them out, they should still look soft and slightly underdone in the center. The edges should be very pale, almost white. Any browning means they are starting to crisp up.
Third, chill the dough again if it gets too warm. If you’re decorating a large batch, the dough might soften from the heat of your hands. Pop the scraps back in the fridge for 10 minutes before rolling them out again. This keeps the shapes crisp and defined.
Fourth, use an egg wash if you want extra shine. Before baking, you can brush the cookies with a little milk or egg white mixed with water. This helps the sugar sprinkles stick and gives the cookies a slight sheen. It’s a nice touch for special occasions.
Finally, be patient with the cooling process. Rushing this step will ruin your icing. Let the cookies cool completely to room temperature. If you’re in a hurry, you can put them in the fridge for 15 minutes, but make sure they are fully cool before icing. Warm cookies will melt the icing, and cold cookies will cause the icing to crack.
Variations & Adaptations
While the classic vanilla flavor is timeless, there are plenty of ways to customize these Soft Batch Iced Sugar Cookies. Here are a few ideas.
Flavor Variations: You can add different extracts to the dough. Try lemon extract for a citrusy twist, or almond extract for a marzipan-like flavor. You can also add zest from a lemon, orange, or lime. Start with 1 teaspoon of zest and adjust to taste. For a chocolate version, substitute ¼ cup of flour with cocoa powder. Note that this will change the texture slightly, making them denser.
Dietary Adaptations: For a gluten-free option, use a 1-to-1 gluten-free flour blend that contains xanthan gum. The texture might be slightly more crumbly, but it will still be soft. For a dairy-free version, use a vegan butter stick and plant-based milk in the icing. The results might not be exactly the same, but they will still be delicious.
Seasonal Twists: For holidays, add red and green food coloring to the dough. Or, sprinkle cinnamon sugar on top before baking for a gingerbread-like flavor. In the summer, you can add fresh berries to the dough, but be aware that the moisture from the berries might affect the texture. It’s best to fold in dried fruits or freeze-dried berries for better results.
Personal Variation: I sometimes add a tablespoon of cream cheese to the dough. It adds a slight tang and makes the cookies even softer. It’s a small change, but it adds a layer of complexity to the flavor. You can also add a pinch of cardamom or nutmeg for a warm, spiced flavor. Experiment and find what you like best.
Serving & Storage Suggestions
These cookies are best served at room temperature. The soft texture is most apparent when they aren’t cold from the fridge. Pair them with a glass of cold milk or a cup of tea for a perfect afternoon snack. They also make great gifts when packaged in a tin with a ribbon. Just make sure they are completely cool and dry before packaging to prevent moisture buildup.
For storage, keep the cookies in an airtight container at room temperature. Layer them with parchment paper to prevent sticking. They will stay soft for up to 5 days. If you need to store them longer, freeze them. Place the cookies in a single layer on a baking sheet and freeze until solid. Then transfer them to a freezer-safe bag or container. They will keep for up to 3 months. Thaw them at room temperature before icing or eating.
If you ice the cookies, store them in a single layer in an airtight container. The icing might get sticky if stored for too long, so try to eat them within 3 days if they are iced. If you need to stack them, place parchment paper between the layers. Be gentle when handling iced cookies, as the icing can crack if they are moved too much.
Flavors develop over time, so these cookies might taste even better on the second day as the moisture from the dough equilibrates. However, the icing might soften if stored for too long. So, plan accordingly. Make them a day ahead if you can, but ice them just before serving for the best presentation.
Nutritional Information & Benefits
These Soft Batch Iced Sugar Cookies are a treat, but they can fit into a balanced diet if enjoyed in moderation. Each cookie contains approximately 150-180 calories, depending on the size and icing. They are primarily composed of carbohydrates and fats, with a small amount of protein from the eggs and flour.
The butter provides saturated fat, which adds flavor and texture. The sugar provides quick energy but should be consumed in moderation. The flour offers some carbohydrates and a small amount of fiber. The eggs add protein and essential nutrients like choline.
While these cookies are not a health food, they are made with simple ingredients. You can control the amount of sugar in the icing by adjusting the recipe. For a lower-sugar option, you can use a sugar substitute in the dough, but note that this may affect the texture. These cookies are naturally nut-free, making them safe for most people with nut allergies. However, always check your ingredient labels if you have specific dietary restrictions.
From a wellness perspective, baking can be a therapeutic activity. The process of mixing, rolling, and decorating can be calming and mindful. Enjoying a cookie mindfully, savoring the flavor and texture, can be a pleasant break from the day. It’s not about the calories; it’s about the joy and the moment. So, indulge without guilt, but be mindful of portion sizes.
Conclusion
Making Soft Batch Iced Sugar Cookies is a labor of love, but the results are worth every minute. These cookies are soft, chewy, and perfectly sweet, with a texture that is hard to beat. The icing adds a fun, creative element that makes them special. Whether you’re baking for a holiday party, a birthday, or just because, these cookies are sure to impress.
I hope this recipe becomes a staple in your kitchen. Don’t be afraid to experiment with flavors and decorations. Make it your own. And when you do, I’d love to hear about it. Share your creations in the comments below or tag me on social media. I love seeing how you adapt this recipe.
Happy baking! And remember, the key to success is patience. Chill the dough, don’t overbake, and let the cookies cool completely. Do these things, and you’ll be rewarded with the best sugar cookies you’ve ever tasted. Enjoy every bite.
FAQs
Why are my sugar cookies hard?
Sugar cookies often turn out hard if they are overbaked or if too much flour is used. Make sure to bake them for the minimum time and check them frequently. Also, measure your flour correctly by spooning it into the cup rather than scooping. Overmixing the dough can also develop gluten, leading to a tough texture.
Can I freeze the cookie dough?
Yes, you can freeze the cookie dough. Wrap the dough discs tightly in plastic wrap and then in aluminum foil. They can be frozen for up to 3 months. When ready to bake, thaw the dough in the refrigerator overnight before rolling and cutting.
How do I keep the icing from cracking?
Icing cracks if the cookies are not completely cool or if the icing is too thick. Make sure the cookies are at room temperature before icing. Adjust the icing consistency by adding milk one teaspoon at a time until it is smooth and spreadable. Avoid moving the cookies too much after icing.
Can I use brown sugar instead of granulated sugar?
It’s not recommended to use brown sugar for this specific recipe. Brown sugar contains molasses, which adds moisture and acidity. This can change the texture and spread of the cookies, making them less soft and more cakey. Stick to granulated sugar for the best results.
What is the best way to store iced cookies?
Store iced cookies in an airtight container at room temperature. Place them in a single layer if possible. If you need to stack them, use parchment paper between the layers. Keep them away from direct sunlight and heat to prevent the icing from melting or becoming sticky.
Pin This Recipe!
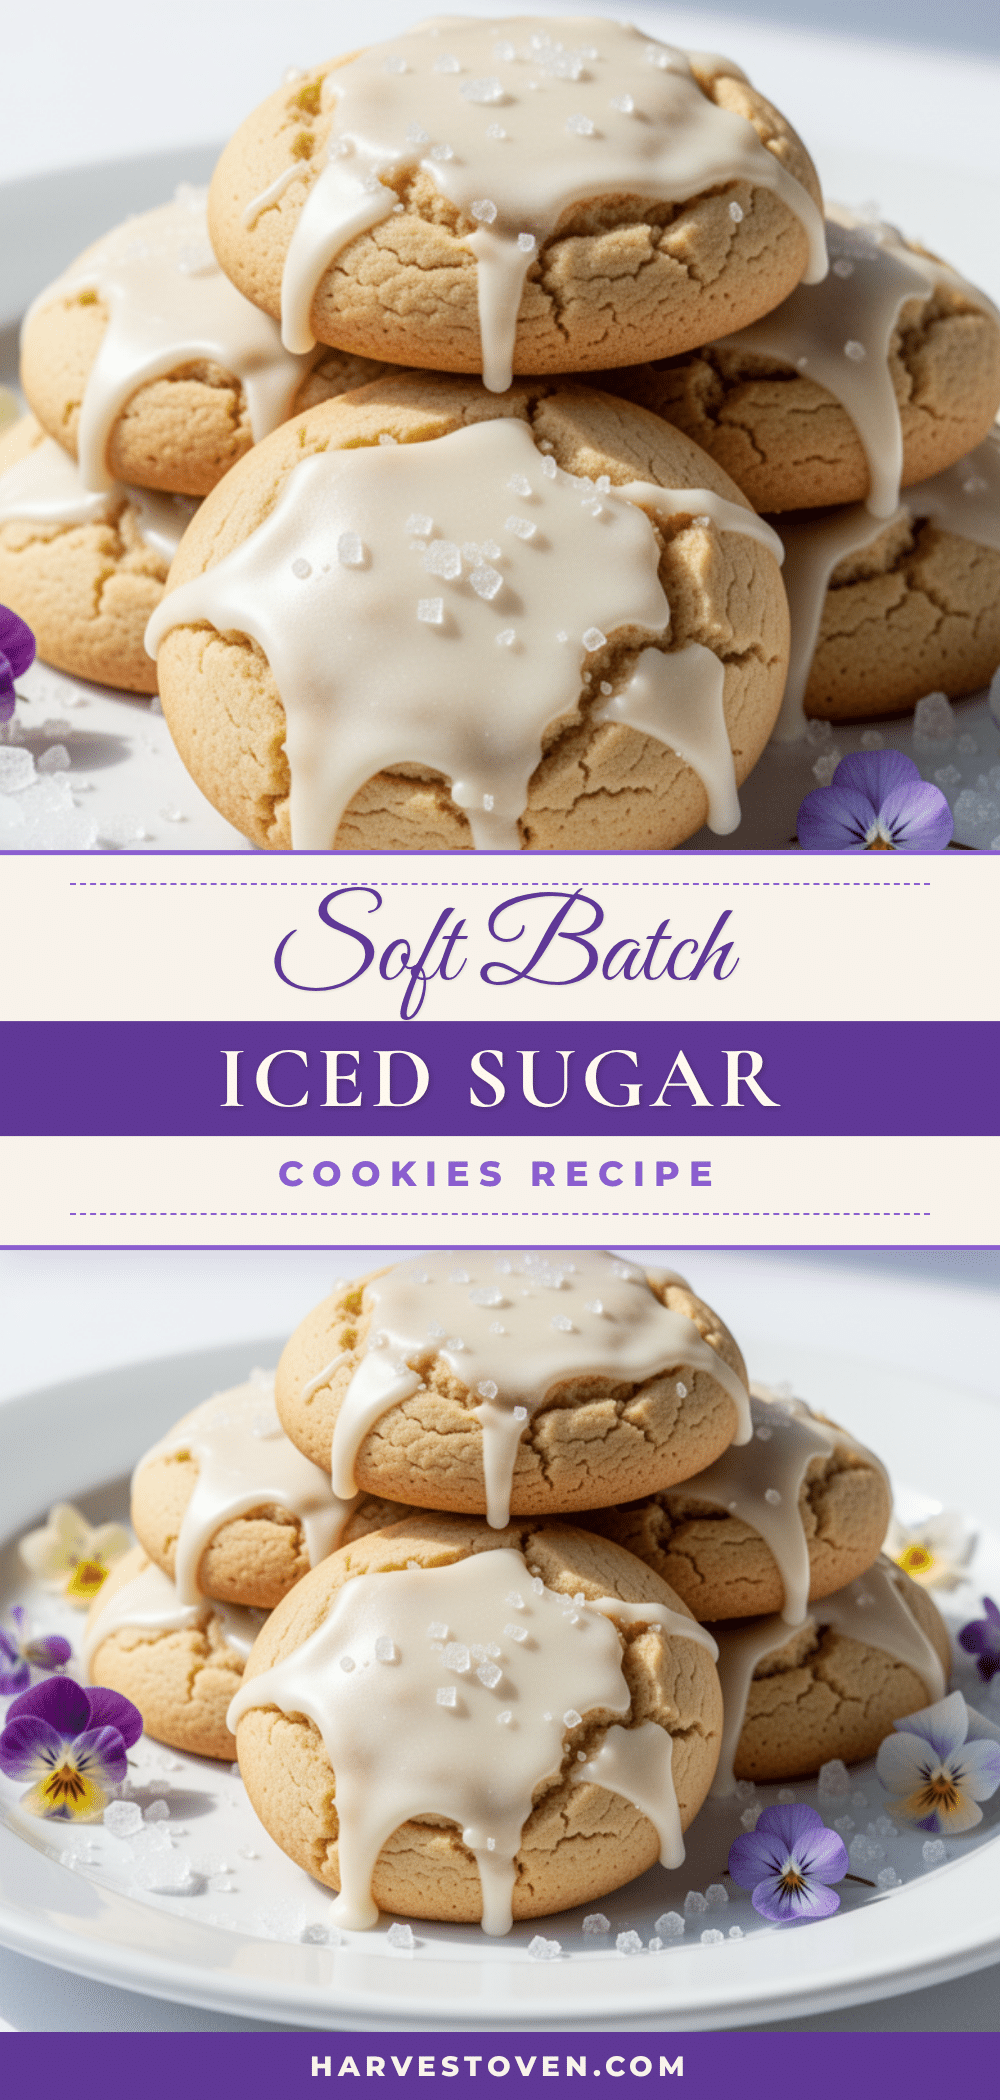
Soft Batch Iced Sugar Cookies: Easy & Best Pinterest Recipe

These soft batch iced sugar cookies are tender, pillowy, and incredibly flavorful. The recipe uses a combination of butter, cornstarch, and an extra egg yolk to ensure a soft texture that doesn’t crisp up, making them perfect for decorating and gifting.
- Prep Time: 30 minutes
- Cook Time: 10 minutes
- Total Time: 40 minutes
- Yield: Approximately 24 cookies 1x
- Category: Dessert
- Cuisine: American
Ingredients
- 2 ¼ cups (280g) All-Purpose Flour
- 1 cup (226g) Unsalted Butter, softened
- 1 cup (200g) Granulated Sugar
- ½ cup (60g) Powdered Sugar
- 1 Large Egg
- 1 Large Egg Yolk
- 2 teaspoons Vanilla Extract
- 1 teaspoon Baking Powder
- ½ teaspoon Salt
- 1 tablespoon Cornstarch
- Milk or Cream (for icing)
- Powdered Sugar (for icing)
- Food Coloring (optional, for icing)
Instructions
- Preheat oven to 350°F (175°C). Line baking sheets with silicone mats or parchment paper.
- In a medium bowl, whisk together the flour, baking powder, cornstarch, and salt.
- In a large bowl, beat the softened butter, granulated sugar, and powdered sugar on medium-high speed for 3-4 minutes until light, fluffy, and pale.
- Add the whole egg, egg yolk, and vanilla extract to the butter mixture. Beat on medium speed until fully combined.
- Gradually add the dry ingredients to the wet ingredients. Mix on low speed just until the flour disappears. Do not overmix.
- Divide the dough into two discs, wrap tightly in plastic wrap, and refrigerate for at least 30 minutes (or up to 24 hours).
- Roll the dough out on a lightly floured surface to about ¼-inch thickness. Cut into shapes using a cookie cutter.
- Place cookies on prepared baking sheets, leaving 1 inch between each cookie.
- Bake for 8-10 minutes. The edges should be pale and just set, while the centers look slightly underdone. Do not let them brown.
- Let cookies cool on the baking sheet for 5 minutes, then transfer to a wire rack to cool completely.
- While cookies cool, mix powdered sugar, vanilla, and milk to create a thick but pipeable icing. Adjust consistency with more milk if needed.
- Ice the completely cooled cookies and allow icing to set before storing.
Notes
Measure flour correctly by spooning it into the cup and leveling it off to avoid dry cookies. Do not overbake; the cookies should look pale and soft in the center. Chill the dough to prevent spreading. Ensure cookies are completely cool before icing to prevent melting.
Nutrition
- Serving Size: 1 cookie
- Calories: 165
- Sugar: 14
- Sodium: 120
- Fat: 8
- Saturated Fat: 5
- Carbohydrates: 22
- Fiber: 0.5
- Protein: 2
Keywords: soft batch sugar cookies, iced sugar cookies, easy cookie recipe, chewy sugar cookies, holiday cookies, baking from scratch