Seven-year-old Maya didn’t say a word. She just stared at the plate, then took a second bite, then a third, before finally looking up with chocolate smeared on her chin and asking if we could have this every day. I laughed, honestly, because I’ve made birthday cakes for years, but usually, there’s polite applause and a quick return to playing with toys. This was different. This was serious business. She loved the best triple layer birthday cake with buttercream not because it was fancy, but because it was reliably, undeniably delicious.
That moment stuck with me. You know how some recipes you make because they’re trendy, or because they look good on Instagram, but they don’t quite hit the spot? This one isn’t like that. It’s the kind of cake that reminds you why you started baking in the first place. It’s not about perfection. It’s about that specific texture—the kind that melts slightly on your tongue before the rich buttercream hits you.
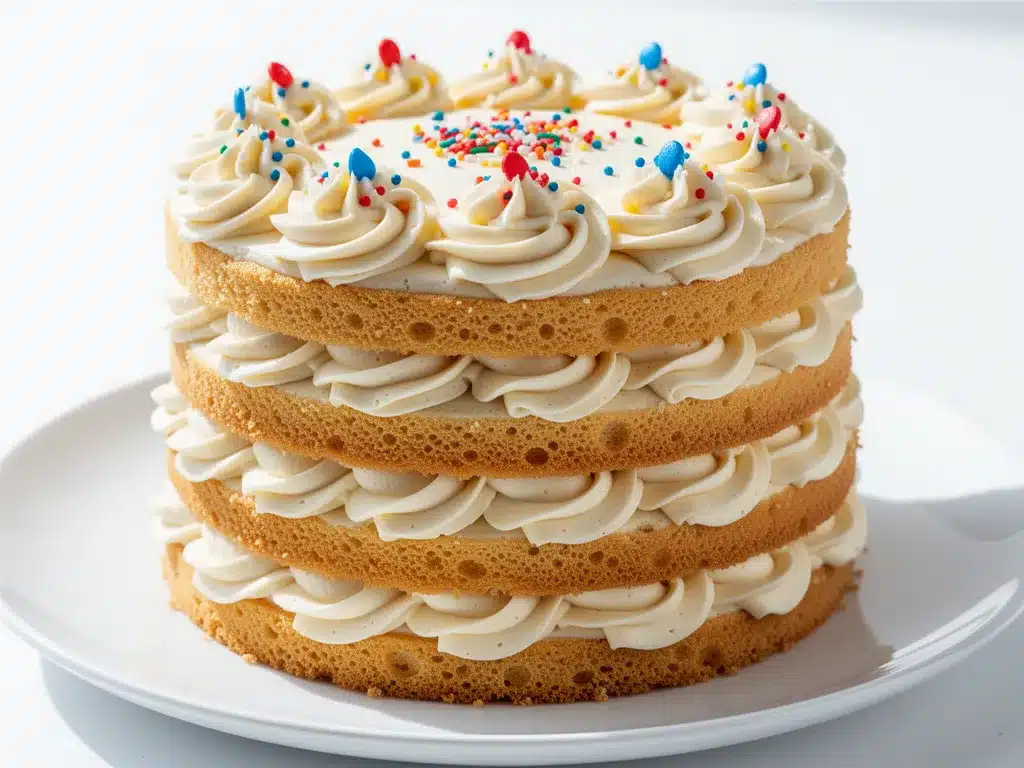
I realized something while watching her eat. The magic isn’t in the number of layers. It’s in how those layers interact. Most people think three layers is overkill. Let’s face it, two layers is easier. But when you get the ratio of cake to frosting right, it changes everything. The cake becomes lighter, airier, and the frosting isn’t just a topping; it’s part of the experience. It’s the balance that matters.
This recipe has become our go-to. Not because it’s hard, but because it delivers every single time. No dry edges, no soggy middles. Just soft, sweet, buttery cake that makes kids stop talking and adults ask for the recipe. It’s not just a dessert; it’s a memory maker. And honestly, that’s worth a little extra effort in the kitchen.
Why You’ll Love This Recipe
There is a specific kind of satisfaction that comes from pulling a perfect three-layer cake out of the oven. It’s not just about the taste, though that is incredible. It’s about the process. I’ve tested dozens of vanilla cake recipes over the years. Some are too dense, like eating a brick. Others are too airy, collapsing under the weight of their own frosting. This one strikes the perfect balance. It’s light enough to feel indulgent without making you feel sluggish afterward.
Here is why this recipe stands out from the crowd:
- Quick & Easy: Yes, three layers sound like a lot of work. But the batter comes together in under 20 minutes. You can have a full, impressive cake on the table in about an hour, which is perfect for last-minute birthday celebrations or surprise parties.
- Simple Ingredients: You don’t need exotic flours or rare extracts. You likely have everything you need in your pantry right now. Flour, sugar, butter, eggs, milk, and vanilla. That’s it. No fancy grocery trips needed.
- Perfect for Celebrations: Whether it’s a child’s birthday, an anniversary, or just a Tuesday because you feel like it, this cake fits any occasion. It’s versatile enough to be dressed up with sprinkles or kept simple with a smooth finish.
- Crowd-Pleaser: I’ve served this to picky eaters and gourmet foodies alike. Everyone loves it. The classic vanilla flavor is nostalgic, comforting, and universally liked. It’s the kind of cake that brings people together.
- Unbelievably Delicious: The texture is next-level. The crumb is fine and tender, and the buttercream is silky smooth. It’s comfort food reimagined—richer than a standard box mix, but with the soul-soothing satisfaction of a homemade treat.
What makes this recipe different is the technique. I use a method that ensures the cake stays moist for days. By using buttermilk and a touch of sour cream in the batter, you get a tangy depth that cuts through the sweetness. It’s a small detail, but it makes a huge difference. This isn’t just another vanilla cake; it’s the best version of one.
What Ingredients You Will Need
This recipe relies on simple, high-quality ingredients to deliver bold flavor and satisfying texture. You don’t need anything complicated, but the quality of what you use does matter. Here is what you need to gather before you start.
For the Cake Batter
- All-purpose flour: 3 cups (375g). I recommend King Arthur brand for consistent protein content, which helps with structure.
- Granulated sugar: 2 cups (400g). Don’t reduce this; sugar adds moisture and tenderness.
- Baking powder: 1 tablespoon. Fresh is key here. If your baking powder is old, your cake won’t rise properly.
- Baking soda: 1 teaspoon. Helps neutralize the acidity in the buttermilk.
- Salt: 1 teaspoon. Enhances the flavor of the vanilla.
- Unsalted butter: 1 cup (226g), softened to room temperature. This is crucial for creaming with the sugar.
- Large eggs: 4, room temperature. Cold eggs can cause the butter to seize up.
- Vanilla extract: 2 tablespoons. Use pure vanilla, not imitation. It makes a world of difference.
- Buttermilk: 2 cups (480ml). Room temperature. If you don’t have buttermilk, see substitutions below.
- Sour cream: 1/2 cup (120g). Adds richness and keeps the cake moist.
For the Buttercream Frosting
- Unsalted butter: 2 cups (454g), softened. Make sure it’s pliable but not melted.
- Confectioners’ sugar: 6-7 cups (750-875g). Sifted to remove lumps.
- Heavy cream: 1/4 cup (60ml). Helps thin the frosting to a spreadable consistency.
- Vanilla extract: 1 tablespoon.
- Salt: 1/2 teaspoon. Cuts the sweetness.
Substitution Notes: If you don’t have buttermilk, add 2 tablespoons of lemon juice or white vinegar to 2 cups of whole milk and let it sit for 10 minutes. For a gluten-free option, use a 1:1 gluten-free flour blend, though the texture may be slightly denser. You can also use dairy-free butter and milk alternatives if needed, but the texture might change slightly.
Equipment Needed
You don’t need a fancy kitchen to make this cake. Here is what you’ll need to get the job done right.
- Three 8-inch round cake pans: This is non-negotiable for even baking. If you only have 9-inch pans, you’ll need to adjust the baking time slightly, as the layers will be thinner.
- Mixing bowls: One large bowl for the dry ingredients, one medium for wet, and one large for combining.
- Electric mixer: A hand mixer or stand mixer is highly recommended. Creaming the butter and sugar by hand takes a lot of effort and time.
- Cooling rack: Essential for cooling the cakes evenly. Never frost a warm cake.
- Offset spatula: Makes spreading the frosting between layers much easier and cleaner.
- Parchment paper: Line the bottoms of your pans to ensure the cakes don’t stick.
Personal Tip: I used to skip the parchment paper and end up scraping cake out of my pans. Now, I never skip it. It’s a small step that saves you from frustration. Also, make sure your pans are greased and floured, or use a baking strip to keep the edges from baking too fast.
Preparation Method
Follow these steps carefully for the best results. Take your time, especially with the mixing.
- Prep the pans and oven. Preheat your oven to 350°F (175°C). Grease three 8-inch round cake pans with butter or cooking spray. Line the bottoms with parchment paper and dust with flour, tapping out the excess. This ensures easy release later.
- Mix the dry ingredients. In a medium bowl, whisk together the flour, baking powder, baking soda, and salt. Set this aside. Sifting is optional but recommended if your flour is lumpy.
- Cream the butter and sugar. In a large bowl, beat the softened butter and granulated sugar on medium-high speed for about 3-4 minutes. The mixture should look pale and fluffy. This step incorporates air, which helps the cake rise.
- Add eggs and vanilla. Add the eggs one at a time, beating well after each addition. Mix in the vanilla extract. Scrape down the sides of the bowl with a spatula to ensure everything is combined.
- Combine wet and dry ingredients. Add the dry ingredients to the butter mixture in three parts, alternating with the buttermilk and sour cream. Start and end with the dry ingredients. Mix on low speed until just combined. Do not overmix, or the cake will be tough.
- Divide the batter. Divide the batter evenly among the three prepared pans. You can use a kitchen scale for accuracy, or estimate by eye. Smooth the tops with a spatula.
- Bake the cakes. Bake for 25-30 minutes, or until a toothpick inserted into the center comes out clean. The cakes should spring back when lightly touched.
- Cool the cakes. Let the cakes cool in the pans for 10 minutes. Then, turn them out onto a cooling rack to cool completely. This is crucial. If you frost them while warm, the buttercream will melt.
- Make the buttercream. In a large bowl, beat the softened butter on medium-high speed until creamy, about 2 minutes. Gradually add the confectioners’ sugar, one cup at a time, beating on low speed. Once all sugar is added, increase speed to high and beat for 3 minutes. Add heavy cream, vanilla, and salt. Beat on high for another 2 minutes until fluffy.
- Assemble the cake. Place one cake layer on a serving plate. Spread a layer of buttercream over the top. Repeat with the second layer. Top with the third layer. Frost the top and sides of the cake with the remaining buttercream. Smooth the surface with an offset spatula.
Troubleshooting: If your cake doms on top, gently level it with a serrated knife after cooling. This ensures flat layers for stacking. If the frosting is too thick, add more cream, one teaspoon at a time. If it’s too thin, add more sugar.
Cooking Tips & Techniques
Here are some pro tips to help you succeed.
- Room temperature ingredients are key. Cold ingredients don’t emulsify properly. Take your butter and eggs out of the fridge at least an hour before you start.
- Don’t overmix the batter. Once you add the flour, mix only until you don’t see streaks of white. Overmixing develops gluten, leading to a tough cake.
- Use a kitchen scale. Measuring flour by volume can be inaccurate. Scooping flour directly into a cup packs it down, leading to too much flour. Spoon and level, or better yet, weigh your ingredients.
- Level your layers. Even if your cakes bake evenly, leveling them makes stacking easier and looks more professional.
- Chill the cake before frosting. If your kitchen is warm, chill the cake layers in the fridge for 30 minutes before frosting. This makes them less crumbly and easier to handle.
Personal Lesson: I once made this cake without chilling the layers. The frosting slid right off. Now, I always chill them first. It’s a small step that makes a big difference.
Variations & Adaptations
This recipe is versatile. Here are some ways to customize it.
- Chocolate Layer Cake: Replace 3/4 cup of flour with unsweetened cocoa powder. Add 1/2 cup of hot coffee to the buttermilk to enhance the chocolate flavor.
- Strawberry Layer Cake: Add 1 cup of finely chopped fresh strawberries to the batter. Reduce the buttermilk by 1/4 cup to account for the moisture in the berries.
- Lemon Layer Cake: Replace the vanilla extract with the zest of two lemons and 2 tablespoons of lemon juice. Add a lemon glaze on top.
- Gluten-Free: Use a 1:1 gluten-free flour blend. Note that the texture may be slightly denser.
- Dairy-Free: Use dairy-free butter and milk alternatives. The flavor will be slightly different, but still delicious.
My Favorite Variation: I love adding a layer of raspberry jam between the cake layers. It adds a tart contrast to the sweet buttercream. Just spread a thin layer of jam on each layer before adding the frosting.
Serving & Storage Suggestions
This cake is best served at room temperature. Cold buttercream can be hard and waxy. Take the cake out of the fridge 30 minutes before serving.
- Storage: Store leftovers in an airtight container at room temperature for up to 3 days. In the fridge, it will last up to 5 days. Bring to room temperature before serving.
- Freezing: You can freeze the cake layers (unfrosted) for up to 3 months. Wrap tightly in plastic wrap and then foil. Thaw overnight in the fridge before frosting.
- Serving Suggestions: This cake pairs well with coffee, tea, or a glass of cold milk. It’s also great with a scoop of vanilla ice cream on the side.
Pro Tip: The flavors develop overnight. If you can, make the cake a day ahead. It will taste even better the next day.
Nutritional Information & Benefits
Here is an estimate of the nutritional information per slice (assuming 12 slices):
- Calories: 450
- Carbohydrates: 65g
- Fat: 18g
- Protein: 5g
- Sugar: 45g
This cake is rich in carbohydrates and fat, providing energy for celebrations. The buttercream adds calcium and vitamin A from the dairy. For a healthier option, you can reduce the sugar in the batter by 1/4 cup, though the texture may change slightly.
Conclusion
Making a triple layer cake might seem daunting, but with this recipe, it’s easier than you think. The result is a cake that is moist, flavorful, and absolutely delicious. It’s perfect for birthdays, celebrations, or just because you want something special.
I encourage you to try this recipe and make it your own. Add your favorite fillings, change the frosting color, or sprinkle on some festive toppings. The possibilities are endless.
If you make this cake, I’d love to hear how it turns out. Leave a comment below with your thoughts, or share a photo on social media. Tag me so I can see your creation. Happy baking!
Frequently Asked Questions
Can I use a box mix for this recipe?
Yes, you can use a box mix, but homemade batter yields better texture and flavor. If you use a box mix, follow the package instructions but add an extra egg and use milk instead of water for a richer taste.
Why did my cake sink in the middle?
This usually happens if the oven temperature is too low, the cake is underbaked, or the pan is overfilled. Make sure your oven is preheated correctly and check the cake with a toothpick before removing it.
Can I make this cake ahead of time?
Yes, you can bake the layers a day ahead and store them wrapped tightly at room temperature. Frost the cake the day of serving for the best texture.
How do I get smooth frosting?
Use an offset spatula and a turntable if you have one. Chill the cake before frosting to make it less crumbly. You can also use a bench scraper to smooth the sides.
Can I freeze the finished cake?
It’s not recommended to freeze a fully frosted cake as the buttercream texture may change. Freeze the unfrosted layers instead, and frost after thawing.
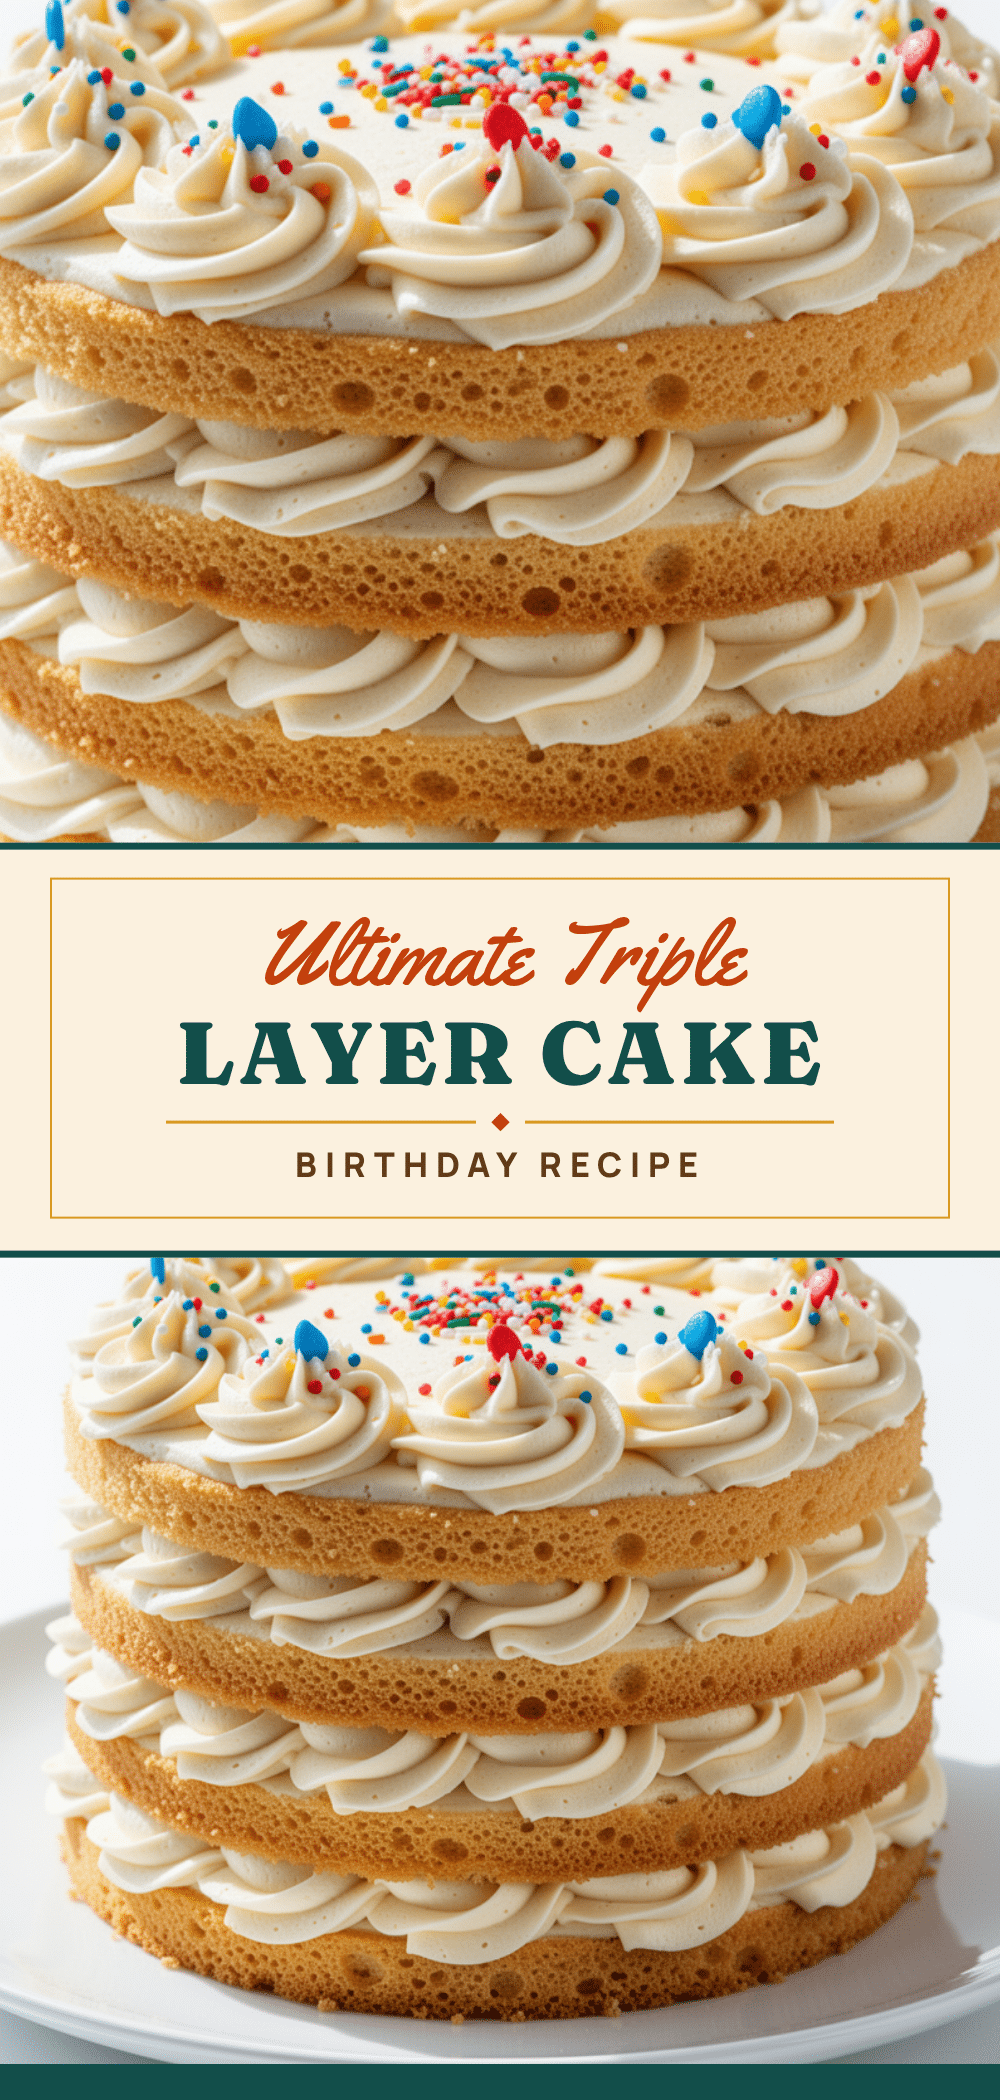
Pin This Recipe!
Triple Layer Birthday Cake with Buttercream
A reliable, moist, and delicious three-layer vanilla cake with silky buttercream frosting. This recipe balances light, airy cake layers with rich frosting for a crowd-pleasing dessert perfect for any celebration.
- Prep Time: 20 minutes
- Cook Time: 30 minutes
- Total Time: 1 hour
- Yield: 12 servings 1x
- Category: Dessert
- Cuisine: American
Ingredients
- 3 cups (375g) all-purpose flour
- 2 cups (400g) granulated sugar
- 1 tablespoon baking powder
- 1 teaspoon baking soda
- 1 teaspoon salt
- 1 cup (226g) unsalted butter, softened to room temperature
- 4 large eggs, room temperature
- 2 tablespoons pure vanilla extract
- 2 cups (480ml) buttermilk, room temperature
- 1/2 cup (120g) sour cream
- 2 cups (454g) unsalted butter, softened (for frosting)
- 6–7 cups (750-875g) confectioners’ sugar, sifted (for frosting)
- 1/4 cup (60ml) heavy cream (for frosting)
- 1 tablespoon vanilla extract (for frosting)
- 1/2 teaspoon salt (for frosting)
Instructions
- Preheat oven to 350°F (175°C). Grease three 8-inch round cake pans, line bottoms with parchment paper, and dust with flour.
- In a medium bowl, whisk together flour, baking powder, baking soda, and salt. Set aside.
- In a large bowl, beat softened butter and granulated sugar on medium-high speed for 3-4 minutes until pale and fluffy.
- Add eggs one at a time, beating well after each addition. Mix in 2 tablespoons vanilla extract. Scrape down bowl sides.
- Add dry ingredients to butter mixture in three parts, alternating with buttermilk and sour cream. Start and end with dry ingredients. Mix on low speed until just combined.
- Divide batter evenly among the three prepared pans and smooth tops.
- Bake for 25-30 minutes or until a toothpick inserted into the center comes out clean.
- Let cakes cool in pans for 10 minutes, then turn out onto a cooling rack to cool completely.
- For frosting, beat 2 cups softened butter on medium-high speed until creamy (2 minutes).
- Gradually add confectioners’ sugar on low speed. Once added, increase speed to high and beat for 3 minutes.
- Add heavy cream, 1 tablespoon vanilla, and 1/2 teaspoon salt. Beat on high for another 2 minutes until fluffy.
- Place one cake layer on a serving plate. Spread a layer of buttercream over the top. Repeat with second layer.
- Top with third layer. Frost top and sides with remaining buttercream. Smooth surface with an offset spatula.
Notes
Ensure all ingredients are at room temperature for best emulsification. Do not overmix the batter to avoid a tough cake. Chill cake layers for 30 minutes before frosting if the kitchen is warm to prevent crumbling. Store leftovers in an airtight container at room temperature for up to 3 days or in the fridge for up to 5 days. For gluten-free option, use a 1:1 gluten-free flour blend.
Nutrition
- Serving Size: 1 slice
- Calories: 450
- Sugar: 45
- Sodium: 350
- Fat: 18
- Saturated Fat: 11
- Carbohydrates: 65
- Fiber: 1
- Protein: 5
Keywords: birthday cake, triple layer cake, vanilla cake, buttercream frosting, homemade cake, celebration cake, easy baking recipe