The Skeptic’s Turnaround
I honestly thought pairing citrus with dark cocoa sounded like a mistake. You know how some flavor combinations just feel like they were invented by someone who didn’t actually taste the food? That was my vibe with orange and brownies. I’ve always been a purist. If I want chocolate, I want chocolate. No distractions. No fancy garnishes. Just a square of dense, fudgy goodness.
My niece, however, is a force of nature. She saw me eyeing the plain cocoa box at the store and immediately declared that Halloween brownies needed “spirit.” I rolled my eyes so hard it probably hurt. Spirits? Like, ghosts? She meant the color orange. The spooky season vibe. She begged me to try it, promising it wasn’t going to taste like toothpaste or cough syrup.
I gave in only because I had thirty minutes to kill before her friends arrived, and I needed something that looked festive but wouldn’t take all day to decorate. I grabbed an orange from the counter and squeezed it into the batter. I figured, worst case, I’d toss them and order pizza.
Then I smelled it. The moment the zest hit the warm butter and sugar, the kitchen changed. It wasn’t just chocolate anymore. It was deeper. Richer. The citrus oils cut through the heaviness of the cocoa in a way I hadn’t expected. It didn’t overpower the chocolate; it woke it up.
When I took the first bite, I was wrong. Dead wrong. The bitterness of the orange zest balanced the sweetness perfectly. It tasted sophisticated, like something you’d get at a high-end bakery, but it was just me, a mixing bowl, and some basic pantry items. I didn’t feel like I was compromising on flavor. I felt like I had discovered a secret.
That was the moment I stopped doubting. Now, every October, that specific aroma signals the start of the season for me. It’s not just a brownie. It’s a reminder that sometimes you have to be stubbornly open to new ideas. The first bite didn’t just taste good. It tasted like a revelation.
Why You’ll Love This Recipe
There is a specific kind of magic that happens when you combine the earthy depth of dark chocolate with the bright, zesty punch of orange. This recipe isn’t just another Halloween treat; it’s a testament to the fact that the best desserts often come from happy accidents or stubborn experimentation. I’ve tested this version dozens of times, tweaking the ratio of cocoa to flour and adjusting the zest, until I landed on a texture that is perfectly fudgy yet structured enough to hold its shape under a thick layer of frosting.
- Quick & Easy: These brownies come together in under 45 minutes, including bake time. This is perfect for busy weeknights or last-minute party prep when you need to look like you planned ahead.
- Simple Ingredients: You likely already have everything in your kitchen. Flour, sugar, butter, eggs, cocoa powder, and an orange. No trip to a specialty store is required.
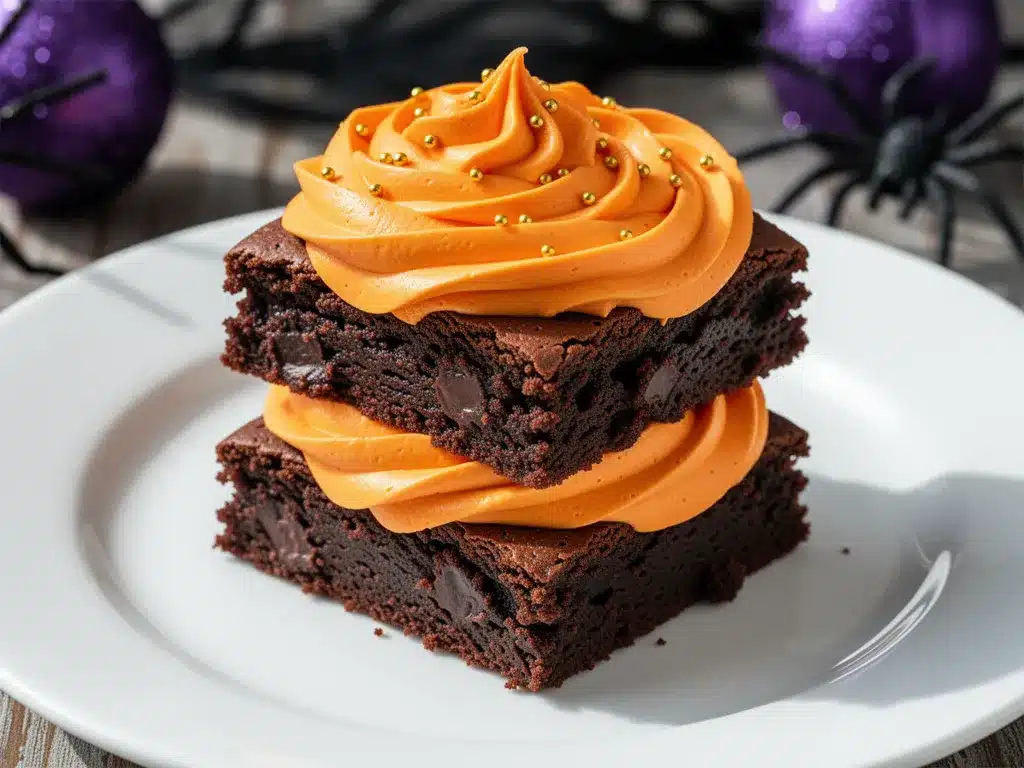
- Perfect for Halloween: The natural orange hue of the frosting makes these instantly thematic without needing artificial dyes that stain your fingers and tongue.
- Crowd-Pleaser: These get rave reviews from kids who love the color and adults who appreciate the sophisticated flavor profile. It bridges the gap between a child’s party and a grown-up gathering.
- Unbelievably Delicious: The texture and flavor combo is next-level comfort food. The contrast between the dense, dark brownie and the fluffy, citrusy frosting creates a sensory experience that keeps people coming back for seconds.
What makes this recipe different from the rest is the balance. Many orange chocolate recipes tip too far into one direction, becoming too sweet or too bitter. This one hits the sweet spot. The orange zest is folded directly into the batter, infusing every bite with aroma, while the frosting adds a creamy counterpoint. It’s not just good—it is the kind that makes you close your eyes after the first bite. It’s comfort food reimagined—healthier in spirit, faster, but with the same soul-soothing satisfaction. Perfect for impressing guests without stress, or turning a simple meal into something memorable.
What Ingredients You Will Need
This recipe uses simple, wholesome ingredients to deliver bold flavor and satisfying texture without the fuss. The key to success here lies in the quality of your cocoa and the freshness of your orange. You don’t need fancy flours or exotic spices. Just the basics, done right.
For the Brownie Base
- All-purpose flour: The standard structure builder. (1 cup / 120g)
- Baking powder: Helps the brownies rise slightly so they aren’t too dense. (1/2 tsp)
- Salt: Crucial for balancing the sweetness and enhancing the chocolate flavor. (1/2 tsp)
- Unsalted butter: Adds richness. I recommend Kerrygold or any high-quality European butter for the best mouthfeel. (1/2 cup / 113g, melted)
- Granulated sugar: Provides the classic crispy top. (1 cup / 200g)
- Dark brown sugar: Adds moisture and a hint of molasses depth. (1/2 cup / 100g)
- Eggs: Large eggs, room temperature, bind everything together. (2 large)
- Pure vanilla extract: (1 tsp)
- Natural unsweetened cocoa powder: This is the star. I prefer Hershey’s Special Dark or Dutch-processed cocoa for a deeper, less acidic chocolate flavor. (3/4 cup / 60g)
- Fresh orange zest: From one large orange. This is non-negotiable for that bright flavor. (1 tbsp)
- Orange juice: Freshly squeezed from the same orange. (2 tbsp)
- Chocolate chips: Semi-sweet or dark chocolate chips for pockets of melted goodness. (1/2 cup / 90g)
For the Orange Frosting
- Butter: Softened to room temperature. (1/2 cup / 113g)
- Powdered sugar: Sifted to avoid lumps. (2-3 cups / 240-360g)
- Orange juice: Freshly squeezed. (2-3 tbsp)
- Orange zest: For extra pop and visual appeal. (1 tsp)
- Vanilla extract: (1/2 tsp)
- Salt: A tiny pinch to cut the sweetness. (1/8 tsp)
Substitution tip: If you need a gluten-free option, you can swap the all-purpose flour for a 1:1 gluten-free baking blend. For dairy-free, use vegan butter and ensure your chocolate chips are dairy-free. The flavor profile remains surprisingly intact.
Equipment Needed
You don’t need a professional kitchen to make these, but having the right tools makes the process smoother and the results more consistent. A 9×13 inch baking pan is essential. I prefer a glass pan because it allows you to see the bottom browning, ensuring you don’t burn the edges. If you only have metal, just keep a closer eye on the bake time.
A fine-mesh sieve is helpful for sifting the cocoa powder and powdered sugar. Cocoa powder tends to clump, and lumps in your brownie batter are a texture nightmare. Similarly, lumpy frosting is a decorator’s worst enemy. A whisk is better than a spoon here for incorporating air into the frosting, making it lighter and fluffier.
For the zest, a microplane zester is the best tool. It gets all the colored part of the peel without the bitter white pith. If you don’t have one, a standard vegetable peeler works, but you’ll need to chop the strips finely afterward. A cooling rack is also important. Letting the brownies cool completely before frosting prevents the orange buttercream from melting into a greasy mess. Honestly, patience is the best equipment you can use here.
Preparation Method
Step 1: Prep the Pan and Oven
Preheat your oven to 350°F (175°C). Grease a 9×13 inch baking pan with butter or non-stick spray. Line it with parchment paper for easy removal later. This step takes about 5 minutes. If you skip the parchment, you will regret it when trying to get clean squares out.
Step 2: Mix the Dry Ingredients
In a medium bowl, whisk together the flour, baking powder, and salt. Sift in the cocoa powder. Whisk until everything is combined and there are no dark spots of powder left. This ensures an even chocolate flavor throughout. Set this aside.
Step 3: Combine Wet Ingredients
In a large mixing bowl, combine the melted butter, granulated sugar, and brown sugar. Whisk vigorously for about 2 minutes. You want the mixture to look glossy and slightly thickened. This incorporates air, which helps create that crackly top. Next, add the eggs one at a time, whisking well after each addition. Stir in the vanilla extract, orange zest, and fresh orange juice. The batter should smell incredible now.
Step 4: Bring It Together
Gradually add the dry ingredients to the wet mixture. Use a spatula to fold them in gently. Do not overmix! Stop as soon as the flour disappears. Overmixing develops gluten, which makes brownies cakey instead of fudgy. Fold in the chocolate chips last. The batter will be thick and dark.
Step 5: Bake
Spread the batter evenly into the prepared pan. Bake for 20-25 minutes. The brownies are done when a toothpick inserted into the center comes out with a few moist crumbs clinging to it. If it comes out clean, you’ve overbaked them. They will continue to cook slightly as they cool. Let them cool completely in the pan on a wire rack. This is the hardest part, but necessary for clean slicing.
Step 6: Make the Frosting
While the brownies cool, beat the softened butter in a bowl until creamy. Add the powdered sugar one cup at a time, alternating with the orange juice. Beat on medium-high speed for 3-4 minutes until fluffy. Stir in the extra orange zest and salt. If it’s too thick, add another teaspoon of juice. If too thin, add more sugar.
Step 7: Assemble
Spread the orange frosting evenly over the cooled brownies. Use an offset spatula for a smooth finish. Cut into squares. Enjoy immediately.
Cooking Tips & Techniques
One common mistake I made early on was using cold eggs. Cold eggs can cause the melted butter to seize up, creating little rubbery bits of fat in your batter. Always let your eggs sit on the counter for 30 minutes before baking. It’s a small step that makes a big difference in texture.
Another tip is about the orange zest. Make sure you only use the orange part of the peel. The white pith underneath is incredibly bitter and will ruin the balance of your brownies. If you accidentally get some white, scrape it off with a knife. The aroma of the zest is what ties the chocolate and citrus together, so don’t be shy with it.
When mixing the batter, resist the urge to use a mixer. Hand-mixing the dry and wet ingredients allows you to feel the consistency. You want to stop mixing the moment the last streak of flour disappears. If you keep going, you’re developing gluten, and you’ll end up with cake-like brownies instead of fudgy ones. Trust your hands.
For the frosting, temperature control is key. If your butter is too warm, the frosting will be greasy. If it’s too cold, it will be lumpy. Room temperature is the goldilocks zone. Also, sift your powdered sugar. It’s not just for looks; lumps in powdered sugar are hard to beat out and will leave gritty spots in your smooth orange frosting.
Finally, patience with cooling. If you frost warm brownies, the heat will melt the butter in the frosting, causing it to slide off or become oily. Let them cool for at least an hour. The flavors meld better when they are at room temperature, and the structural integrity of the brownie holds up better for cutting.
Variations & Adaptations
While the classic orange and chocolate combo is my favorite, there are plenty of ways to tweak this recipe to suit different tastes or dietary needs. Here are a few variations I’ve tried with success.
Spicy Halloween Twist: Add a pinch of cayenne pepper or a dash of cinnamon to the brownie batter. The heat complements the orange beautifully and adds a subtle “spooky” kick that adults will appreciate. It’s like a Mexican hot chocolate vibe in brownie form.
White Chocolate Orange: Swap the semi-sweet chocolate chips for white chocolate chips. This makes the brownies sweeter and milder, which is great for kids who might find dark chocolate too bitter. The orange flavor pops even more against the white chocolate.
Gluten-Free Option: Use a high-quality 1:1 gluten-free flour blend. I recommend Bob’s Red Mill or Cup4Cup. The texture might be slightly more delicate, so be careful not to overmix. Add an extra egg yolk for moisture if the batter feels too dry.
Vegan Version: Use vegan butter and flax eggs (1 tbsp ground flaxseed mixed with 3 tbsp water per egg). Use dairy-free chocolate chips. The result is surprisingly close to the original, though the texture will be slightly less fudgy. Add an extra tablespoon of oil to compensate.
Maple Orange: Swap half of the granulated sugar for pure maple syrup. This adds a rich, autumnal flavor that pairs wonderfully with the orange. Just reduce the orange juice by a tablespoon to account for the extra liquid in the syrup.
Serving & Storage Suggestions
These brownies are best served at room temperature. Cold brownies mute the flavor of the chocolate and make the frosting hard. Let them sit out for 15-20 minutes before serving for the best experience. For a festive presentation, dust the top with a little extra orange zest or even some edible gold dust for a premium look.
They pair wonderfully with a cold glass of milk, which cuts through the richness of the chocolate. For adults, a cup of black coffee or a small glass of port wine complements the orange notes beautifully. You could also serve them alongside a scoop of vanilla ice cream for a “spiderweb” dessert effect.
For storage, keep the brownies in an airtight container at room temperature for up to 3 days. If your kitchen is very hot, store them in the refrigerator, but let them come to room temperature before eating to restore the texture. They can also be frozen. Wrap individual squares in plastic wrap and place them in a freezer-safe bag. They will last for up to 3 months. Thaw them at room temperature for an hour before serving.
As the days pass, the flavors actually deepen. The orange zest continues to infuse the brownie, making them taste even better on day two. This is one of those recipes that rewards patience.
Nutritional Information & Benefits
While these are definitely a treat, they do offer some nutritional benefits. Cocoa powder is rich in antioxidants, specifically flavonoids, which are good for heart health. Oranges provide Vitamin C, which supports immune function. A single square (out of 12) contains approximately 280 calories, 15g of fat, 35g of carbohydrates, and 4g of protein.
The recipe is naturally nut-free, making it safe for schools or environments with nut allergies. However, it contains dairy and gluten, so those with sensitivities should use the substitutions mentioned earlier. I always try to balance indulgence with mindful eating. Enjoy these as a special occasion treat rather than an everyday snack.
Conclusion
Making the Best Halloween Brownies with Orange Frosting is a rewarding experience that transforms simple pantry staples into a show-stopping dessert. The combination of fudgy chocolate and bright citrus is a classic for a reason—it just works. I hope this recipe becomes a staple in your Halloween rotation, bringing joy to your family and friends.
Feel free to experiment with the variations I shared. Add some spice, swap the chocolate, or try the vegan version. Cooking is about making it your own. Once you try this, you’ll see why I was so skeptical at first, and why I’m now a total convert.
Please leave a comment below if you make these! I love hearing how they turned out. Did you add the cayenne? Did you use Dutch-processed cocoa? Share your tips and tricks with the community. And if you have friends who love baking, share this recipe with them. Happy baking, and happy Halloween!
Frequently Asked Questions
Can I use bottled orange juice instead of fresh?
It’s not recommended. Bottled juice often contains preservatives and lacks the bright, fresh aroma of real orange. The zest is also crucial, and you can’t get that from bottled juice. Fresh is worth the effort.
Why are my brownies cakey instead of fudgy?
This usually happens from overmixing the batter or using too much flour. Measure your flour carefully (spoon and level, don’t scoop) and stop mixing as soon as the flour disappears. Also, ensure you aren’t overbaking them.
Can I make these ahead of time?
Yes! You can bake the brownies a day ahead and store them uncovered at room temperature. Make the frosting the day of, or up to 2 days ahead and store it in the fridge. Bring the frosting to room temperature and re-whip before spreading.
How do I get clean cuts for the brownies?
Make sure the brownies are completely cool. Use a sharp knife and wipe it clean between each cut. For even cleaner cuts, you can dip the knife in hot water and dry it before slicing.
Can I freeze the orange frosting?
Yes, you can freeze frosting for up to 3 months. Thaw it in the refrigerator overnight and then beat it on high speed to restore its fluffy texture before using.
Pin This Recipe!
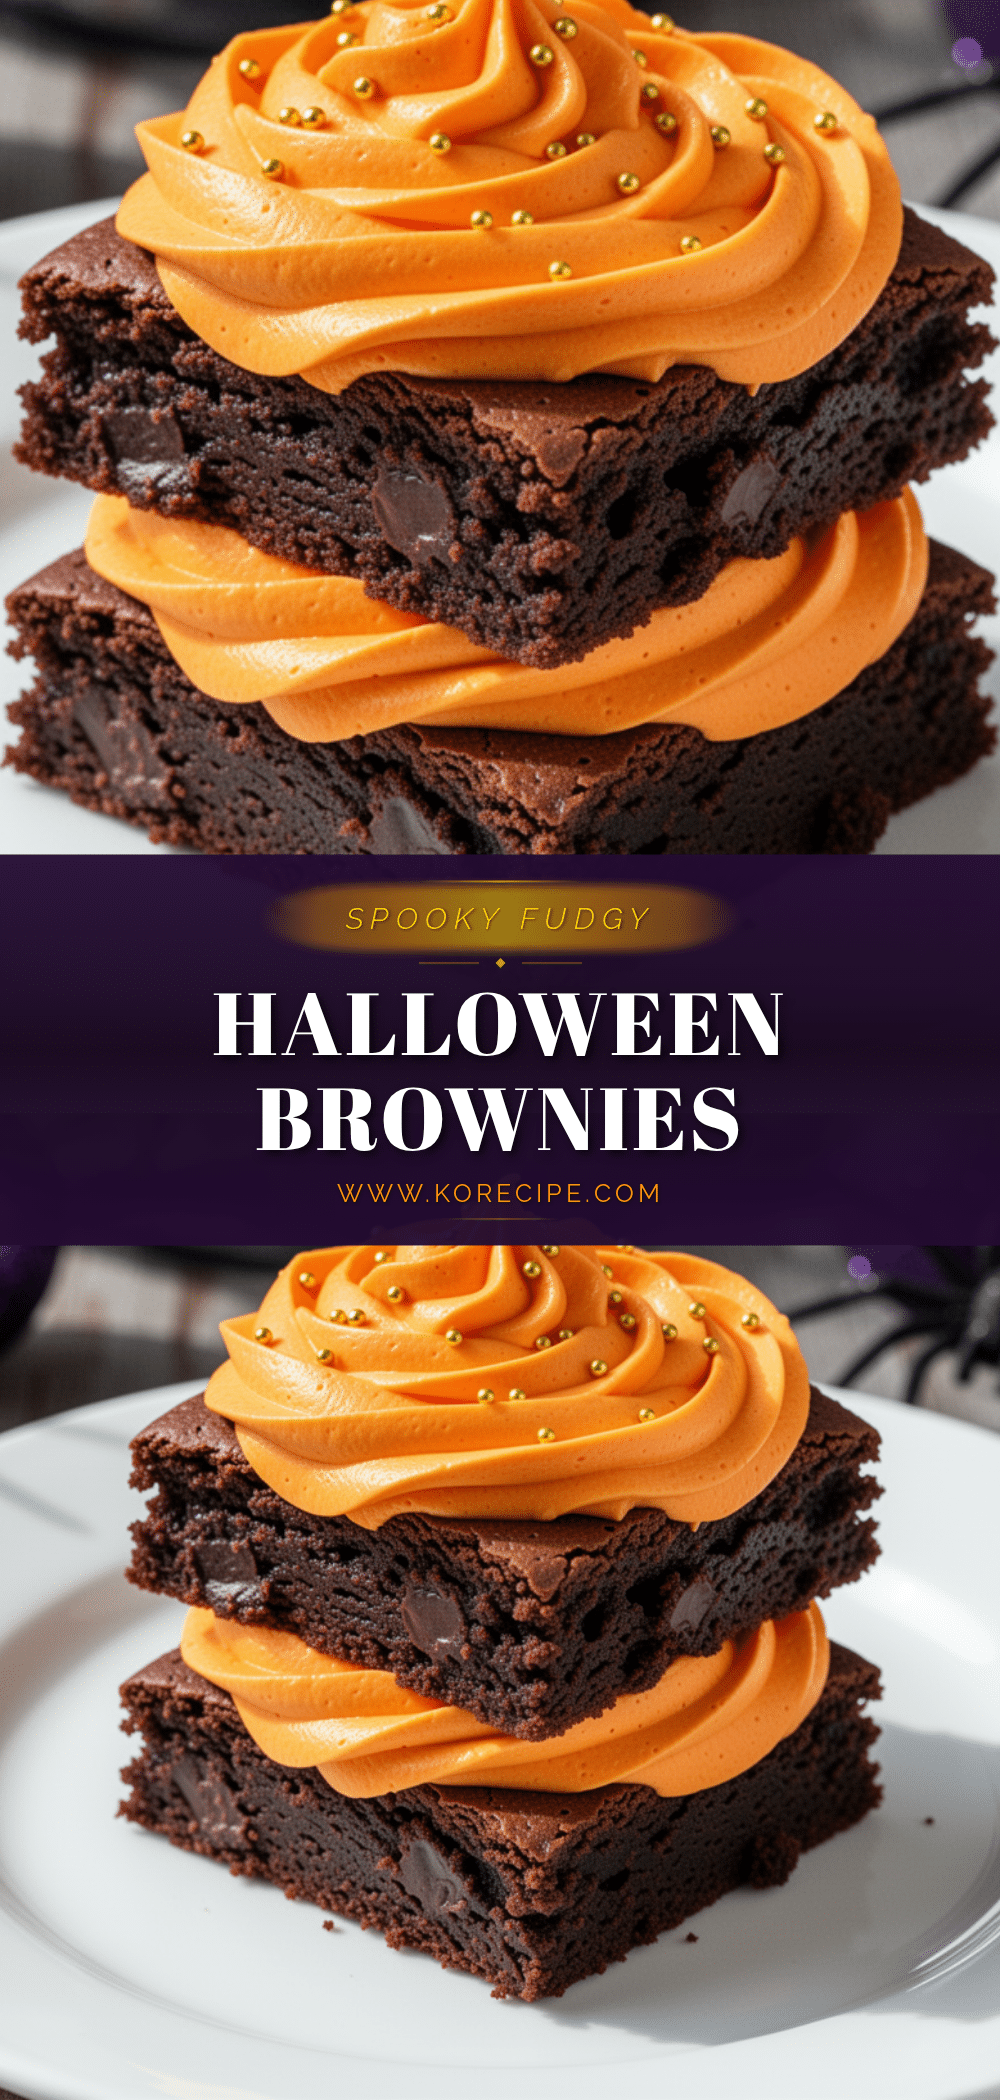
Best Halloween Brownies with Orange Frosting (Easy)
A fudgy, dark chocolate brownie infused with fresh orange zest and juice, topped with a bright, creamy orange buttercream frosting. This festive treat is perfect for Halloween and balances sophisticated citrus notes with rich chocolate.
- Prep Time: 15 minutes
- Cook Time: 25 minutes
- Total Time: 45 minutes
- Yield: 12 servings 1x
- Category: Dessert
- Cuisine: American
Ingredients
- 1 cup (120g) all-purpose flour
- 1/2 tsp baking powder
- 1/2 tsp salt
- 1/2 cup (113g) unsalted butter, melted
- 1 cup (200g) granulated sugar
- 1/2 cup (100g) dark brown sugar
- 2 large eggs, room temperature
- 1 tsp pure vanilla extract
- 3/4 cup (60g) natural unsweetened cocoa powder
- 1 tbsp fresh orange zest
- 2 tbsp fresh orange juice
- 1/2 cup (90g) semi-sweet or dark chocolate chips
- 1/2 cup (113g) butter, softened (for frosting)
- 2–3 cups (240-360g) powdered sugar, sifted (for frosting)
- 2–3 tbsp fresh orange juice (for frosting)
- 1 tsp orange zest (for frosting)
- 1/2 tsp vanilla extract (for frosting)
- 1/8 tsp salt (for frosting)
Instructions
- Preheat oven to 350°F (175°C). Grease a 9×13 inch baking pan and line with parchment paper.
- In a medium bowl, whisk together flour, baking powder, and salt. Sift in cocoa powder and whisk until combined. Set aside.
- In a large bowl, whisk melted butter, granulated sugar, and brown sugar vigorously for 2 minutes until glossy. Add eggs one at a time, whisking well after each. Stir in vanilla, orange zest, and orange juice.
- Gradually fold dry ingredients into wet ingredients using a spatula until just combined. Do not overmix. Fold in chocolate chips.
- Spread batter evenly into the prepared pan. Bake for 20-25 minutes, until a toothpick inserted comes out with moist crumbs. Cool completely in the pan on a wire rack.
- While brownies cool, beat softened butter until creamy. Add powdered sugar one cup at a time, alternating with orange juice. Beat on medium-high for 3-4 minutes until fluffy. Stir in zest and salt.
- Spread orange frosting over cooled brownies. Cut into squares and serve.
Notes
Ensure eggs are at room temperature to prevent butter from seizing. Use only the orange part of the peel for zest, avoiding the bitter white pith. Do not overmix the batter to maintain a fudgy texture. Cool brownies completely before frosting to prevent melting. For gluten-free, use a 1:1 gluten-free flour blend. For dairy-free, use vegan butter and dairy-free chocolate chips.
Nutrition
- Serving Size: 1 square
- Calories: 280
- Sugar: 28
- Sodium: 150
- Fat: 15
- Saturated Fat: 8
- Carbohydrates: 35
- Fiber: 2
- Protein: 4
Keywords: Halloween brownies, orange frosting, chocolate orange dessert, easy brownie recipe, fudgy brownies, citrus chocolate, holiday baking