It was 3 AM on a Tuesday in October, and the only thing I wanted was a bowl of candy corn.
The house was silent, save for the hum of the refrigerator kicking on in the kitchen. I had just finished editing a long video for work, my eyes burning from blue light, and my brain felt like it was wrapped in cotton wool. I didn’t want dinner. I didn’t want a healthy snack. I wanted something sweet, something nostalgic, and something that felt a little bit like cheating on a weeknight.
I remember pulling open the pantry door, the light spilling out onto the linoleum floor. There it was. The classic yellow, orange, and white triangles. Candy corn. Most people mock it. They call it “chewy wax” or “too sweet.” But honestly, let’s face it. There is a specific kind of magic in that sugary texture when you’re tired and craving comfort.
I sat on the floor, back against the cabinets, eating straight from the bag. It wasn’t elegant. It wasn’t Instagram-worthy. But it was perfect for that lonely, quiet moment.
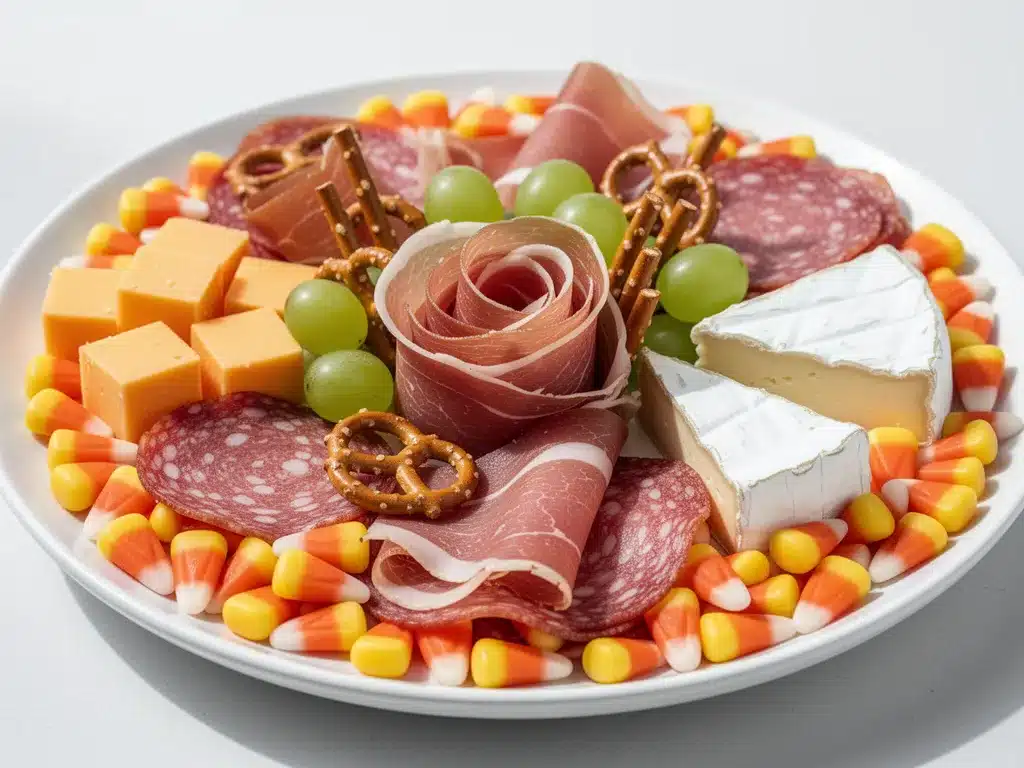
Later, when I started planning our Halloween party, I realized I didn’t want just a bag of candy. I wanted to recreate that feeling. I wanted to build a board that felt like a midnight snack but looked like a centerpiece. So, I combined the savory, salty elements of a traditional charcuterie board with the chaotic sweetness of Halloween candy.
The result was unexpected. The saltiness of the sharp cheddar cut through the sugar of the candy corn. The crunch of the pretzels balanced the chewiness of the gummy worms. It wasn’t just a plate of food; it was a conversation starter. It was the kind of board that keeps people coming back to the kitchen long after the party has wound down.
I’ve made this board three times now. Each time, I tweak it slightly. Sometimes I add pumpkin seeds. Sometimes I swap the cheese. But the core idea remains the same. It’s about taking simple, accessible ingredients and arranging them with intention. You don’t need to be a professional chef to make this work. You just need a large platter and a willingness to embrace the weirdness of Halloween.
This recipe stuck with me because it turned a solitary, tired moment into a shared, joyful experience. It’s not about perfection. It’s about abundance. It’s about looking at a board filled with bright oranges, deep purples, and stark whites, and knowing that everyone at the party will find something they love. Even the pickiest eaters. Even the ones who claim they don’t like candy corn.
You’ll see.
Why You’ll Love This Halloween Board
Let’s be real for a second. Planning a Halloween party can feel like a full-time job. You have decorations to hang, music to curate, and drinks to mix. The last thing you want is to spend hours standing over a stove, sweating in your costume, while your guests stand around with empty plates.
This charcuterie board is your secret weapon. It is the ultimate stress-free solution for feeding a crowd without losing your mind.
Here is why this specific combination works so well:
- Zero Cooking Required: Seriously. There is no baking. There is no chopping that takes more than five minutes. Everything is pre-prepared or requires minimal assembly. You can build this board in under 20 minutes, which means you can actually enjoy the party instead of hiding in the kitchen.
- Pantry Staples and Grocery Store Finds: You likely already have half of the ingredients in your house. Crackers, cheese, maybe some nuts. The rest is just a quick trip to the candy aisle. It’s not about buying expensive, hard-to-find items. It’s about mixing what you have with a few festive treats.
- Perfect for Any Occasion: While it’s themed for Halloween, this board works for any fall gathering. It’s great for game night, a post-trick-or-treating wind-down, or even a casual office party. The colors are seasonal without being overly childish.
- The Sweet and Salty Balance: This is the key. A board with only cheese and meat can feel heavy. A bowl of candy can feel cloying. By mixing them, you create a flavor profile that keeps people tasting more. The salt from the olives and cheese makes the candy corn taste sweeter. The sugar makes the savory items taste richer. It’s a culinary loop that guests can’t stop participating in.
- Visually Striking Without Effort: Halloween is all about aesthetics. This board uses the natural colors of the ingredients—orange cheddar, white mozzarella, purple grapes, yellow corn—to create a palette that looks intentional and festive. It photographs beautifully, which is a huge plus if you’re sharing your party on social media.
What makes this different from other party ideas is the inclusion of the candy corn. It’s polarizing, yes. But that’s what makes it interesting. It sparks debate. It adds a layer of fun and nostalgia that traditional charcuterie lacks. It’s not just food; it’s a memory trigger.
I’ve served this board to groups ranging from teenagers to grandparents. Everyone finds something to eat. The kids go straight for the candy and gummy worms. The adults gravitate toward the cheeses and wines. It bridges the gap between generations, which is exactly what a good holiday party should do.
This isn’t just a snack plate. It’s the heart of your Halloween celebration. It’s the thing that stays on the table all night, refilled and admired. And you get to relax while it happens.
What Ingredients You Will Need
Building a great charcuterie board is less about following a strict recipe and more about understanding the roles each ingredient plays. You need a balance of textures and flavors. You need something crunchy, something creamy, something salty, and something sweet.
For this Halloween version, we are leaning heavily into the seasonal color palette. We are using ingredients that are naturally orange, white, and purple, with pops of black and yellow. This creates a cohesive look without needing artificial food coloring.
Here is what you will need to assemble the board. I’ve grouped them by function to help you shop efficiently.
For the Cheeses (The Foundation)
Cheese is the anchor of any charcuterie board. It provides the savory depth that balances the sweets. For Halloween, we want cheeses that fit the color scheme or can be easily dressed up.
- Sharp Cheddar Cheese (8 oz): Look for a block of cheddar that has a deep orange hue. You can buy it pre-sliced, but I recommend buying a block and slicing it yourself. It looks much more rustic and appealing. (Adds a sharp, tangy flavor)
- White Cheddar or Monterey Jack (8 oz): This provides the “ghost” element. A mild, creamy cheese that contrasts with the sharp cheddar. Cut it into cubes or small triangles. (Use a brand like Sargento or Tillamook for consistent texture)
- Mozzarella Balls (8 oz): Small mozzarella balls, or bocconcini, are perfect for creating white clusters. They look like little pearls or ghosts when scattered around the board. Pat them dry with a paper towel before placing them to prevent excess moisture. (Adds a mild, milky flavor)
For the Crunch and Savory Elements
You need texture. Without something crunchy, the board feels soft and uninteresting. These elements also provide the salt that balances the candy.
- Black Olive Slices (1 small jar): Sliced black olives are essential for the “spooky” theme. They look like little black eyes or bats when scattered. They add a briny, salty kick. (Drain well before adding)
- Pretzel Sticks or Twists (2 cups): Pretzels are sturdy and salty. They are great for scooping up cheese or dip. Stick to the darker, saltier varieties for better contrast. (Adds a hearty crunch)
- Salted Mixed Nuts (1 cup): Almonds, cashews, or pecans work well. Pecans are especially good for fall. They add a rich, earthy flavor. (Adds healthy fats and crunch)
- Beef Jerky or Salami Strips (4 oz): If you eat meat, this is a great addition. Look for jerky that is dark in color to fit the theme. Tear it into bite-sized pieces rather than leaving it in long strips. (Adds a chewy, savory element)
For the Fruit and Freshness
Fruit adds moisture and a natural sweetness. It also adds color, which is crucial for the Halloween aesthetic.
- Red Grapes (1 large bunch): Red grapes provide a pop of deep purple/red color. They are sweet and juicy. Leave them on the vine for a more organic look. (Adds freshness and sweetness)
- Clementines or Mandarin Oranges (2-3): Peel these and separate them into segments. The bright orange color is perfect for fall. They are easy to eat and not messy. (Adds citrusy brightness)
- Apple Slices (2 large apples): Use a crisp apple like Honeycrisp or Gala. Toss them in a little lemon juice to prevent browning. Cut them into wedges or stars. (Adds a crisp, clean flavor)
For the Sweet and Spooky Finish
This is where the Halloween theme really shines. These items are the stars of the show.
- Candy Corn (2-3 bags): Yes, the real deal. Use the classic yellow, orange, and white kind. Avoid the pumpkin-shaped ones if you want the traditional look. (Adds nostalgic sweetness)
- Gummy Worms (2 packs): These are non-negotiable for the spooky factor. They look like they are crawling out of the cheese. (Adds chewy texture)
- Orange Candy Coated Chocolates (1 small bag): Think M&Ms or Reese’s Pieces. The orange color ties everything together. (Adds chocolate richness)
- Lollipop “Eyeballs” or Ghosts (Optional): If you want to go all out, add a few novelty candies. They add height and visual interest. (Adds fun and novelty)
Equipment Needed
You don’t need much to pull this off. The beauty of a charcuterie board is that it requires minimal tools. However, having the right equipment makes the process smoother and the final result more polished.
- A Large Platter or Board: This is the most important piece of equipment. You want something with a bit of height or texture. A wooden slab, a marble slab, or even a large ceramic platter works. Avoid flat, plain plates as they can look boring. A board with a rim helps contain the smaller items. (Size should be at least 18×24 inches)
- Cheese Knives: You don’t need a full set, but having a small cheese knife or a sharp paring knife is helpful for cutting the cheese into bite-sized pieces. A knife with a hole in the blade helps release the cheese cleanly. (Budget-friendly option: A simple paring knife from any kitchen drawer works fine)
- Tongs: Use small tongs for placing the olives, nuts, and candies. It keeps your hands clean and allows for precise placement. (Stainless steel tongs are easy to clean and last forever)
- Small Bowls or Ramekins: If you plan to add a dip, like pumpkin butter or cheese spread, you’ll need small containers. These also work well for holding loose candies like the candy corn, preventing them from spilling onto the board. (Glass ramekins look elegant and are easy to wash)
- Paper Towels: Keep a stack nearby for wiping your hands and drying the mozzarella balls. Moisture is the enemy of a good board. (No special brand needed, just keep them handy)
Preparation Method
Building the board is a process of layering. You don’t just throw everything on at once. You start with the large items and work your way down to the small details. This ensures the board looks full and organized, not cluttered.
Step 1: Prepare the Ingredients (10 Minutes)
Before you even touch the board, get everything ready. This is called “mise en place,” and it makes the assembly process much faster.
- Take the cheddar and white cheese out of the fridge about 20 minutes before serving. Cold cheese is harder to slice and doesn’t release as much flavor. (Let them come to room temperature)
- Slice the cheddar into triangles or cubes. Aim for pieces that are about 1 inch in size. If you cut them too small, they disappear. If you cut them too large, they are hard to eat in one bite. (Use a sharp knife for clean cuts)
- Cut the white cheese into similar shapes. You can leave the mozzarella balls whole or cut them in half for larger clusters. (Keep them dry)
- Wash and dry the grapes thoroughly. Pat them dry with a paper towel. (Wet grapes make the board soggy)
- Peel and segment the clementines. Arrange them in a small bowl or directly on the board later. (Remove any seeds)
- Slice the apples into wedges. Toss them lightly in lemon juice if you aren’t assembling immediately. (Prevents browning)
- Open the bags of candy corn, gummy worms, and nuts. Pour them into small bowls or ramekins. (This makes them easier to scoop onto the board)
Step 2: Place the Anchor Items (5 Minutes)
Start by placing the largest items on the board. These act as anchors that guide the eye.
- Place the bowls of dip or candy in strategic spots. If you are using ramekins, place them in the corners or along the edge. (Create negative space around them)
- Arrange the cheese piles. Place the cheddar in one area and the white cheese in another. Don’t mix them yet. (Create distinct zones)
- Place the pretzels and crackers in bundles. Lean them against the cheese or in the empty spaces. (Use gravity to your advantage)
- Add the meat strips. Fold them loosely and place them in the gaps between the cheese and crackers. (Avoid flat, boring lines)
Step 3: Add the Fruit and Nuts (5 Minutes)
Now, fill in the gaps with the colorful elements.
- Tuck the grapes into the corners and around the cheese piles. (They fill space well)
- Scatter the apple slices around the board. (Distribute evenly)
- Pour the nuts and olives into the remaining empty spaces. (Don’t be afraid to spill them a little)
- Add the clementine segments. (Place them where they contrast with darker items)
Step 4: The Spooky Finish (5 Minutes)
This is the fun part. Add the Halloween-themed candies.
- Scatter the candy corn generously over the board. (Don’t be shy)
- Toss the gummy worms around the cheese and nuts. (Make them look like they are crawling)
- Add the orange chocolates and any novelty candies. (Place them at the highest points for visibility)
- Step back and assess. Add more items where it looks too empty. (Trust your gut)
Cooking Tips & Techniques
While there is no actual cooking involved, there are techniques that can make or break your charcuterie board. Here are some professional tips to ensure your board looks and tastes amazing.
- Temperature Matters: Cheese tastes bland when it’s too cold. Letting it sit out for 20-30 minutes before serving allows the fats to soften and the flavors to bloom. This is a crucial step that many people skip. (It makes a huge difference in taste)
- Height is Your Friend: A flat board can look boring. Use small bowls, stacked crackers, or piled cheese to create height. This adds visual interest and makes the board look more abundant. (Use ramekins or small cups for elevation)
- Color Blocking: Try to group similar colors together. Place all the orange items in one area and the white items in another. This creates a pleasing visual rhythm. (It helps the eye move across the board)
- Texture Variety: Ensure you have a mix of crunchy, chewy, and soft items. If everything is soft, the board feels heavy. If everything is crunchy, it feels dry. (Balance is key)
- Don’t Overcrowd: Leave some empty space. If the board is too full, it looks messy and people don’t know where to start. (Negative space is elegant)
- Use Tongs for Placement: Handling food with your hands can leave fingerprints and smudge the cheese. Use tongs for precise placement, especially for small items like olives and candies. (Keeps the board looking pristine)
Variations & Adaptations
This board is highly adaptable. You can tweak it based on your dietary needs, seasonal availability, or personal preferences.
- Vegan Option: Swap the cheeses for vegan alternatives. Many brands now make excellent vegan cheddar and mozzarella. Use pretzels and crackers that are vegan. Replace the meat with marinated tofu strips or vegan jerky. (Many vegan cheeses melt and taste surprisingly similar)
- Gluten-Free Option: Use gluten-free crackers and pretzels. Most nuts and fruits are naturally gluten-free. Check the candy labels to ensure they are processed in a gluten-free facility. (Look for rice crackers or almond flour crackers)
- Kid-Friendly Version: Reduce the amount of sharp cheese and olives. Add more fruit, cookies, and kid-friendly candies. Use fun-shaped crackers. (Kids love the gummy worms)
- Adult-Only Version:(Elevate the quality of ingredients)
- Seasonal Twist: In autumn, add pears and figs. In winter, add cranberries and dark chocolate. (Use what is fresh and in season)
Serving & Storage Suggestions
Serving the board is easy, but storage requires a bit of planning.
- Serving Temperature: Serve the board at room temperature. This allows the flavors to shine. (Don’t serve cold cheese)
- Complementary Beverages: Pair the board with a crisp apple cider, a red wine, or a craft beer. (Apple cider is a perfect fall pairing)
- Storage: Any leftover cheese and meat can be stored in airtight containers in the refrigerator for 3-4 days. (Keep them separate to prevent flavor transfer)
- Reheating: Charcuterie boards are best served cold or at room temperature. Do not reheat. (Cheese texture changes when heated)
- Flavor Development: The flavors meld together over time. If you make the board a few hours in advance, let it sit out to reach room temperature. (This enhances the taste)
Nutritional Information & Benefits
While this board is indulgent, it offers some nutritional balance.
- Protein: The cheeses and meats provide a good source of protein, which helps keep you full. (Cheese is protein-dense)
- Calcium: Dairy products are rich in calcium, essential for bone health. (Great for growing kids)
- Fiber: The fruits, nuts, and whole grain crackers add fiber, which aids digestion. (Fruit adds natural fiber)
- Healthy Fats: Nuts and cheese provide healthy fats, which are important for brain function. (Nuts are heart-healthy)
- Allergens: This board contains dairy, nuts, and gluten. Be aware of your guests’ allergies. (Always ask about dietary restrictions)
Conclusion
This Halloween Charcuterie Board is more than just a snack. It’s a celebration. It’s a way to bring people together, to share food, and to enjoy the season.
I hope you try this recipe. I hope you find joy in the process of building it, and even more joy in sharing it.
Please leave a comment below and let me know how it went. Did your guests love the candy corn? Did you add any unique twists? I’d love to hear your stories.
Share this post with your friends who are planning their Halloween parties. It might just be the inspiration they need.
Happy Halloween!
FAQs
Can I make this board ahead of time?
Yes, you can prepare most of the ingredients a day in advance. Slice the cheese and fruit, and store them in the fridge. Assemble the board a few hours before serving to allow the cheese to come to room temperature. (Prevents sogginess)
What kind of crackers work best?
Crackers with a sturdy texture work best. Water crackers, wheat crackers, or pretzel crisps are great choices. Avoid delicate crackers that break easily. (Sturdy is better)
Can I use different cheeses?
Absolutely. Feel free to swap in brie, gouda, or blue cheese. Just try to maintain the color scheme. (Flexibility is key)
How long does the board last?
The board is best served within 2-3 hours. After that, the fruit may brown and the cheese may dry out. (Best fresh)
Is candy corn safe for kids?
Candy corn is generally safe for children over the age of 4. Younger children may have difficulty chewing it. (Supervise young kids)
Pin This Recipe!
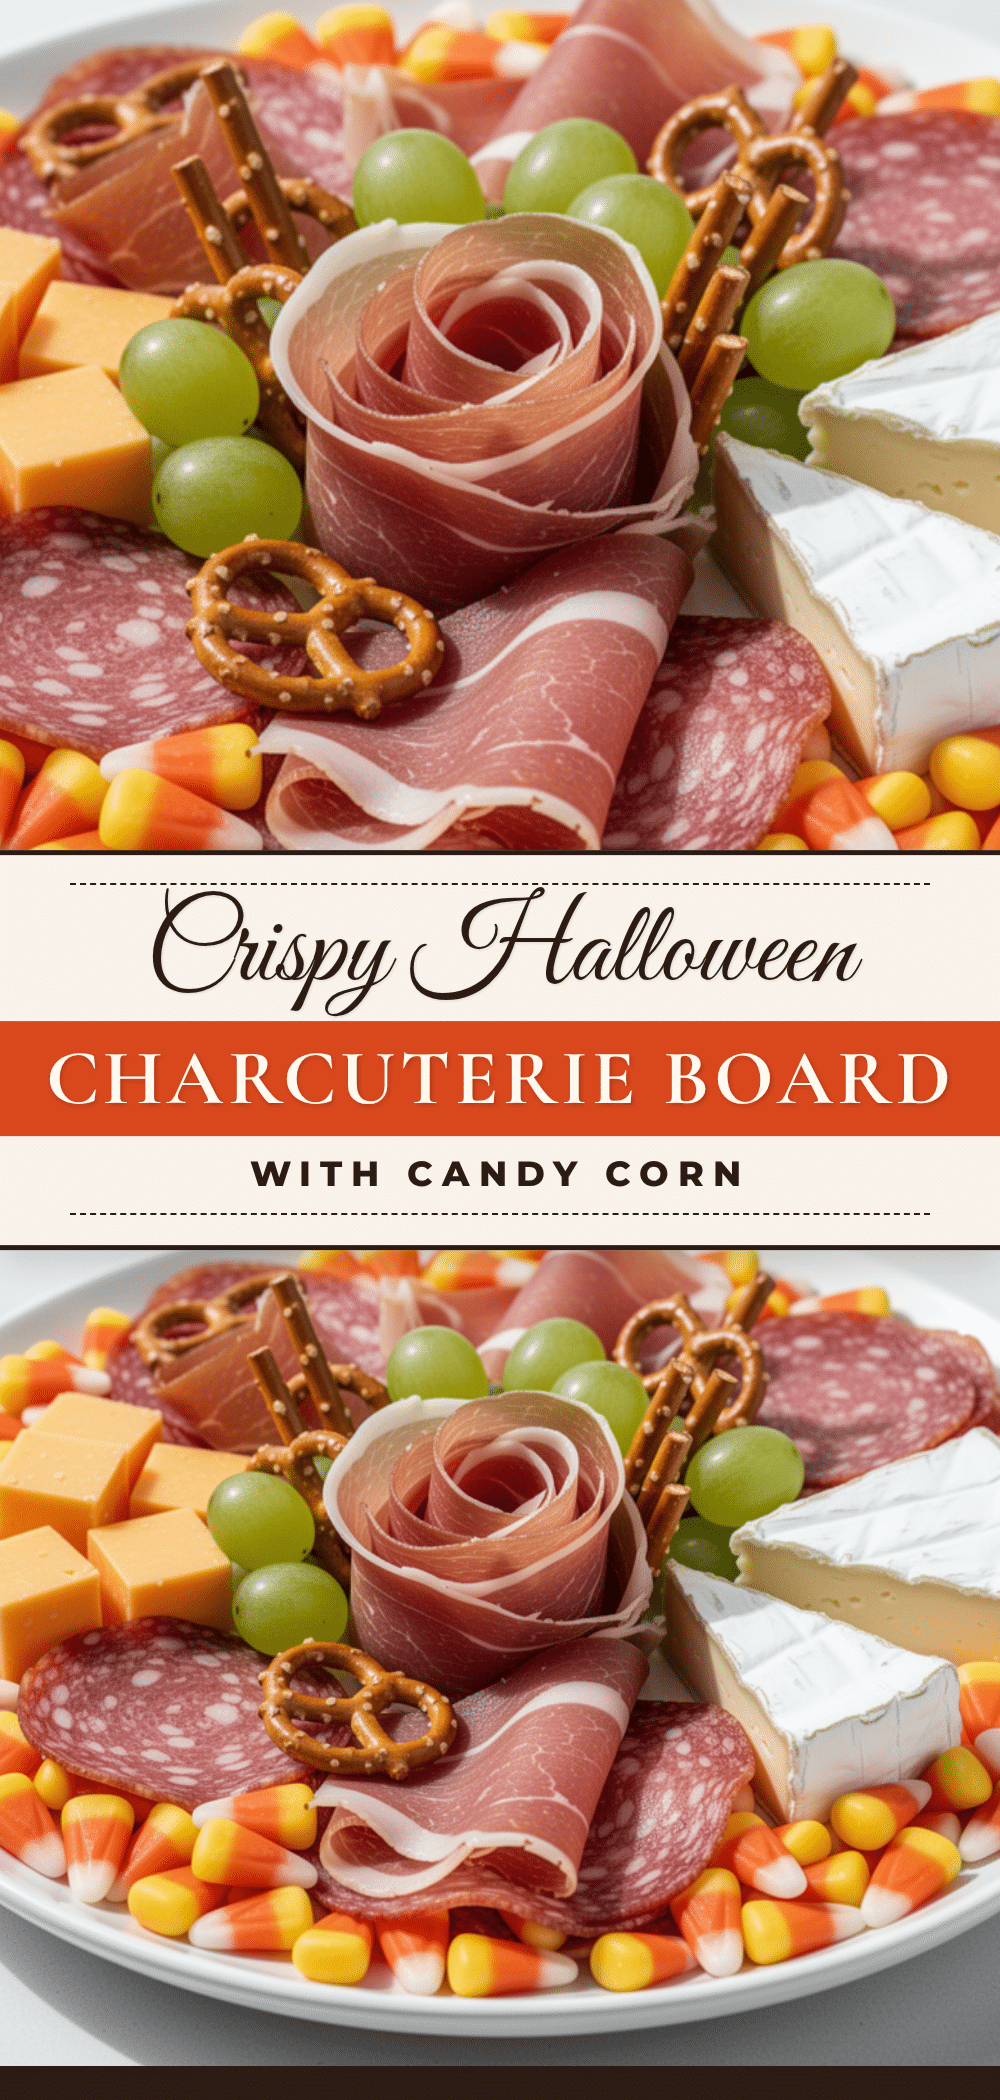
Festive Halloween Charcuterie Board with Candy Corn
A stress-free, no-cook Halloween party centerpiece that combines savory cheeses and meats with festive Halloween candies like candy corn and gummy worms for a perfect sweet and salty balance.
- Prep Time: 20 minutes
- Cook Time: 0 minutes
- Total Time: 20 minutes
- Yield: 12-15 servings 1x
- Category: Appetizer
- Cuisine: American
Ingredients
- 8 oz Sharp Cheddar Cheese
- 8 oz White Cheddar or Monterey Jack Cheese
- 8 oz Mozzarella Balls (bocconcini)
- 1 small jar Black Olive Slices
- 2 cups Pretzel Sticks or Twists
- 1 cup Salted Mixed Nuts
- 4 oz Beef Jerky or Salami Strips
- 1 large bunch Red Grapes
- 2–3 Clementines or Mandarin Oranges
- 2 large Apples (Honeycrisp or Gala)
- 2–3 bags Candy Corn
- 2 packs Gummy Worms
- 1 small bag Orange Candy Coated Chocolates
- Optional: Lollipop ‘Eyeballs’ or Ghosts
- Lemon juice (for apples)
Instructions
- Prepare ingredients: Let cheeses sit out for 20 minutes to reach room temperature. Slice cheddar and white cheese into 1-inch triangles or cubes.
- Wash and dry grapes thoroughly. Peel and segment clementines. Slice apples into wedges and toss lightly with lemon juice to prevent browning.
- Open bags of candy corn, gummy worms, and nuts; pour them into small bowls or ramekins for easier placement.
- Place bowls of dip or loose candies in strategic spots on the large platter.
- Arrange cheese piles in distinct zones (e.g., cheddar in one area, white cheese in another).
- Place pretzels and crackers in bundles, leaning them against cheese or in empty spaces.
- Fold meat strips loosely and place them in gaps between cheese and crackers.
- Tuck grapes into corners and around cheese piles. Scatter apple slices evenly across the board.
- Pour nuts and olives into remaining empty spaces. Add clementine segments where they contrast with darker items.
- Scatter candy corn generously over the board. Toss gummy worms around cheese and nuts to look like they are crawling.
- Add orange chocolates and novelty candies at the highest points for visibility. Step back and adjust as needed.
Notes
Serve at room temperature for best flavor. Cheese tastes bland when too cold. Create height using stacked crackers or bowls. Leave negative space to avoid overcrowding. Use tongs for precise placement to keep the board looking pristine.
Nutrition
- Serving Size: Varied bites from th
- Calories: 350
- Sugar: 18
- Sodium: 650
- Fat: 22
- Saturated Fat: 10
- Carbohydrates: 28
- Fiber: 3
- Protein: 12
Keywords: Halloween party, charcuterie board, candy corn, no cook, party snacks, sweet and salty, fall appetizer, easy party idea