I figured a nacho bar was just a pile of chips with cheese melted on top. It took about twenty minutes for that assumption to fall apart completely when my oven died mid-party. We were watching the Super Bowl, the score was tied, and the snack bowl looked tragically sad. I had promised a spread, not a snack plate, so I scrambled. I grabbed every cheese I could find, some leftover salsa, and started layering like I was building a fort. The result wasn’t just “okay.” It was actually better than the fancy appetizers I used to spend hours on.
Honestly, I never thought I would turn a disaster into a game day tradition. But here we are. The contrast between what I expected—a simple, messy finger food—and what I got—a structured, interactive feast—was wild. You know how it is when you stop trying to be perfect and just let the food do its thing? That’s where the magic happens.
This Ultimate Loaded Nacho Bar for Game Day isn’t about gourmet presentation. It’s about volume, variety, and the chaos of picking your perfect bite. It’s for the people who argue over whether pineapple belongs on pizza and the ones who hoard the crispy chips. It’s messy, it’s loud, and it’s exactly what a crowd needs when the big game starts.
I’ve made this bar three times now. Each time, I added something new. Sometimes it’s jalapeños. Sometimes it’s black beans. But the core idea stays the same: give people options and step back. The tension of waiting for the cheese to melt is real, but the payoff is worth every second. It’s comfort food at its most communal.
The realization hit me while watching my friends dig in. They weren’t just eating; they were creating their own masterpieces. That’s the secret. It’s not about the recipe. It’s about the experience. And once you try it, you’ll never go back to a single bowl of plain chips again.
Why You’ll Love This Recipe
- Quick & Easy: This nacho bar comes together in under 45 minutes, perfect for busy weeknights or last-minute cravings before the kickoff.
- Simple Ingredients: No fancy grocery trips needed; you likely already have chips, cheese, and basic toppings in your kitchen.
- Perfect for Game Day: Great for tailgating, watching parties, or cozy dinners where everyone wants something different.
- Crowd-Pleaser: Always gets rave reviews from kids and adults alike because everyone can build their own ideal bite.
- Unbelievably Delicious: The texture and flavor combo is next-level comfort food, with crispy chips meeting gooey, melted cheese and fresh, crunchy toppings.
What makes this recipe different from the rest is the assembly method. Most nachos are just a sheet pan of cheese and meat. This bar separates the components so nothing gets soggy until it hits your plate. I tested this for months, trying to find the balance between hot and cold toppings. The result is a bar that feels elevated but is actually super simple.
This recipe isn’t just good—it is the kind that makes you close your eyes after the first bite. It’s comfort food reimagined—healthier, faster, but with the same soul-soothing satisfaction. Perfect for impressing guests without stress, or turning a simple meal into something memorable.
What Ingredients You Will Need
This recipe uses simple, wholesome ingredients to deliver bold flavor and satisfying texture without the fuss. The key is variety. You want a mix of textures and temperatures to keep things interesting. Here is what you need to build the ultimate bar.
For the Base:
- Restaurant-style tortilla chips: Look for thick, sturdy chips that can hold up to heavy toppings. I recommend Tostitos or Lay’s Classic for their structural integrity.
For the Cheese Layer:
- Sharp cheddar cheese: Grated fresh. Pre-shredded cheese has anti-caking agents that prevent smooth melting.
- Monterey Jack cheese: Grated. Adds a mild, creamy melt that balances the sharp cheddar.
- Pepper Jack cheese: Grated. For a little kick and extra meltability.
For the Protein:
- Ground beef or turkey: Browned and seasoned with taco seasoning. Ground turkey is a lighter option, but beef adds more flavor.
- Black beans: Rinsed and drained. Adds protein and fiber for a heartier bar.
For the Fresh Toppings:
- Tomatoes: Diced. Adds acidity and freshness.
- Green onions: Sliced. Adds a mild onion bite.
- Jalapeños: Sliced fresh. For heat lovers.
- Cilantro: Chopped. Adds a bright, herbal note.
- Avocado: Sliced or cubed. Adds creaminess.
For the Sauces:
- Salsa: Your choice of mild or hot.
- Sour cream: Plain or with chives.
- Guacamole: Homemade or store-bought.
You can substitute ground chicken for beef or use veggie crumbles for a vegetarian option. For a gluten-free version, ensure your chips are certified gluten-free.
Equipment Needed
- Large sheet pans: Two or three rimmed baking sheets are essential. You need surface area for the chips to stay crispy.
- Skillet: For browning the meat and heating the beans.
- Grater: A microplane or box grater for fresh cheese. This is non-negotiable for good melt.
- Serving bowls: Small bowls for cold toppings like salsa, sour cream, and guacamole.
- Oven: To melt the cheese without burning the chips.
If you don’t have multiple sheet pans, you can use a large roasting pan. Just make sure it fits in your oven. A good grater saves time and ensures even melting. Avoid pre-shredded cheese for the best results.
Preparation Method
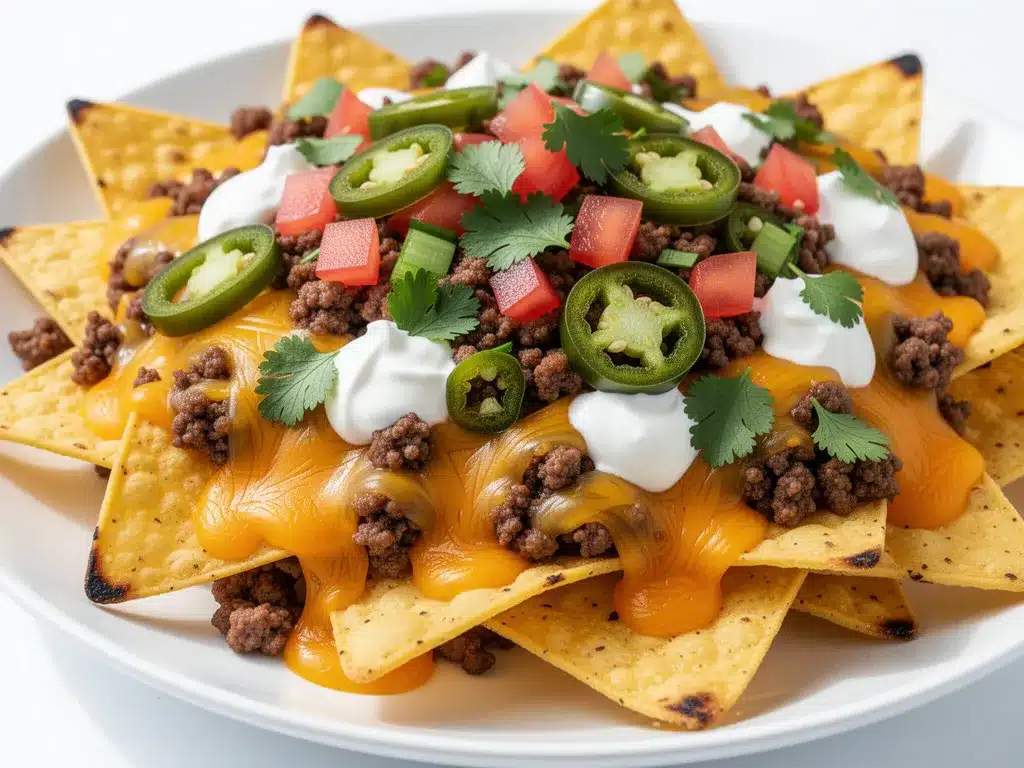
- Preheat the oven: Set your oven to 375°F (190°C). This temperature is high enough to melt cheese quickly but low enough to keep chips from burning.
- Prepare the chips: Arrange the tortilla chips in a single layer on your sheet pans. Do not overlap them. This ensures even heating and prevents sogginess.
- Add the cheese: Sprinkle the grated cheddar, Monterey Jack, and Pepper Jack evenly over the chips. Use about 1/3 cup of cheese per sheet pan. Be generous; you want full coverage.
- Bake: Place the pans in the oven for 5-7 minutes. Watch closely. The cheese should be bubbly and melted, but the chips should still be golden, not brown.
- Prepare the toppings: While the nachos bake, brown the ground meat in a skillet. Drain excess fat. Stir in taco seasoning and a splash of water. Simmer for 5 minutes. In a separate pot, warm the black beans with a pinch of cumin and salt.
- Prepare fresh toppings: Dice the tomatoes, slice the green onions, jalapeños, and avocado. Chop the cilantro. Place each in its own serving bowl.
- Assemble the bar: Remove the hot nachos from the oven. Place them on a large table or counter. Arrange the bowls of toppings around the hot cheese chips. Add the warm meat and beans in separate bowls or directly on the chips if you prefer a layered approach.
- Serve: Let guests build their own nachos. Encourage them to add cold toppings after melting the cheese to prevent sogginess.
Cooking Tips & Techniques
The biggest mistake people make is overcrowding the pan. If you pile the chips too high, the bottom ones get soggy from steam. Spread them out. Also, never use pre-shredded cheese for the melting layer. The cellulose coating stops it from becoming gooey. Grate it yourself. It takes five minutes but makes a huge difference.
Another tip is to keep the cold toppings separate until serving. If you put salsa on the hot nachos too early, the chips will absorb the liquid and lose their crunch. Let your guests add their own salsa. This also lets them control the moisture level.
If you are making a large batch, rotate the pans halfway through baking. This ensures even melting. Watch the edges of the chips. If they start to brown too much, take them out. They will continue to cook from residual heat.
For a crispy finish, broil for the last 30 seconds. But stay close. It goes from perfect to burnt in seconds. Use this technique only if you need extra browning.
Variations & Adaptations
- Vegetarian: Skip the meat. Add roasted corn, zucchini, and extra black beans. Use veggie cheese if needed.
- Spicy: Add diced habaneros or hot sauce to the cheese layer. Use spicy salsa and jalapeños.
- Seafood: Substitute the beef with grilled shrimp or crab meat. Add a lime crema instead of sour cream.
You can also swap the tortilla chips for plantain chips or pita chips for a different texture. For a low-carb option, use cheese crisps instead of chips. These adaptations keep the spirit of the bar while catering to different diets.
I tried a BBQ chicken version once. It was delicious but too messy. Stick to the classic flavors for the best balance. The key is to experiment with toppings, not the base.
Serving & Storage Suggestions
Serve the nachos immediately while the cheese is hot. Pair them with cold beers or margaritas. For sides, consider a simple green salad or corn on the cob. These balance the richness of the cheese.
Store leftovers in an airtight container in the fridge for up to 2 days. Reheat in the oven at 350°F for 10 minutes. The chips will lose some crispness, but the flavor remains. Do not microwave, as it makes them chewy.
Cold toppings can be stored separately for 3-4 days. Guacamole should be covered with plastic wrap directly on the surface to prevent browning. Salsa and sour cream last longer.
The flavors develop over time, but the texture changes. Fresh is always best for nachos. Plan to make them in batches for large parties. This keeps the quality high throughout the event.
Nutritional Information & Benefits
A serving of loaded nachos is calorie-dense due to the cheese and chips. However, it provides protein from the meat and beans, and fiber from the vegetables. Cheddar cheese is a good source of calcium. Black beans offer iron and folate.
For a lighter option, use fewer chips and more vegetables. Guacamole adds healthy fats from avocados. Be mindful of portion sizes, as it’s easy to overeat.
This recipe is not gluten-free unless you use certified chips. It contains dairy. For dairy-free, use vegan cheese and omit sour cream. Overall, it’s a fun, indulgent treat for special occasions.
Conclusion
This Ultimate Loaded Nacho Bar for Game Day is more than just food. It’s a way to bring people together. It’s messy, it’s fun, and it’s delicious. I hope you try it and make it your own. Customize it with your favorite toppings and share it with friends.
Leave a comment below with your favorite Nacho Bar topping. Did you add pineapple? Did you use a specific cheese? I’d love to hear your creations. Share this recipe with your game day crew. They will thank you later.
Enjoy the chaos. Enjoy the food. And enjoy the game.
Frequently Asked Questions
Can I make this nacho bar ahead of time?
You can prep the toppings ahead of time. Store them in the fridge. Assemble and bake the nachos just before serving. This ensures the best texture and flavor.
What is the best cheese for melting?
Monterey Jack and Cheddar are the best for melting. Pepper Jack adds flavor and meltability. Avoid pre-shredded cheese for the best results.
How do I keep the chips crispy?
Spread the chips in a single layer. Do not overlap them. Bake at the right temperature. Add cold toppings after melting the cheese.
Can I use vegetarian protein?
Yes. Use black beans, corn, or veggie crumbles. They add protein and fiber to the bar.
What sides go well with nachos?
A green salad, corn on the cob, or guacamole with vegetables are great sides. They balance the richness of the nachos.
Pin This Recipe!
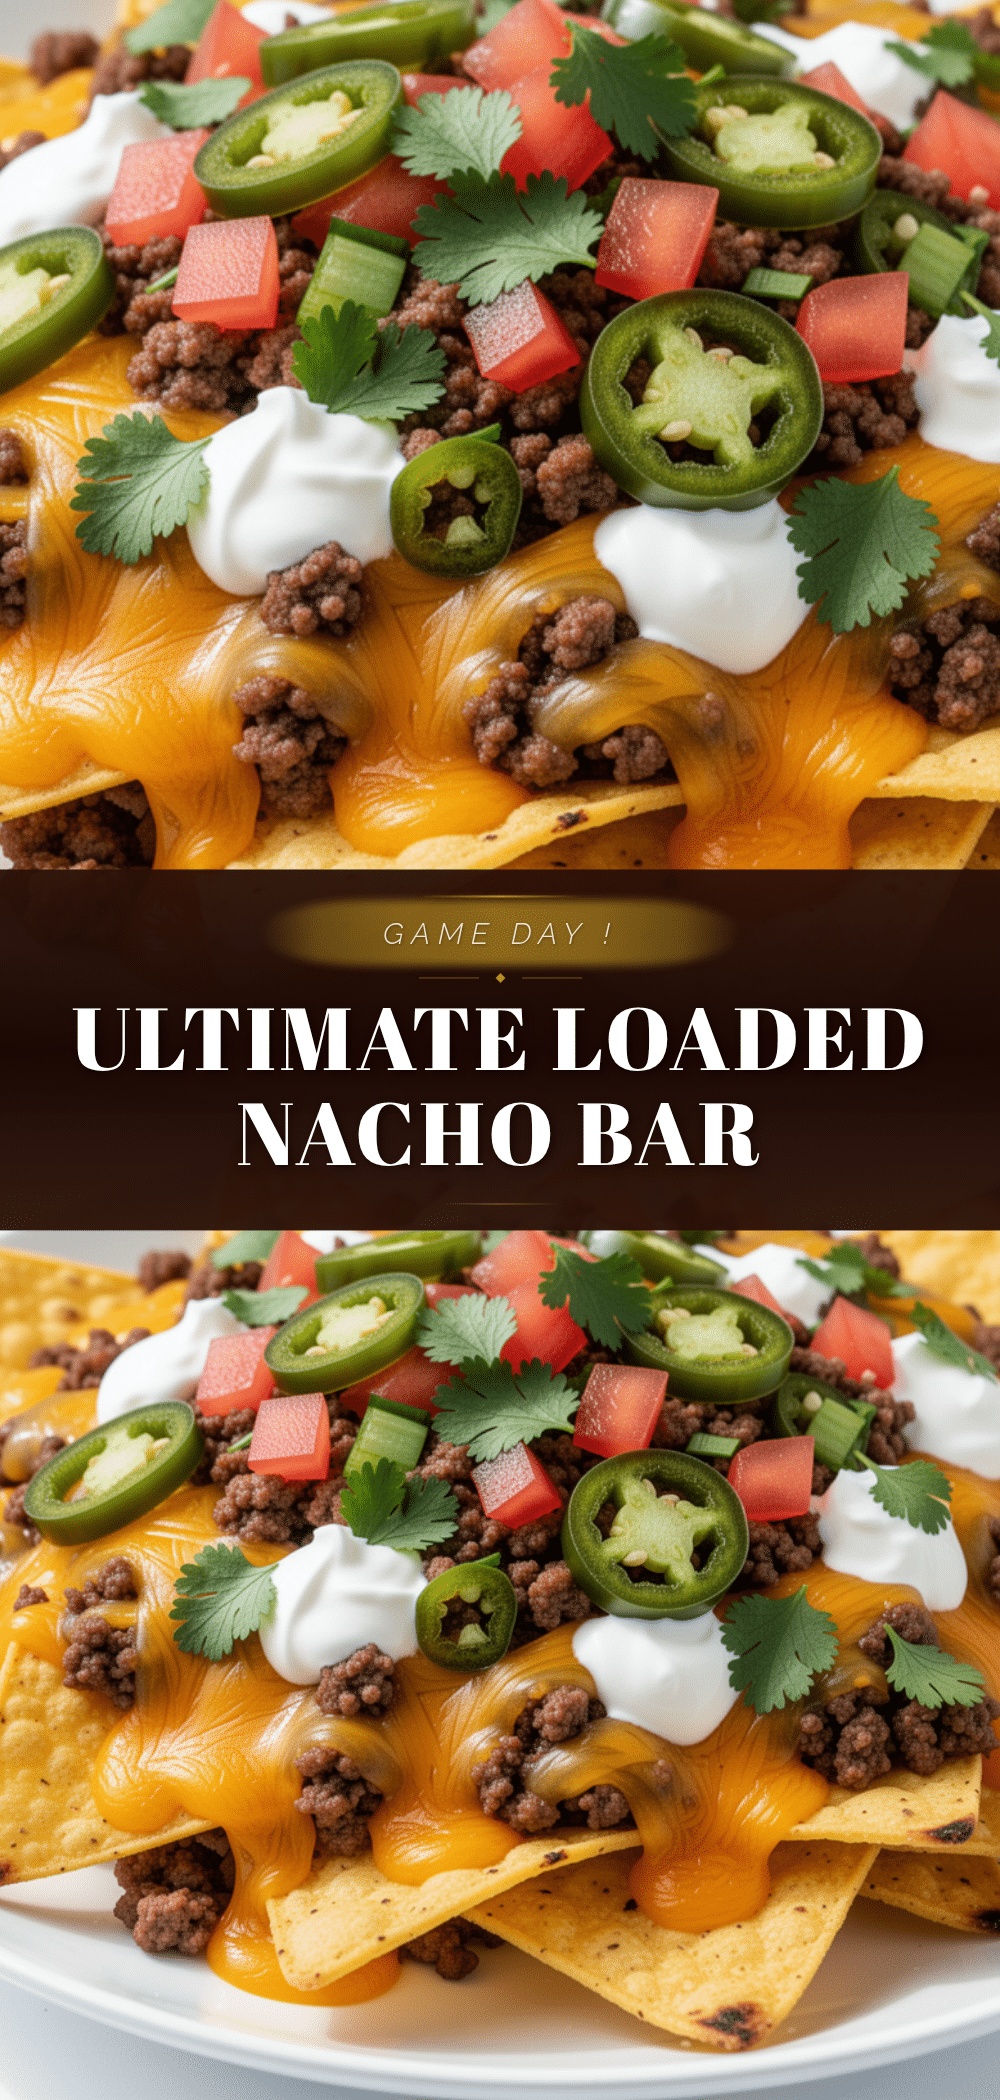
Ultimate Loaded Nacho Bar for Game Day
A structured, interactive feast featuring crispy chips, melted cheese, and a variety of hot and cold toppings, designed for crowd-pleasing game day gatherings.
- Prep Time: 20 minutes
- Cook Time: 15 minutes
- Total Time: 35 minutes
- Yield: 8 servings
- Category: Appetizer
- Cuisine: Mexican
Ingredients
- Restaurant-style tortilla chips
- Sharp cheddar cheese, grated
- Monterey Jack cheese, grated
- Pepper Jack cheese, grated
- Ground beef or turkey, browned
- Taco seasoning
- Black beans, rinsed and drained
- Tomatoes, diced
- Green onions, sliced
- Jalapeños, sliced fresh
- Cilantro, chopped
- Avocado, sliced or cubed
- Salsa
- Sour cream
- Guacamole
Instructions
- Preheat oven to 375°F (190°C).
- Arrange tortilla chips in a single layer on rimmed baking sheets, ensuring no overlap.
- Sprinkle grated cheddar, Monterey Jack, and Pepper Jack cheese evenly over the chips (approx. 1/3 cup per sheet pan).
- Bake for 5-7 minutes until cheese is bubbly and melted but chips are not browned.
- While nachos bake, brown ground meat in a skillet, drain excess fat, and stir in taco seasoning with a splash of water; simmer for 5 minutes.
- In a separate pot, warm black beans with a pinch of cumin and salt.
- Prepare fresh toppings: dice tomatoes, slice green onions, jalapeños, and avocado, and chop cilantro; place each in separate serving bowls.
- Remove hot nachos from oven and place on a large table or counter.
- Arrange bowls of toppings around the hot cheese chips.
- Add warm meat and beans in separate bowls or directly on chips.
- Serve immediately, allowing guests to build their own nachos and add cold toppings after melting the cheese.
Notes
Do not overcrowd the pan to prevent sogginess. Avoid pre-shredded cheese as anti-caking agents prevent smooth melting. Keep cold toppings separate until serving to maintain chip crispness. Rotate pans halfway through baking for even melting. For a crispy finish, broil for the last 30 seconds, watching closely.
Nutrition
- Serving Size: Varies by individual
- Calories: 450
- Sugar: 2
- Sodium: 650
- Fat: 28
- Saturated Fat: 12
- Carbohydrates: 35
- Fiber: 4
- Protein: 18
Keywords: nacho bar, game day food, party appetizer, loaded nachos, easy recipe, crowd pleaser, cheese dip, football snacks